Electronics / Televisions
User Manual for Sylvox Bathroom TV
Quick guide for the Sylvox Bathroom TV. Includes installation instructions, remote control setup, Google TV configuration, channel tuning, and troubleshooting steps.
Table of contents
Manual images
Click an image to enlargeQuick guide from the manual
This manual provides instructions for the Sylvox Bathroom TV. Key steps include ensuring proper ventilation (at least 5cm space), secure wall mounting, pairing the Bluetooth remote control, and completing the Google TV initial setup wizard. Always disconnect the TV from the mains during extreme weather or long periods of inactivity.
Safety and Installation
Safety Warnings:
- Do not expose the TV to high temperatures, humidity, or dripping liquids.
- Ensure the power cord is easily accessible and not damaged.
- Do not place the TV on inclined surfaces or the floor.
- Keep plastic bags away from children and animals.
- Wall mounting must be done carefully; ensure the wall is flat and the bracket is horizontal.
Installation Steps:
- Mark the positions for wiring and screw holes using the mounting bracket as a guide.
- Drill the necessary holes (wiring hole 40-60mm).
- Install the mounting bracket securely.
- Connect cables to the back of the TV host and use self-fluxing tape for waterproofing.
- Hang the TV main body on the upper jaw of the bracket and fix the lower part with screws.
Device Overview
The TV features various ports on the rear panel, including:
- USB 1/2: For USB signal.
- HDMI 1 & HDMI 2(ARC): For HDMI connections.
- DVB-T2 / DVB-S2: For antenna and satellite inputs.
- RJ45: Ethernet connection.
- COAXIAL OUT: Digital audio output.
- MINI AV IN: Composite video input.
- EARPHONE OUT: Headphone connection.
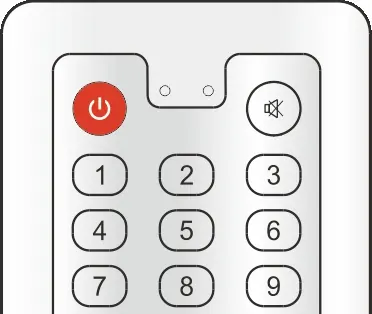
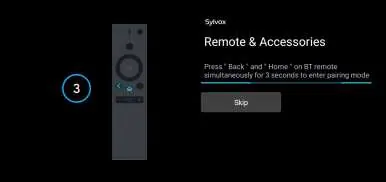
Remote Control
The remote control must be paired with the TV via Bluetooth. To pair, follow the on-screen instructions during the initial setup. The remote includes dedicated buttons for Netflix, YouTube, Disney+, and Prime Video, as well as Google Assistant and standard TV controls.
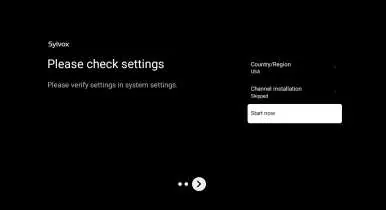
Initial Setup
Upon first power-on, follow the Google TV setup wizard:
- Select system language.
- Choose between Google TV (requires account) or Basic TV.
- Connect to Wi-Fi.
- Accept Google Terms of Service.
- Set your location.
- Configure Tuner mode (Cable/Antenna).
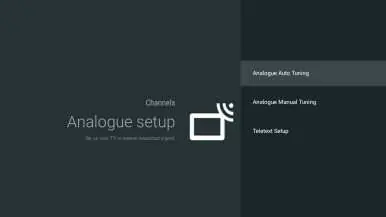
Channels and Inputs
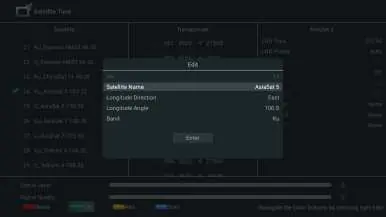
To add channels, navigate to Settings > Channels & Inputs > Channels. Select your signal type and run a Channel Scan. You can perform Auto Tuning or Manual Tuning for Antenna, Cable, or Satellite sources.
Settings
The Settings menu allows you to configure:
- Display & Sound: Adjust Picture Mode (Standard, Movie, ECO, Vivid, Sports, Game), Screen Brightness, Sound Mode, and Audio Output settings.
- Network & Internet: Manage Wi-Fi and Ethernet connections.
- Accounts & Sign-in: Manage Google accounts and kids profiles.
- Privacy & Apps: Manage permissions and app settings.
- System: Accessibility, Date & Time, Language, Storage, and Factory Reset.
Troubleshooting
If you encounter issues, try these steps:
- No power: Check power cord and outlet. Unplug for 60 seconds and restart.
- No picture: Check antenna connection and adjust contrast/brightness.
- No sound: Check volume, mute status, and cable connections.
- USB not playing: Ensure the disk is formatted in FAT32 and compatible.
- TV turns off automatically: Check if Off Timer or Sleep Timer is enabled.
Warranty
Sylvox offers a 24-month warranty under normal use. For support, contact the after-sales email at [email protected], [email protected], or [email protected]. Customer service hotline for USA: +1(866)979-5869.
Practical help
Common problems
No power
Check if the power cord is plugged in and the outlet works. Unplug for 60 seconds and restart.
No picture
Check antenna connection, try tuning to another station, or adjust contrast and brightness.
No sound
Increase volume, check if Mute is on, and ensure external device volumes are not turned off.
USB not playing
Ensure the USB disk is formatted in FAT32 and the file format is supported.
TV turns off automatically
Check if the Off Timer or Sleep Timer is enabled in the Setup menu.
Before use
- Ensure at least 5cm of free space around the TV for ventilation.
- Verify the wall is flat and suitable for mounting.
- Pair the Bluetooth remote control during initial setup.
- Connect antenna or satellite cables before mounting.
- Ensure the power outlet is easily accessible.
Specs in practice
- Display Size
- 24 inch (BT24A1KEGB) or 32 inch (BT32A1KEGB).
Images and diagrams
- Overview of rear ports including USB, HDMI, DVB-T2, DVB-S2, and RJ45.
- Wall mounting bracket installation steps.
- Remote control button layout.
Model compatibility
- DVB-S2 & CI+ are not available in Australia.
- CI+ is not available in New Zealand.
- USB disk must be formatted in FAT32.

Manual page author
David Miller
Documentation analyst
Organizes user manual content into clear summaries, with attention to model details, product context, and everyday usability.