Toys / Scale Models
Assembly Instructions for Tamiya 1275S Mk.I Morris Mini Cooper
Comprehensive assembly guide for the Tamiya 1275S Mk.I Morris Mini Cooper 1/24 scale model. Includes painting instructions, decal application, and step-by-step assembly procedures.
Table of contents
Manual images
Click an image to enlargeQuick guide from the manual
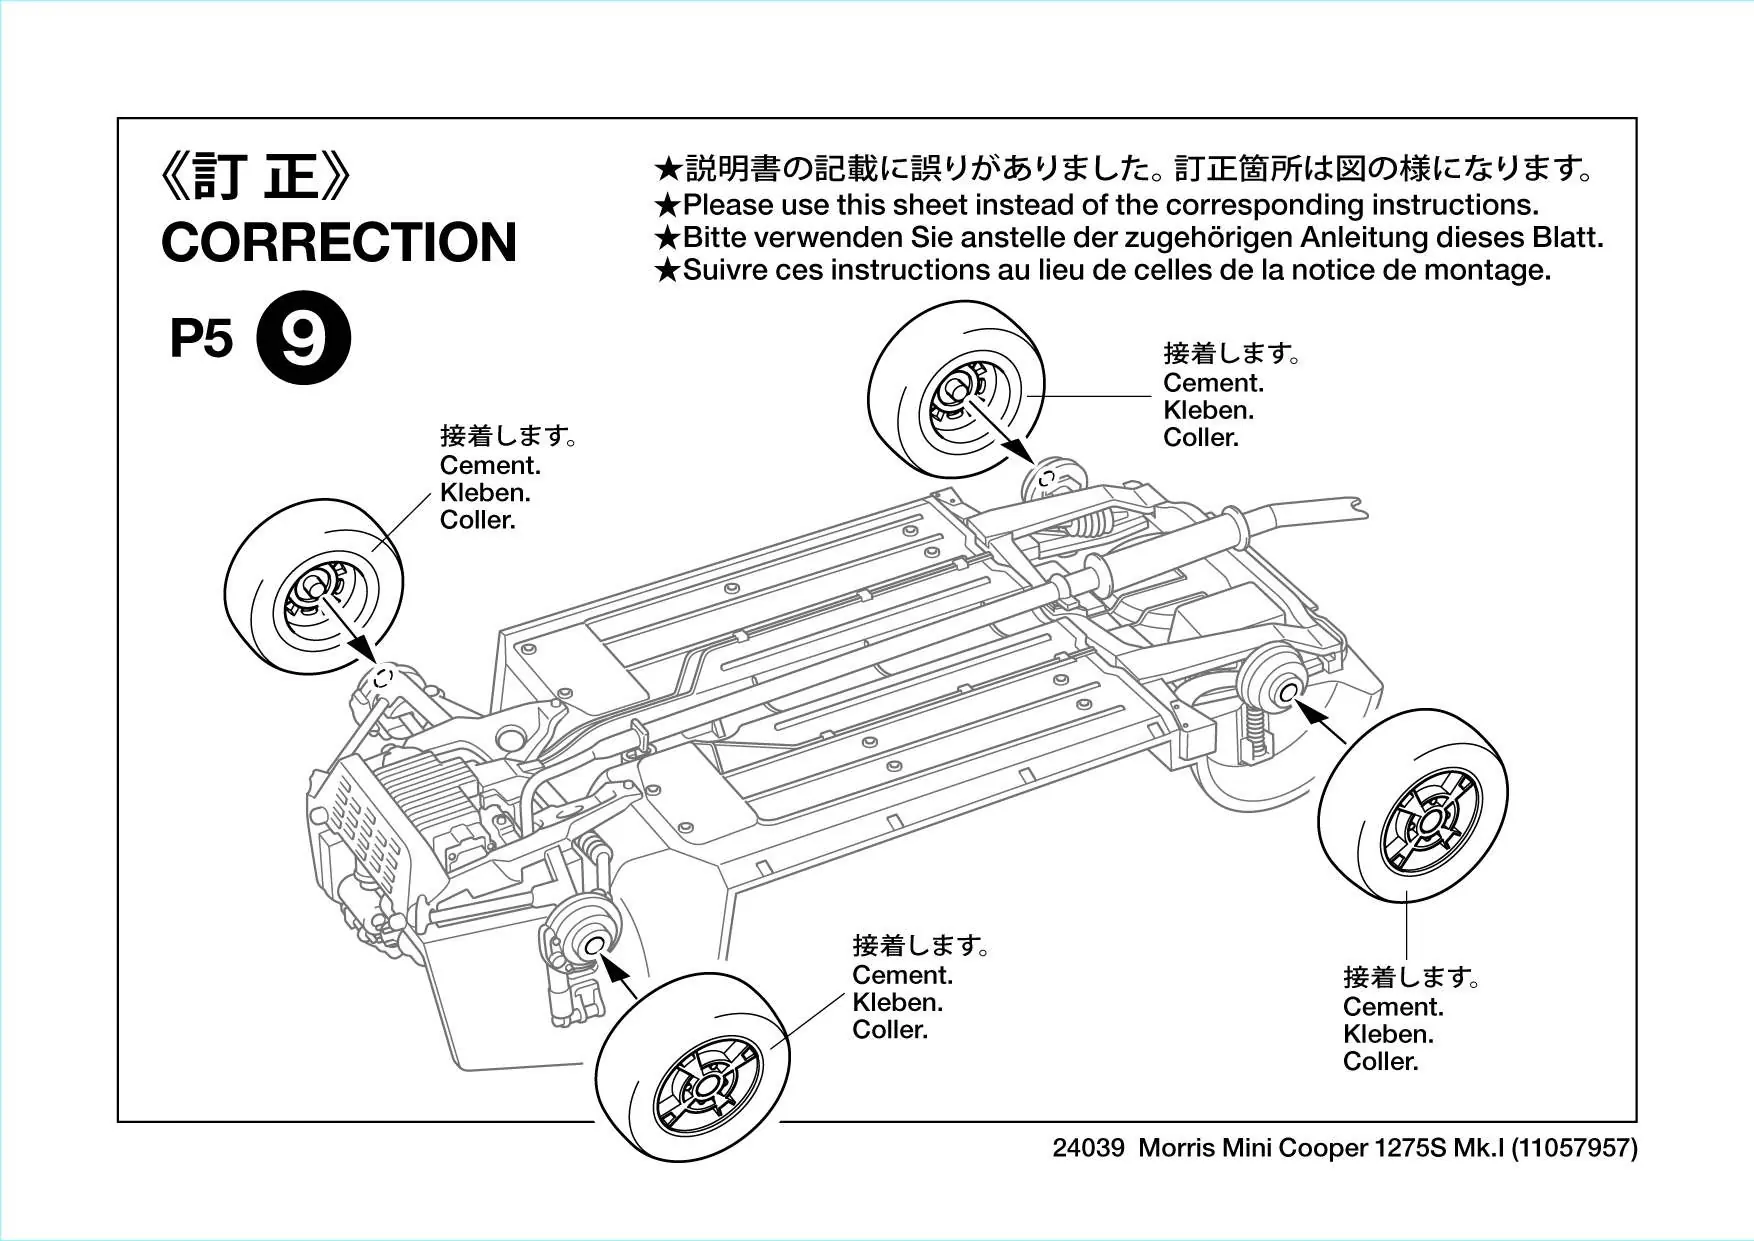
This document provides assembly instructions for the Tamiya 1/24 scale Morris Mini Cooper 1275S Mk.I (Item 24039). Please note the correction sheet on page 1 regarding wheel attachment, which supersedes the original instructions for that specific step.
Safety and preparation
Before beginning assembly, ensure you have the necessary tools and a well-ventilated workspace. Required tools include:
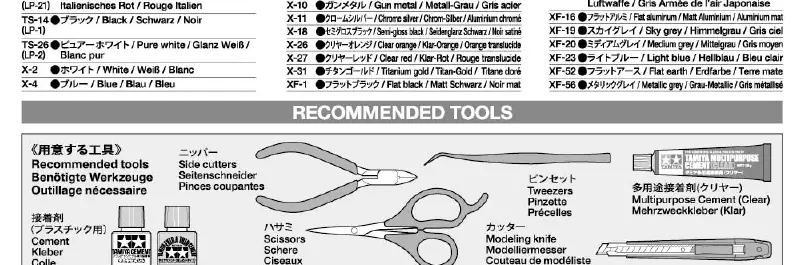
- Side cutters
- Modeling knife
- Tweezers
- Scissors
- Tamiya cement (plastic glue)
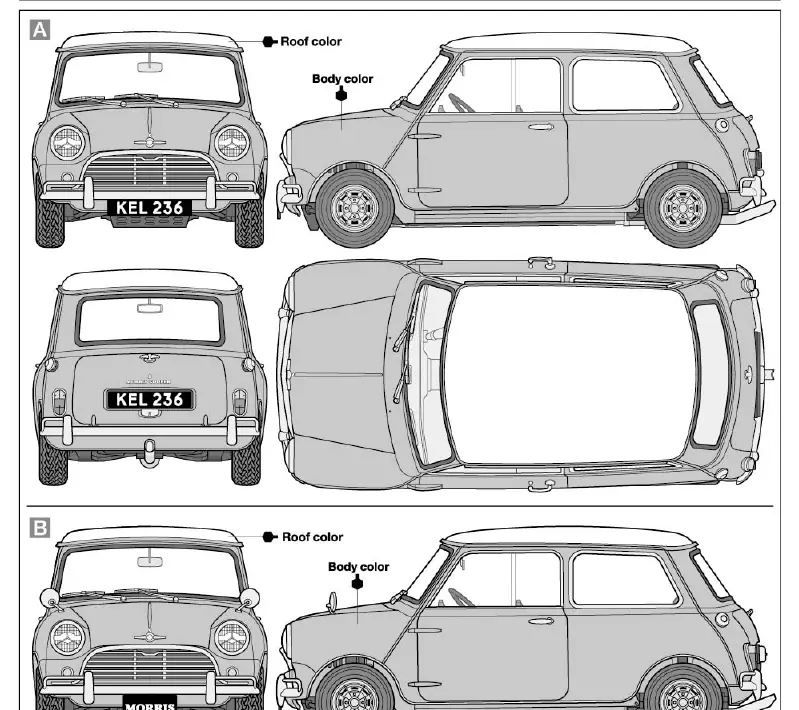
Painting: The model requires specific Tamiya paint colors (TS, X, and XF series). Refer to the paint chart on page 3 for color codes. You may choose between three body colors: Almond Green, Tartan Red, or Smoke Grey, which dictate the interior and roof colors.
Assembly instructions
The assembly is divided into 21 steps:
- Engine Assembly (Steps 1-3): Assemble the engine block and components.
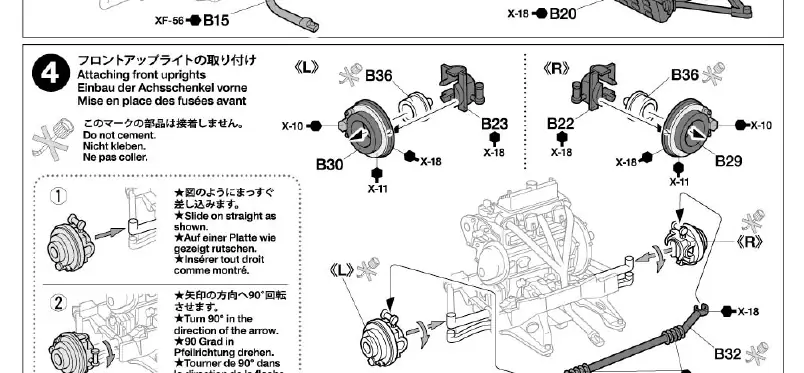
- Chassis and Suspension (Steps 4-8): Attach front uprights, chassis, engine, radiator, and rear suspension. Note that some parts require specific orientation.
- Interior and Body (Steps 9-12): Install wheels, seat rails, interior parts, and the dashboard.
- Exterior Details (Steps 13-19): Attach carburetors, body panels, windows, interior door panels, engine hood, main body, and roof.
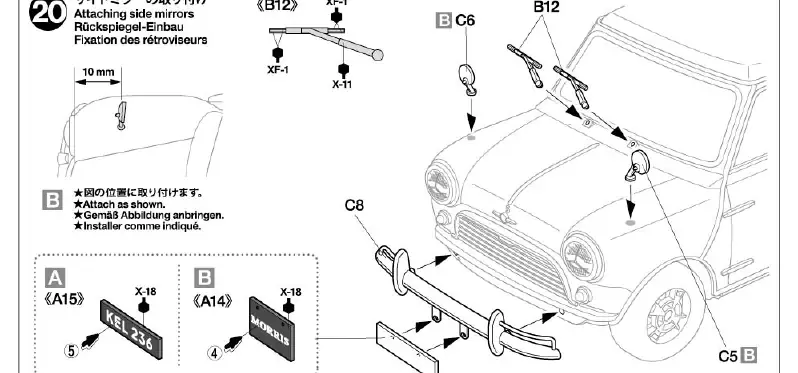
- Final Details (Steps 20-21): Install side mirrors, license plates, and taillights.
Note on Versions: Steps 20 and 21 offer options for UK (A) or Japan (B) specifications regarding side mirrors and license plates. Follow the icons corresponding to your chosen version.
Painting and decal application
Painting: Follow the painting guide on page 12 for exterior and interior details. Ensure the body is painted before final assembly of small exterior parts.
Decals: To apply decals:
- Cut the desired decal from the sheet.
- Dip in lukewarm water for 10 seconds and place on a clean cloth.
- Slide the decal onto the model.
- Use a soft cloth to press out excess water and air bubbles.
- For curved surfaces, use a decal setting solution (Mark Fit) to ensure proper adhesion.
Parts service
If you require replacement parts, please contact Tamiya Customer Service. In Japan, you can use the service address provided on page 13. For international inquiries, contact your local Tamiya dealer.
Practical help
Common problems
Decals not adhering to curved surfaces
Use a decal setting solution (Mark Fit) to help the decal conform to the surface.
Parts not fitting correctly
Ensure all excess plastic (flash) is trimmed from parts before assembly.
Confusion between UK and Japan versions
Follow the specific icons (A for UK, B for Japan) provided in steps 20 and 21.
Before use
- Ensure you have side cutters, modeling knife, tweezers, and scissors.
- Purchase Tamiya cement and required paints (TS, X, XF series).
- Read all safety warnings regarding sharp tools and paint fumes.
- Identify if you are building the UK or Japan specification.
Images and diagrams
- Icons like 'Cement' indicate where glue is required.
- Arrows indicate direction of assembly or rotation.
- Icons A and B denote version-specific parts (UK vs Japan).
Model compatibility
- Decals can be used on both UK and Japanese spec cars.
- Some parts require specific painting colors based on the chosen body color (Almond Green, Tartan Red, Smoke Grey).

Manual page author
Emily Carter
User documentation editor
Prepares concise manual descriptions and highlights the most useful setup, operation, and maintenance information for readers.