Toys / Scale Models
Tamiya 1/48 Scale German Steyr Type 1500A/01 Model Kit Assembly Guide
Assembly guide for the Tamiya 1/48 Scale German Steyr Type 1500A/01 model kit. Includes painting instructions, decal application, and step-by-step construction steps.
Table of contents
Manual images
Click an image to enlargeQuick guide from the manual
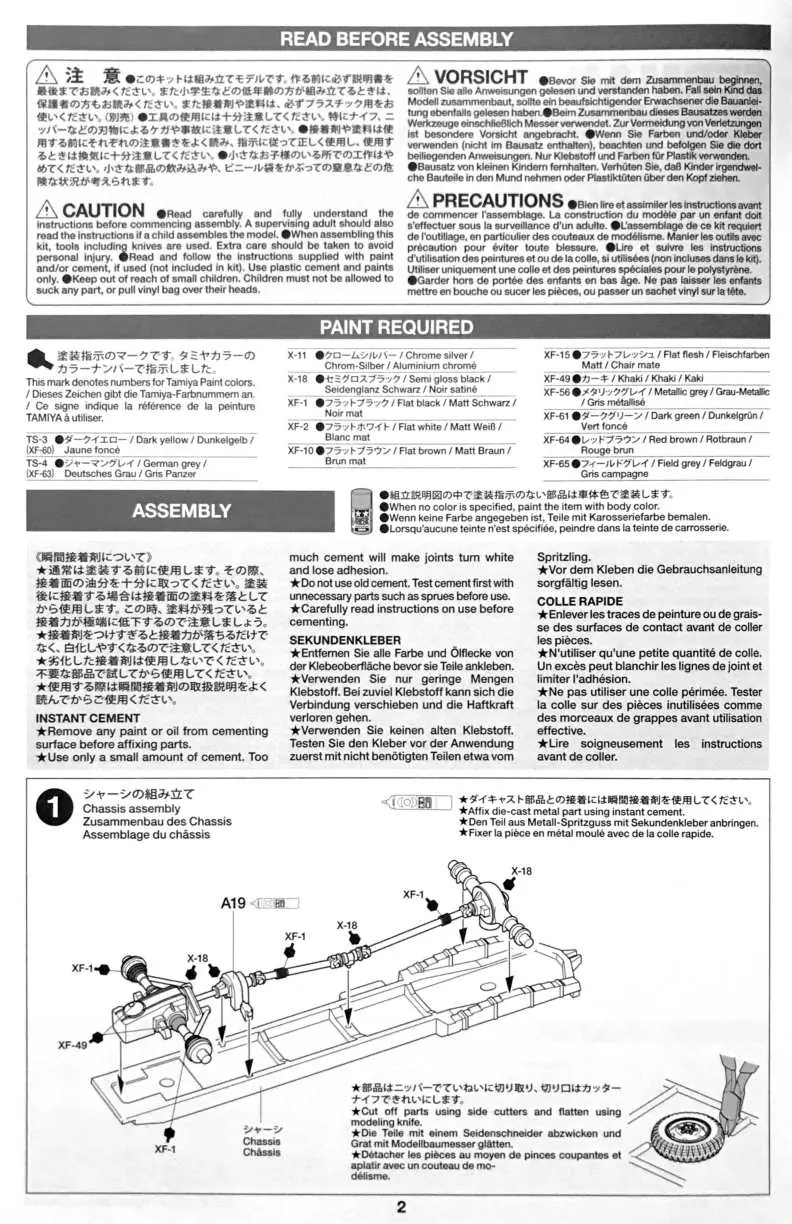
This document provides assembly and painting instructions for the Tamiya 1/48 Scale German Steyr Type 1500A/01 (Item 32549). Before beginning, ensure you have the necessary tools: side cutters, a modeling knife, tweezers, cement, and the recommended Tamiya paints. Always work in a well-ventilated area and keep small parts away from children.
Assembly Preparation
Proper preparation is essential for a high-quality model. Use side cutters to remove parts from the sprue and a modeling knife to flatten any remaining plastic burrs. When using cement, apply only a small amount to the contact surfaces. Excessive cement can cause the plastic to melt, turn white, or lose detail. Test the cement on spare parts if you are unsure.
Step-by-Step Assembly
The assembly process is divided into 10 logical steps:
- Step 1: Assemble the chassis, ensuring die-cast parts are secured with instant cement.
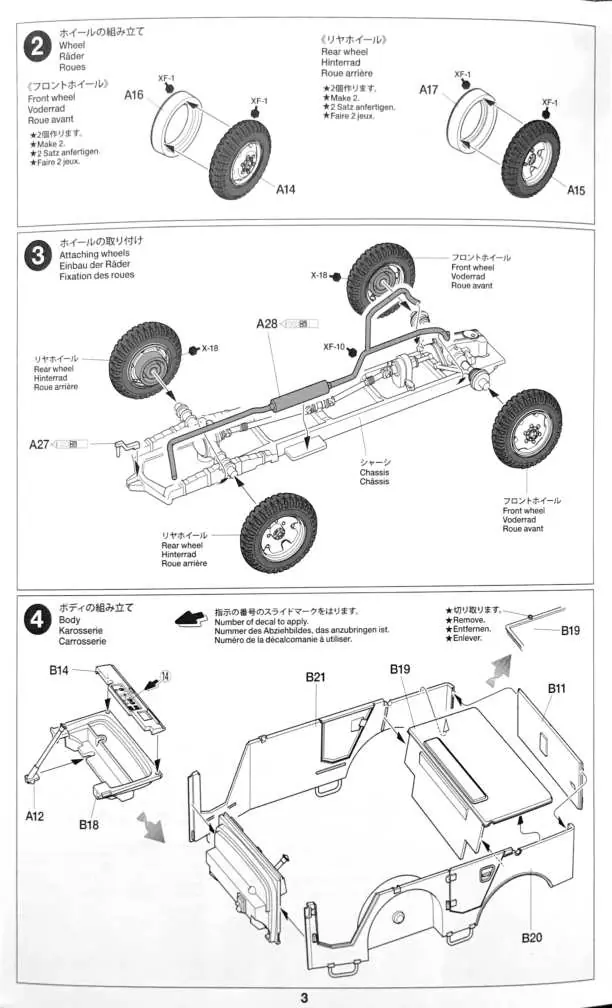
- Step 2: Assemble the front and rear wheels.
- Step 3: Attach the wheels to the chassis.
- Step 4: Begin body assembly, applying decals where indicated.
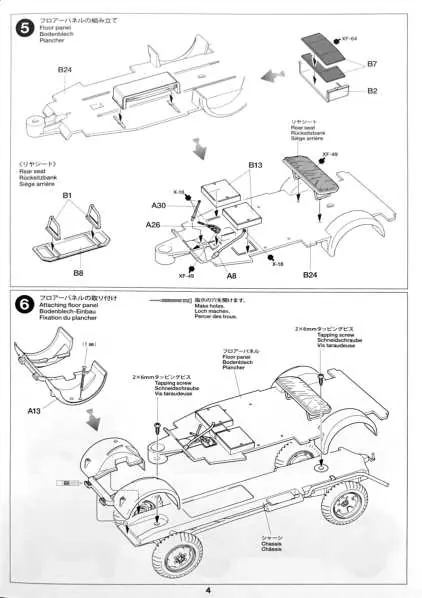
- Step 5: Assemble the floor panel and rear seats.
- Step 6: Attach the floor panel to the chassis using the provided tapping screws.
- Step 7: Attach the main body to the chassis.
- Step 8: Install body accessories, including the Notek light, jerry can, and middle seat.
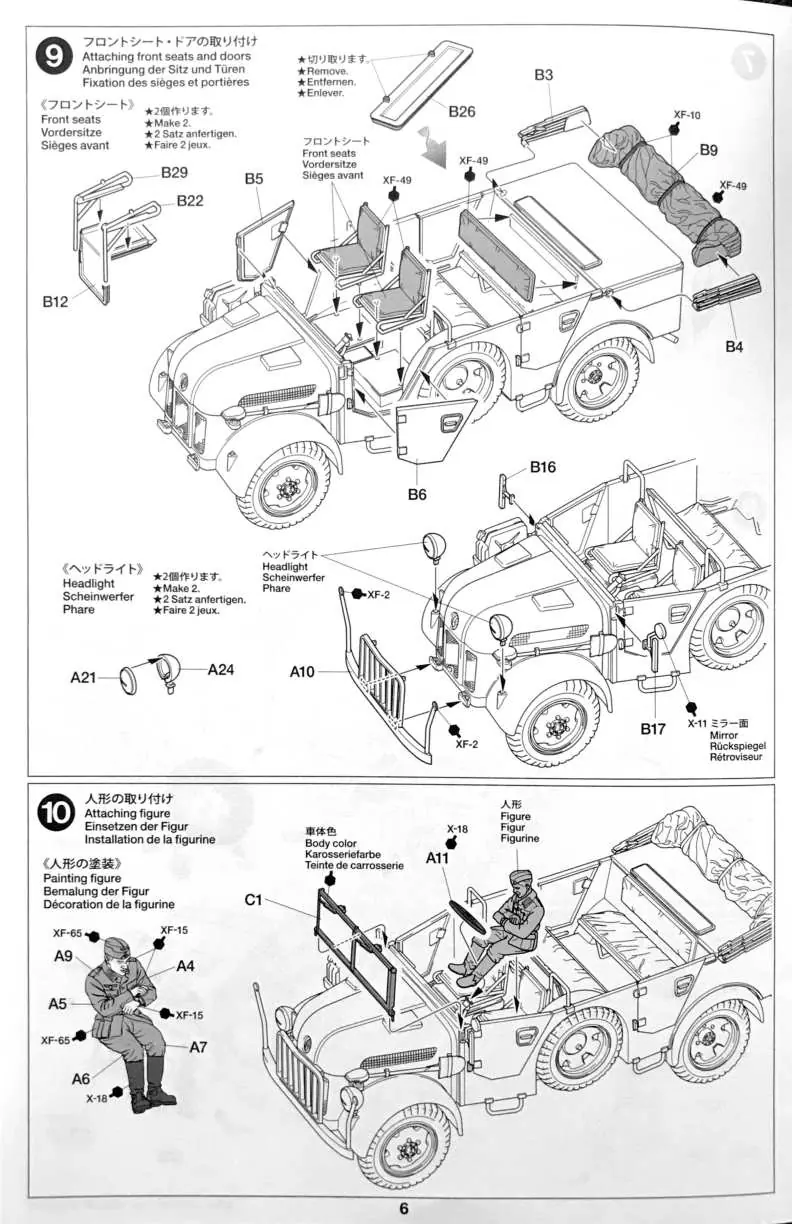
- Step 9: Attach the front seats, doors, and headlights.
- Step 10: Assemble and paint the included figure, then place it in the vehicle.
Painting and Decal Application
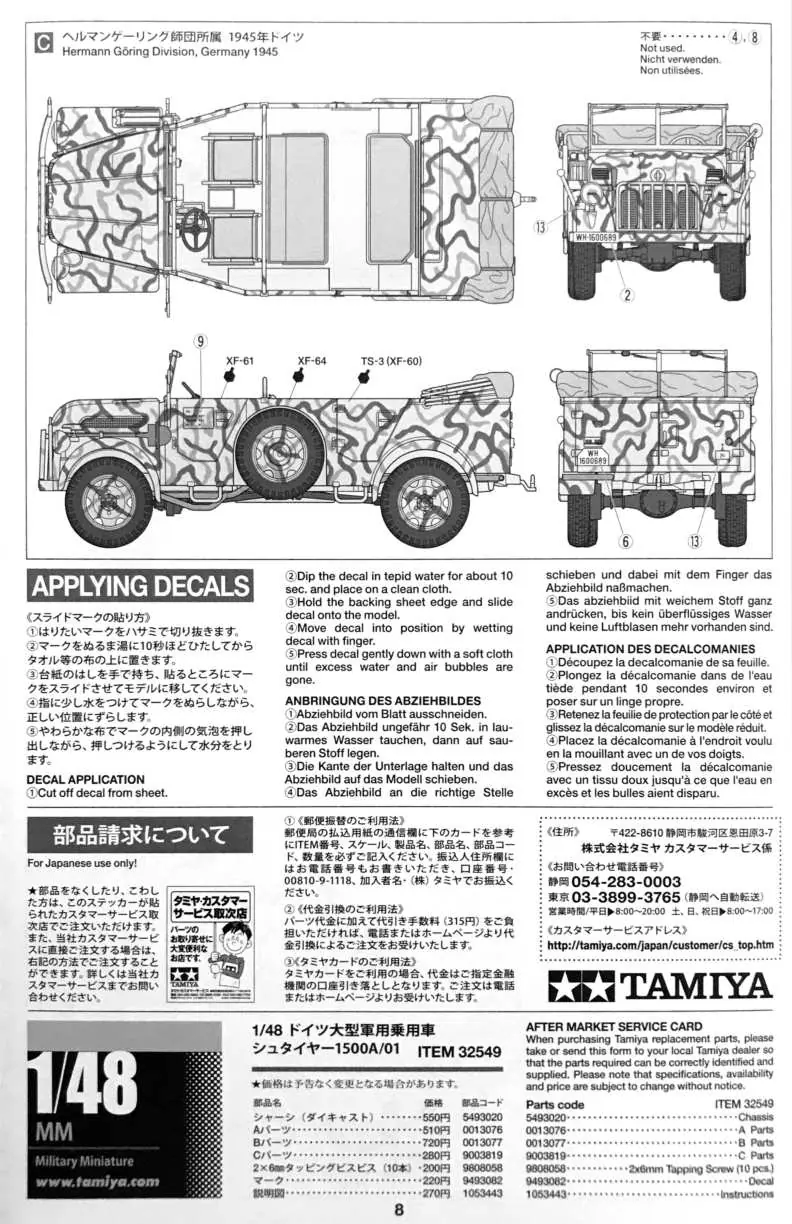
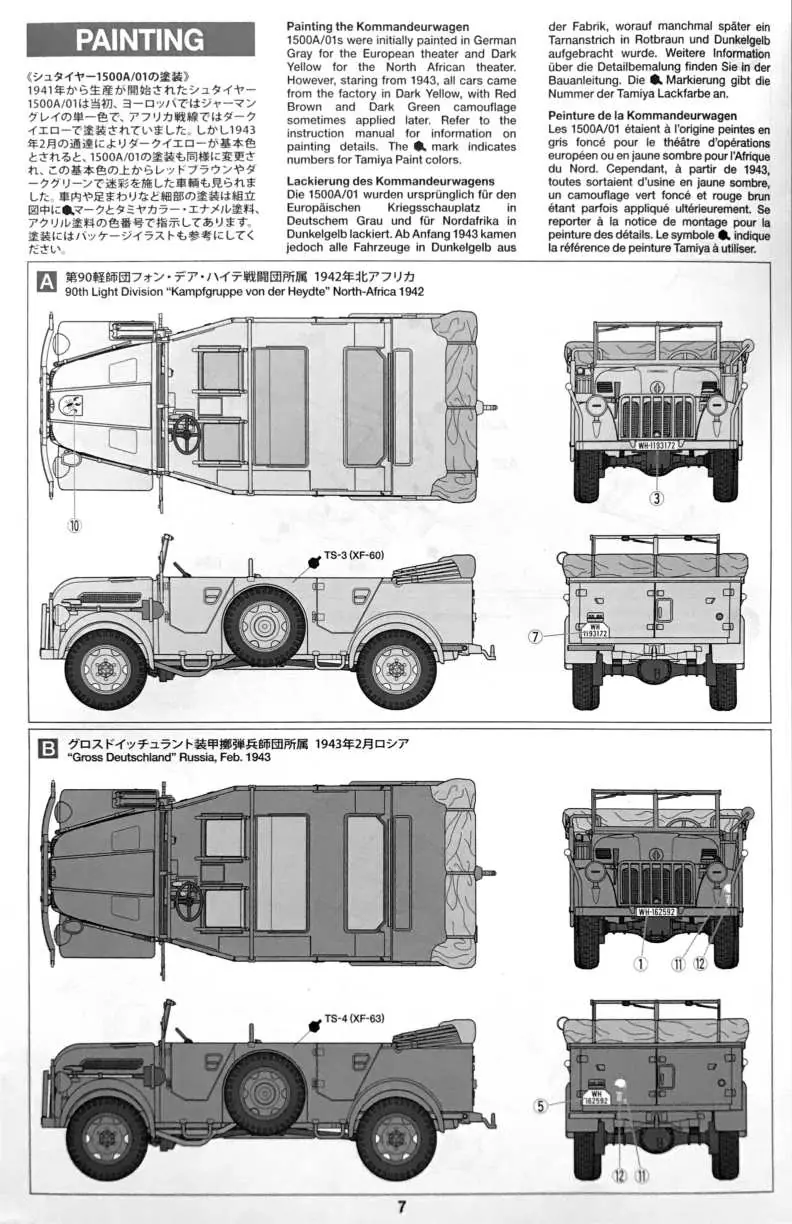
The Steyr 1500A/01 was historically painted in German Gray for European theaters and Dark Yellow for North African theaters. Later in the war, camouflage patterns were applied. Refer to the painting guide on page 7 for specific color codes and historical examples. To apply decals, dip the decal in tepid water for 10 seconds, place it on a clean cloth, slide it onto the model, and gently press with a soft cloth to remove air bubbles and excess water.
Practical help
Common problems
Cement marks on plastic
Use only a small amount of cement. Excessive cement can cause the plastic to turn white and lose detail.
Decal air bubbles
Press the decal gently with a soft cloth until all excess water and air bubbles are removed.
Before use
- Side cutters
- Modeling knife
- Plastic cement
- Tamiya paints (as specified in the paint guide)
Specs in practice
- Overall Length
- 108mm
Images and diagrams
- Steps 1-10 illustrate the precise placement of parts.
- Arrows indicate the direction of assembly or attachment.
- Black dots indicate where specific Tamiya paint colors should be applied.
Model compatibility
- Use only plastic cement and paints suitable for polystyrene.
- Refer to the Tamiya paint color chart for specific color numbers (e.g., XF-60, XF-63).

Manual page author
Emily Carter
User documentation editor
Prepares concise manual descriptions and highlights the most useful setup, operation, and maintenance information for readers.