Toys / Scale Models
Assembly Guide for Tamiya Steyr Type 1500A/01 Scale Model
A comprehensive assembly guide for the Tamiya Steyr Type 1500A/01 1/48 scale model. This manual provides step-by-step construction instructions, painting schemes, decal application procedures, and a parts list to assist in building the kit.
Table of contents
Manual images
Click an image to enlargeQuick Guide from the Manual
This document provides assembly instructions for the Tamiya 1/48 scale Steyr Type 1500A/01 model. Before beginning, ensure you have the necessary tools: side cutters, a modeling knife, tweezers, and instant cement (cyanoacrylate). Always work in a well-ventilated area and supervise children if they are assembling the model.
Assembly Instructions
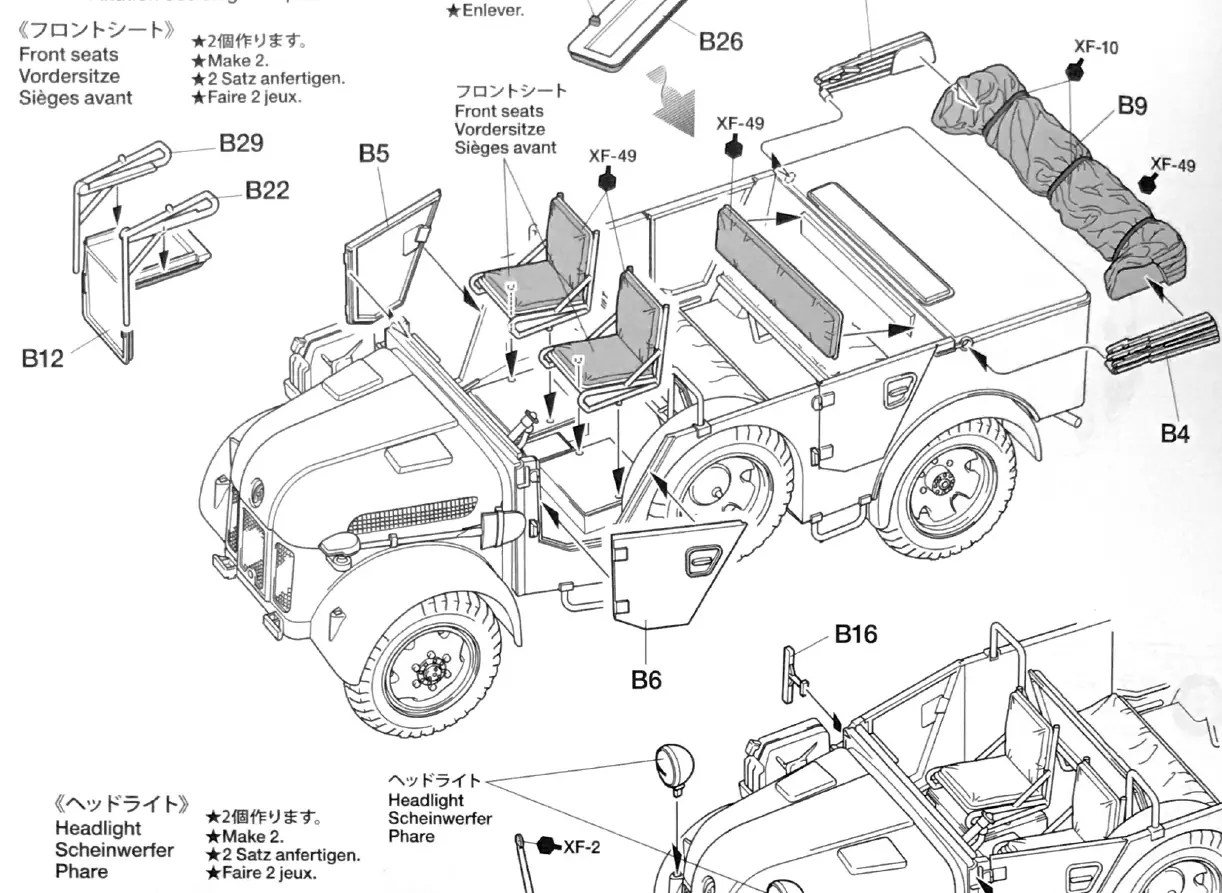
The assembly process is divided into 10 main steps. Follow the sequence carefully to ensure proper fitment:
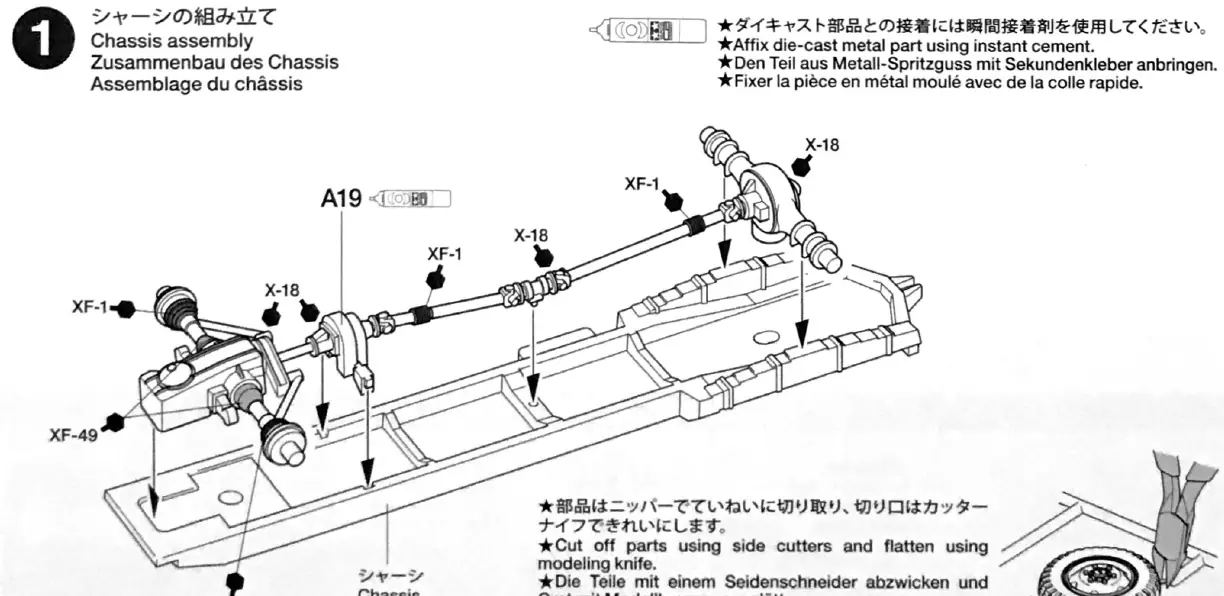
- Step 1: Chassis Assembly - Assemble the main chassis frame using the specified parts. Use instant cement for metal parts.
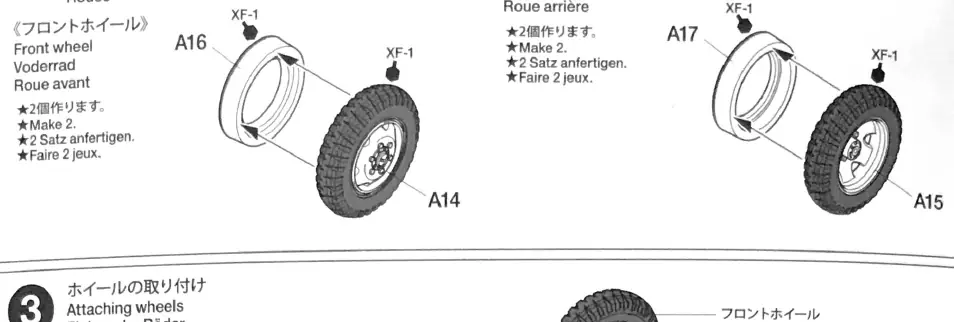
- Step 2: Wheel Assembly - Assemble the front and rear wheels. Ensure you make the correct number of sets as indicated.
- Step 3: Attaching Wheels - Attach the assembled wheels to the chassis.
- Step 4: Body Assembly - Assemble the main body components. Apply decals where indicated by the numbers.
- Step 5: Floor Panel Assembly - Assemble the floor panel and interior seating components.
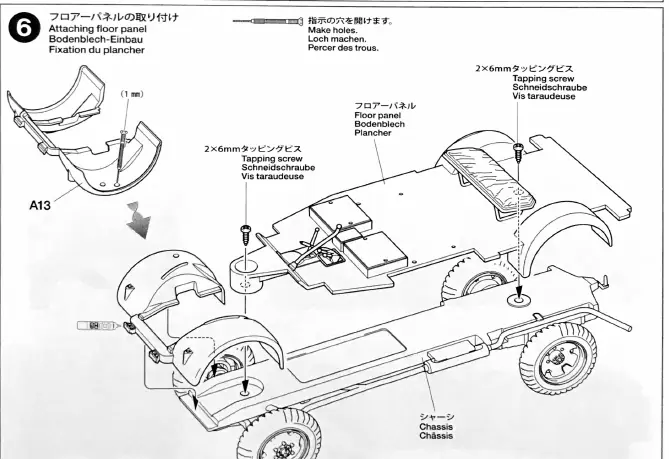
- Step 6: Attaching Floor Panel - Secure the floor panel to the chassis using the provided tapping screws.
- Step 7: Attaching Body - Mount the assembled body onto the chassis.
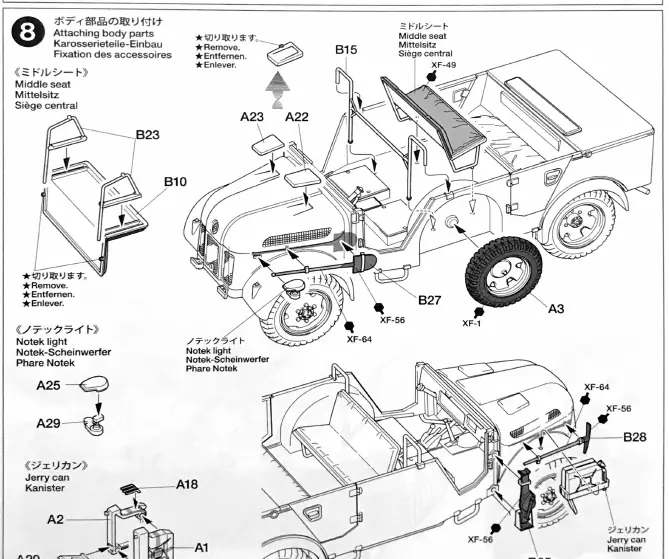
- Step 8: Attaching Body Parts - Install exterior details including the Notek light, Jerry can, and other accessories.
- Step 9: Front Seats and Doors - Attach the front seats, doors, and headlights.
- Step 10: Attaching Figure - Assemble and paint the included figure, then place it in the vehicle.
Painting and Decals
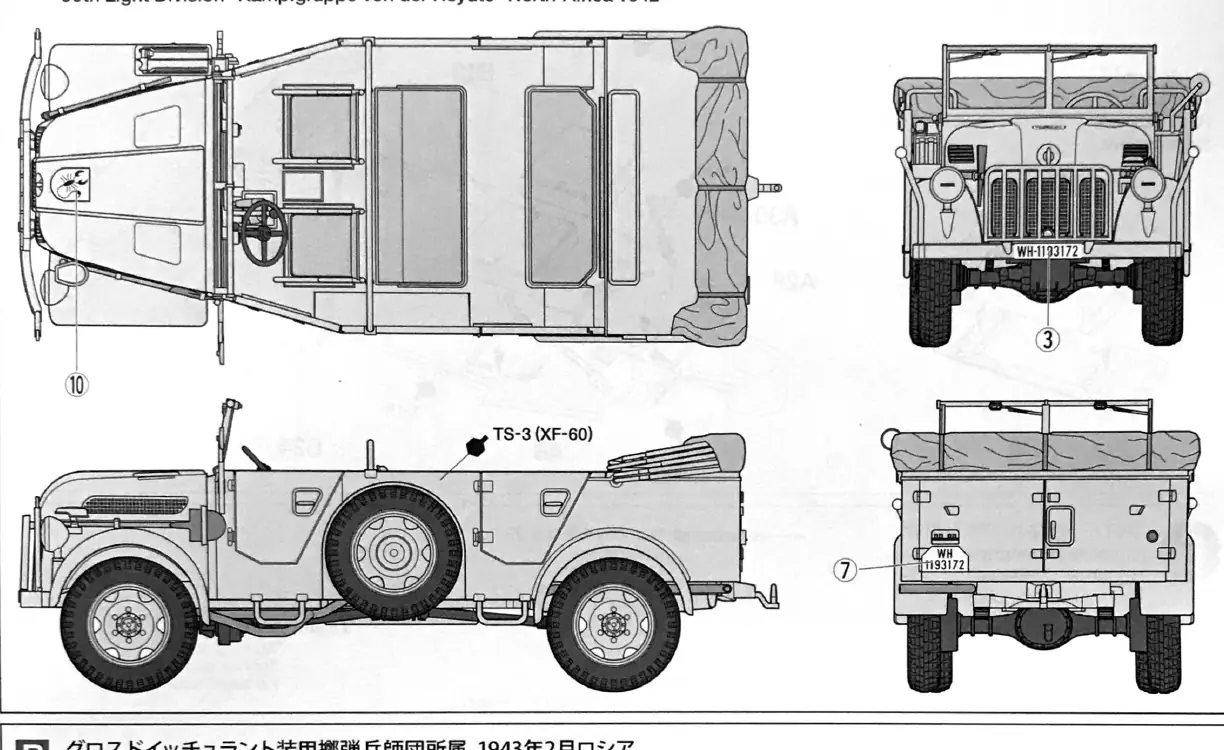
The manual provides specific color codes (Tamiya Paint colors) for accurate finishing. Refer to the painting guide for camouflage patterns used by the 90th Light Division in North Africa (1942) and the Gross Deutschland division in Russia (1943). To apply decals, cut them from the sheet, dip in tepid water for 10 seconds, slide onto the model, and press gently with a soft cloth to remove air bubbles.
Parts and Support
A detailed parts list is included at the end of the manual. For replacement parts, contact Tamiya Customer Service at 054-283-0003 or visit their website at tamiya.com/japan/customer/cs_top.htm.
Official resources from the manual
Practical help
Common problems
Decals not adhering
Ensure the surface is clean. Dip the decal in tepid water for 10 seconds, slide it into position, and press gently with a soft cloth to remove air bubbles.
Parts not fitting correctly
Check for excess plastic or paint on mating surfaces. Use a modeling knife to trim any burrs or excess material.
Paint not sticking
Remove any oil, grease, or dust from the plastic parts before applying paint.
Before use
- Side cutters
- Modeling knife
- Instant cement (cyanoacrylate)
- Tamiya paints (as specified in the color guide)
Specs in practice
- XF-1, XF-10, etc.
- Specific Tamiya paint color codes required for accurate historical finishing.
Images and diagrams
- Numbers in circles indicate the assembly order.
- Arrows indicate the direction of part attachment.
- Black triangles indicate parts that need to be removed or cut.
Model compatibility
- Designed specifically for the Tamiya 1/48 Military Miniature Series.

Manual page author
David Miller
Documentation analyst
Organizes user manual content into clear summaries, with attention to model details, product context, and everyday usability.