Electronics / Televisions
Toshiba 43L310U/49L310U/55L310U LED TV User Manual
Quick guide and user manual for Toshiba 43L310U, 49L310U, and 55L310U LED TVs. Includes setup, connection instructions, remote control usage, settings, and troubleshooting.
Table of contents
Manual images
Click an image to enlargeQuick guide from the manual
This user manual provides essential instructions for setting up and operating your Toshiba 43L310U, 49L310U, or 55L310U LED TV. Key procedures include installing the stand or wall mount, connecting external devices, performing the initial setup, and adjusting picture and sound settings.
Installation
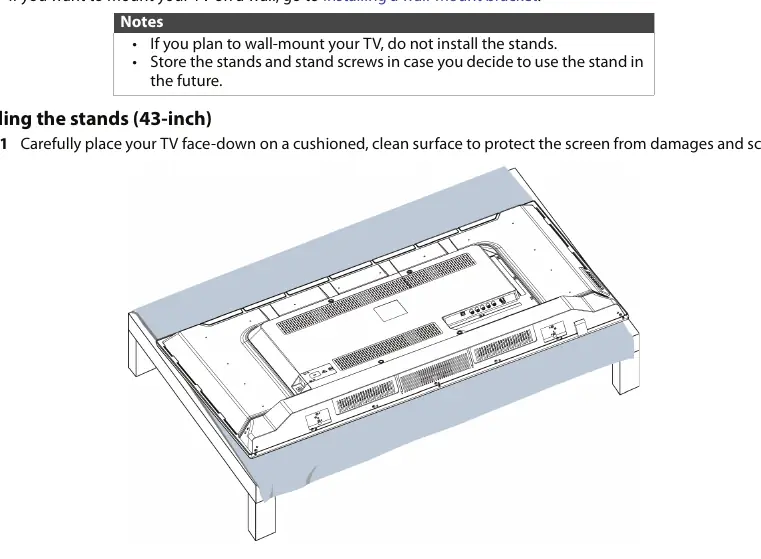
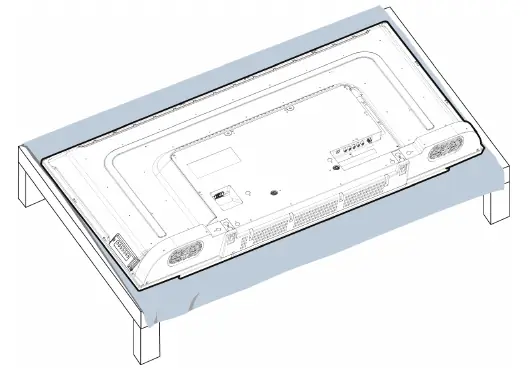
Stands: Place the TV face-down on a clean, cushioned surface. Secure the stand legs to the bottom of the TV using the provided M5 screws. Wall Mount: Ensure you use a UL-listed wall mount bracket. The TV has four VESA mounting holes on the back (200 x 300 mm). Use M6 screws to attach the bracket, ensuring all four holes are used for safety.
TV Components
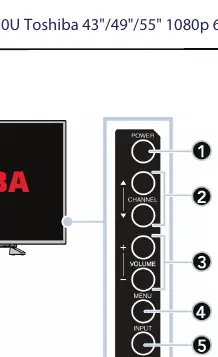
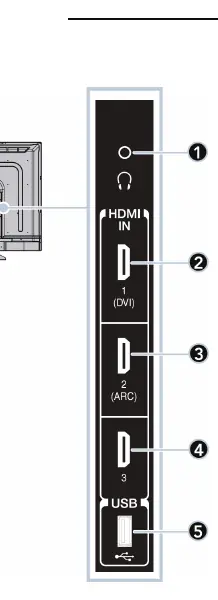
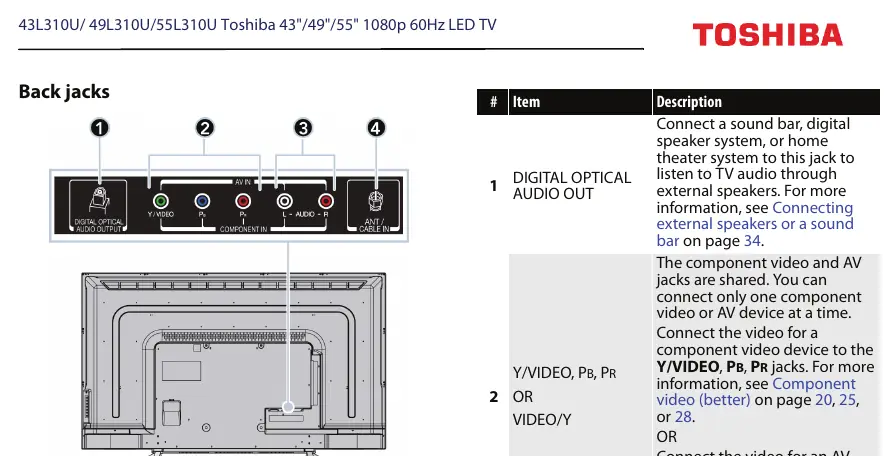
The TV features a remote control sensor and power indicator on the front. Side jacks include HDMI inputs, a USB port, and a headphone/audio output jack. Back jacks include Digital Optical Audio Out, Component/AV inputs, and an Antenna/Cable input.
Connections
For the best quality, use HDMI connections for cable/satellite boxes, DVD/Blu-ray players, game consoles, and computers. Component and AV (composite) connections are available for older devices. Use the Antenna/Cable input for over-the-air or direct cable TV. External speakers or sound bars can be connected via the Digital Optical Audio Out or the headphone jack.
Initial Setup
Upon first power-on, the Initial Setup wizard will guide you through selecting the menu language, time zone, and TV signal source (Antenna or Cable). You must select Home mode for normal use.
Settings and Adjustments
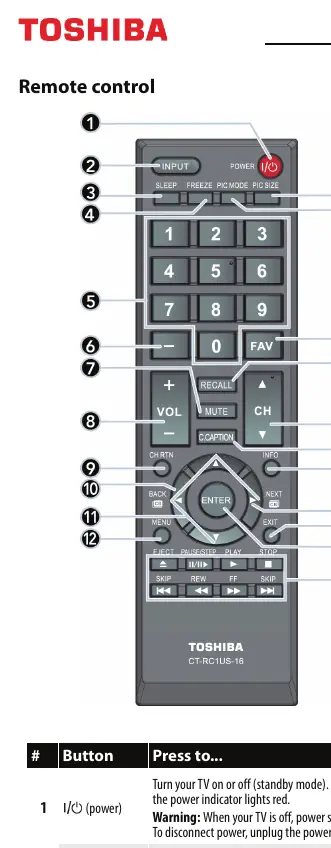
Access the menu using the MENU button on the remote. You can adjust picture modes (Dynamic, Standard, Movie, Game, PC), sound settings (Balance, Bass, Treble, DTS TruSurround), and channel settings (Auto Tuning, Manual Tuning, Favorites). Parental controls allow you to lock inputs, channels, and set a GameTimer.
Media Player
Connect a USB flash drive to the side USB port to view JPEG photos. Use the Media Player menu to navigate files, view photos, or start a slideshow.
Troubleshooting
If you encounter issues, check cable connections, ensure the correct input is selected, and verify power. For no power, unplug the cord for 60 seconds and plug it back in. For remote issues, check batteries and ensure no obstructions are blocking the sensor.
Practical help
Common problems
No picture and no sound
Check that the power cord is plugged into a working outlet, ensure the correct video input source is selected, and verify that all cables are connected securely.
Picture does not fill the screen
Press the PIC SIZE button on the remote to cycle through aspect ratio options.
Remote control not working
Check that batteries are installed correctly, remove any obstructions between the remote and the TV sensor, and ensure you are pointing the remote directly at the sensor.
No power
Unplug the power cord from the outlet, wait 60 seconds, then plug it back in and turn on the TV.
Before use
- Install two AAA batteries in the remote control.
- Place the TV on a stable, flat surface or mount it securely to a wall.
- Connect your antenna, cable, or satellite box to the appropriate input.
- Connect the power cord to a power outlet.
- Ensure the TV is in a well-ventilated area.
Specs in practice
- Refresh Rate
- 60Hz
Images and diagrams
- Front panel: Remote sensor and power indicator.
- Side jacks: HDMI, USB, and Headphone/Audio output.
- Back jacks: Digital Optical Audio, Component/AV, and Antenna/Cable input.
Model compatibility
- HDMI CEC compatible devices can be controlled via the TV remote.
- USB port supports JPEG photo files and firmware upgrades.

Manual page author
David Miller
Documentation analyst
Organizes user manual content into clear summaries, with attention to model details, product context, and everyday usability.