Furniture / Storage Cabinets
Aberdeen 1K VS1 194 Showcase Installation Guide
Comprehensive installation guide for the Aberdeen 1K VS1 194 showcase. Includes step-by-step assembly instructions, parts list, safety warnings, and care guidelines.
Table of contents
Manual images
Click an image to enlargeQuick guide from the manual
This document provides essential instructions for the assembly and installation of the Aberdeen 1K VS1 194 showcase. Wall mounting is mandatory to prevent the product from overturning. Before starting, ensure you have a clean, soft surface (such as cardboard or fabric) to protect the furniture during assembly. The provided plastic plugs are intended for standard brick walls; if they are not suitable for your wall type, you must purchase the correct type from a specialized store.
Parts and Hardware
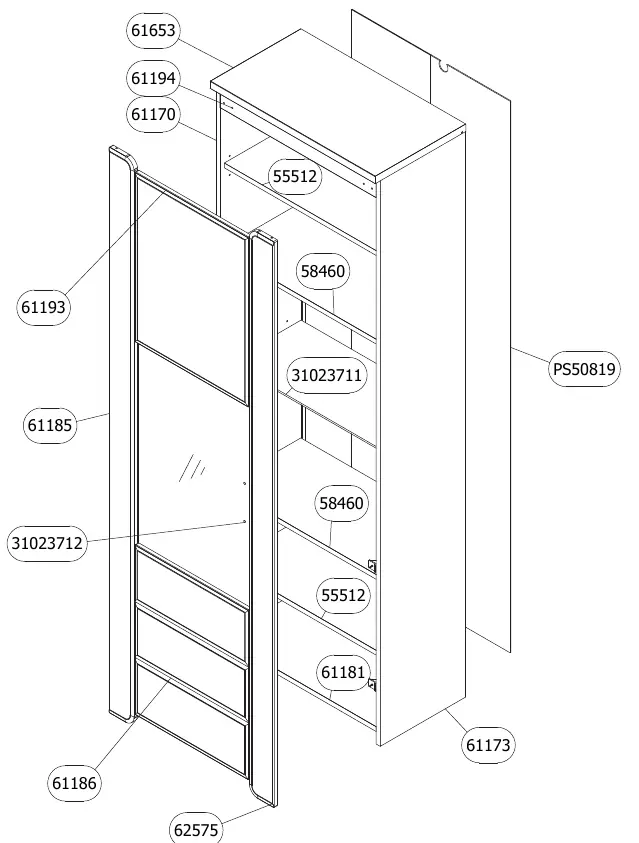
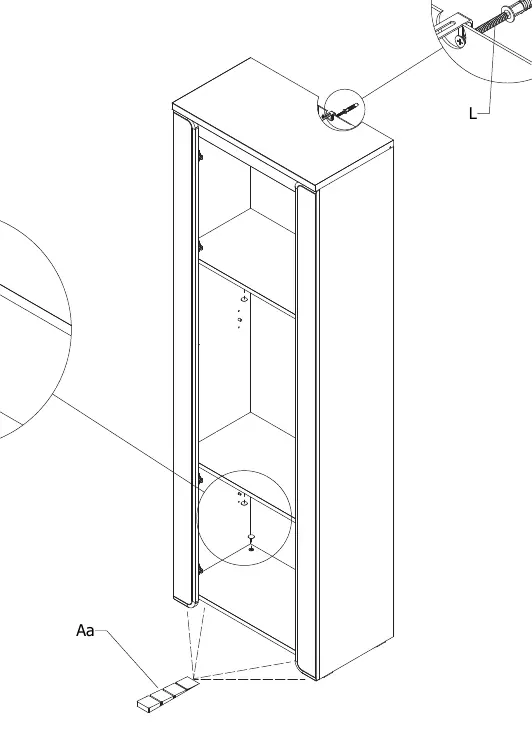
The manual includes a detailed parts list on page 2, identifying all panels and components. Page 4 provides a comprehensive list of hardware (screws, dowels, etc.) required for assembly. Always verify that you have all parts before beginning the installation.
Assembly Instructions
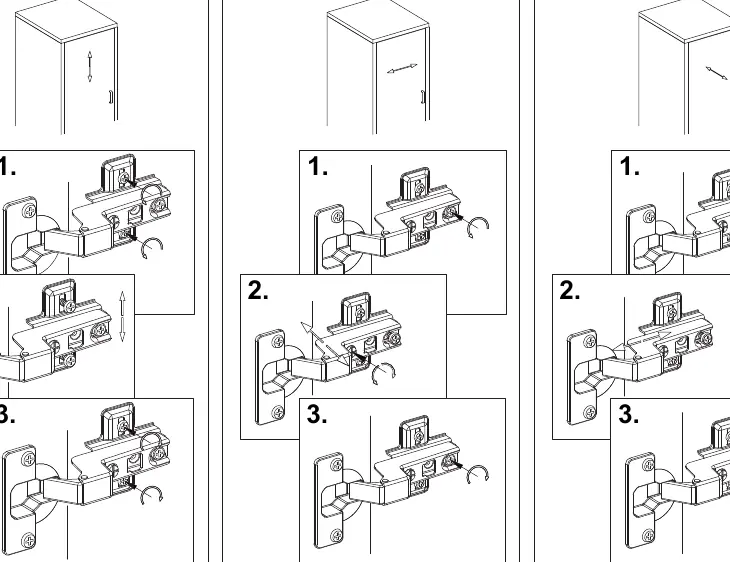
The assembly process is broken down into sequential steps (1-18). Key assembly procedures include:
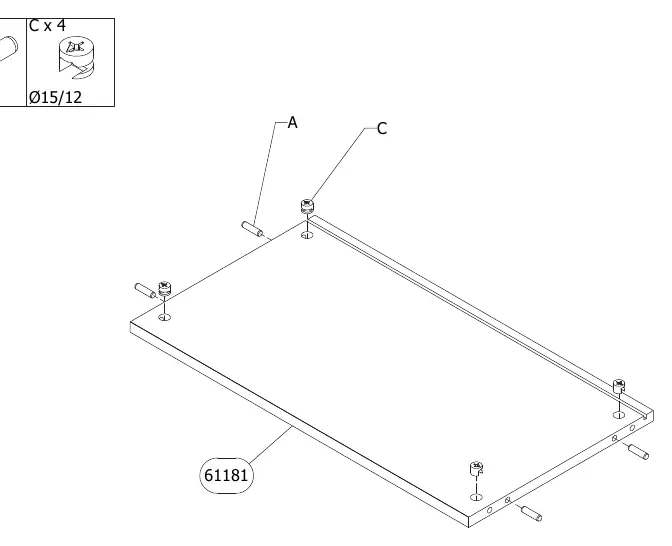
- Step 1-3: Initial panel preparation and hardware insertion.
- Step 4-13: Main structure assembly, including side panels and shelves.
- Step 14-15: Attaching top and structural elements.
- Step 16-17: Final adjustments and wall mounting preparation.
- Step 18: Installing shelves and final checks.
Follow the diagrams carefully, paying attention to the orientation of panels and the specific hardware used in each step.
Safety and Wall Mounting
To prevent accidental overturning, it is mandatory to fix the product to the wall. Ensure you check the type and load-bearing capacity of your wall before installation. If the provided wall plugs are not suitable, you are responsible for obtaining the correct ones.
Care and Maintenance
To maintain the quality of your furniture:
- Clean wood and refined chipboard products using only a dry, soft cloth without abrasive properties.
- For upholstered parts, use a vacuum cleaner or water (up to 40°C) with neutral chemical agents.
- Avoid using dry-cleaning agents, solvents, polishing agents, oils, or abrasive agents on leather or faux leather surfaces.
- Ventilate the room frequently for at least four weeks after installation, as wood-based panels may emit substances into the indoor air.
Manufacturer information
XXXLutz
Practical help
Common problems
Furniture instability
Wall mounting is mandatory to prevent the product from overturning.
Wall plugs not suitable for wall type
The provided plugs are for standard brick walls. If they do not fit your wall, purchase suitable plugs from a specialized store.
Before use
- Check all parts against the list on page 2.
- Prepare a clean, soft surface (cardboard or fabric) for assembly.
- Ensure you have the necessary tools (screwdriver, drill).
- Verify your wall type to ensure the provided plugs are appropriate.
- Read all safety warnings regarding wall mounting.
Specs in practice
- Shelf load capacity
- Max 2kg for specific shelves, max 5kg for others (see page 15).
Images and diagrams
- Assembly steps 1-18 show the sequence of connecting panels and hardware.
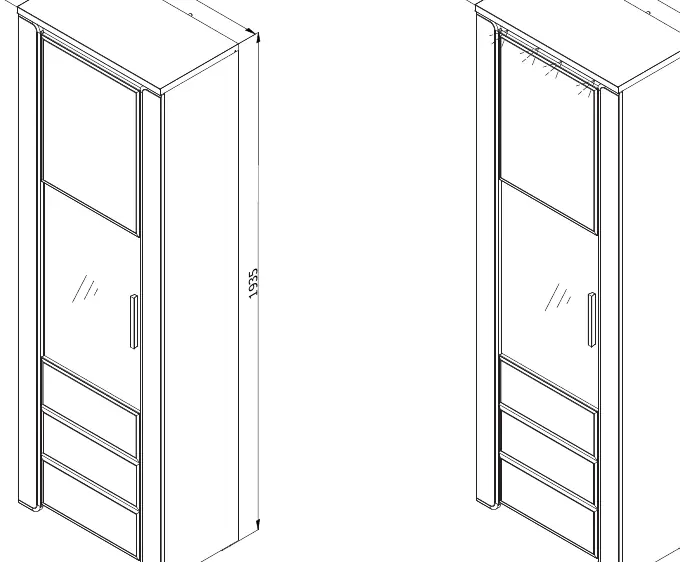
- Page 2 provides a detailed parts list with dimensions for each component.
Model compatibility
- Wall mounting is mandatory for safety.
- Plastic plugs provided are for standard brick walls only.

Manual page author
David Miller
Documentation analyst
Organizes user manual content into clear summaries, with attention to model details, product context, and everyday usability.