Lighting / Fixtures
User Manual for ADJ Starburst Lighting Fixture
Quick guide for the ADJ Starburst lighting fixture. Includes setup instructions, DMX configuration, system menu navigation, maintenance tips, and technical specifications.
Table of contents
Manual images
Click an image to enlargeQuick Guide from the Manual
The ADJ Starburst is an intelligent DMX lighting centerpiece featuring 5x 15W 6-in-1 HEX LEDs. This guide covers the essential setup, operation, and maintenance procedures required to operate the fixture safely and effectively.
Safety Precautions
- Indoor Use Only: Using this product outdoors voids all warranties.
- Ventilation: Always mount the unit in an area with proper ventilation, allowing at least 6 inches (15cm) between the device and any wall.
- Electrical Safety: Do not remove the cover; there are no user-serviceable parts inside. Ensure the power cord is not frayed or broken.
- Heat Sources: Keep the appliance away from radiators, stoves, and other heat-producing equipment.
- Connection: Disconnect from main power before making any connections.
Setup and Installation
The Starburst features an automatic voltage switch, allowing it to be plugged into any standard power source (100V-240V). You can daisy chain up to 20 fixtures using the IEC input and output sockets.
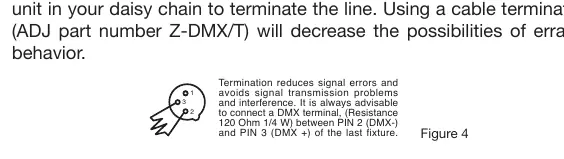
DMX Linking: To control the fixture via DMX-512, use approved 110-120 Ohm shielded DMX cables. For longer cable runs (over 100 feet), it is highly recommended to use a DMX terminator (120 Ohm resistor) on the last fixture in the chain to prevent signal errors.
System Menu Navigation
To access the system menu, use the MENU, ENTER, UP, and DOWN buttons. Press ENTER to confirm settings. The display will lock after 30 seconds; press and hold the MENU button for 3 seconds to unlock.
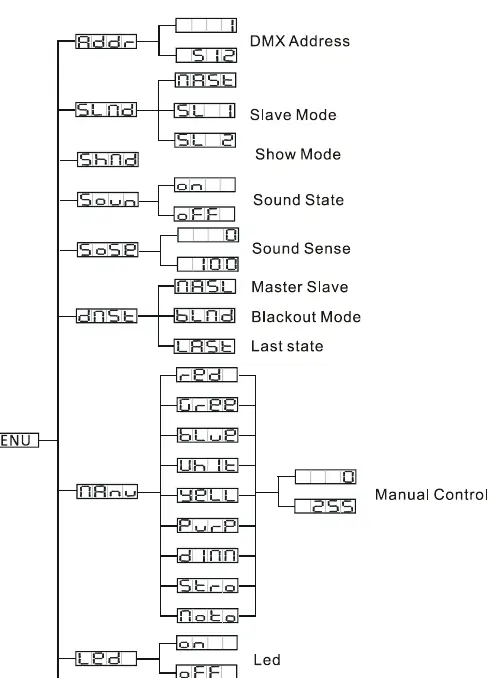
- ADDR: Set the DMX address.
- SLND: Configure Master/Slave settings (MAST, SL 1, SL 2).
- SHND: Activate Show Mode.
- SOUN: Toggle Sound Active mode.
- SENS: Adjust sound sensitivity (0-100).
- DNST: Set behavior when DMX signal is lost (LAST, MASL, BLND).
- MANU: Manual test mode for LEDs, dimmer, strobe, and motor.
- LED: Toggle LED display timeout.
- DISP: Reverse display orientation.
- FHRS: View total running time.
- VER: View software version.
- RSET: Reset the unit.
Operating Modes
The fixture supports three primary operating modes: Sound Active, Show Mode, and DMX Controlled. In Master/Slave configuration, you can link up to 16 units. Set one unit to "MAST" and the others to "SL 1" or "SL 2" to synchronize movement.
Maintenance
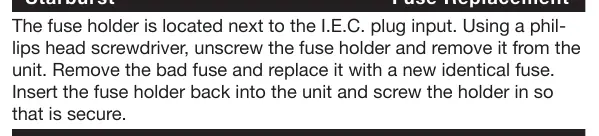
Regular cleaning is required to maintain light output, especially in environments with smoke or fog. Clean external optics every 20 days and internal optics every 30-60 days using glass cleaner and a soft cloth. If the unit fails to power on, check the fuse located next to the IEC input and replace it with an identical 2 Amp fuse if necessary.
Manufacturer information
ADJ Products, LLC
Practical help
Common problems
Fixture not responding to DMX controller
Check DMX address settings, ensure cables are not damaged, and verify the DMX line is properly terminated at the last fixture.
Erratic behavior or signal errors
Ensure the DMX line is terminated with a 120 Ohm resistor at the last fixture in the chain.
Unit will not power on
Check the fuse located next to the IEC power input. Replace with an identical 2 Amp fuse if blown.
Before use
- Inspect the shipping carton and fixture for physical damage.
- Ensure the mounting location allows for at least 6 inches (15cm) of ventilation space.
- Verify the power source is within the 100V-240V range.
- Prepare 110-120 Ohm shielded DMX cables if using DMX control.
- Unlock the display by holding the MENU button for 3 seconds if it is locked.
Specs in practice
- 5x 15W 6-in-1 HEX LED
- High-output LED configuration providing RGBWYP color mixing.
- 12 DMX Channels
- The number of channels required on your DMX controller to fully operate the fixture.
Images and diagrams
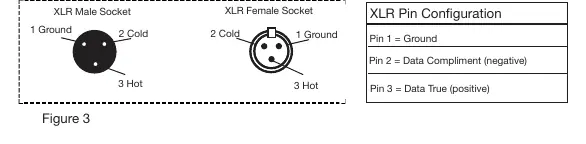
- XLR Pin Configuration: Details how to wire 3-pin XLR cables for DMX data transmission (Pin 1: Ground, Pin 2: Data-, Pin 3: Data+).
- System Menu Tree: A visual guide to navigating the fixture's settings menu.
Model compatibility
- Compatible with standard DMX-512 controllers.
- Supports Master/Slave configuration for up to 16 units.
- 5-pin DMX fixtures can be used in a 3-pin line with an appropriate adapter.

Manual page author
David Miller
Documentation analyst
Organizes user manual content into clear summaries, with attention to model details, product context, and everyday usability.