Electronics / Networking
Quick Installation Guide for AirLive ONU-10XG(S)-1004-10G
Get started with your AirLive ONU-10XG(S)-1004-10G. This guide covers hardware installation, port descriptions, LED status indicators, and environmental requirements for optimal performance.
Table of contents
Manual images
Click an image to enlargeQuick guide from the manual
This document provides essential instructions for the AirLive ONU-10XG(S)-1004-10G. It covers the physical installation, interface identification, and LED status interpretation to ensure proper setup and operation.
Packing List
- 10G-XG/XGS-PON ONU
- Power adapter
- Installation Guide
- Network cable
Indicator and Interface Description
The device features several ports and buttons for connectivity and management:


- ON/OFF: Power switch.
- DC 12V: Power input (12V, 1A).
- LAN1: Silver 10GE port. Connect using a Cat6a cable with an RJ-45 connector.
- LAN2-5: Yellow 1GE ports. Connect using a Cat5 cable with an RJ-45 connector.
- PON: SC type fiber connector for connection to the OLT using a single-mode optical fiber cable.
- RST: Reset button. Press for over 10 seconds to restore factory defaults and reboot.
- USB 3.0: External USB port for connecting USB storage devices.
Panel Lights
The LED indicators provide real-time status of the device:
- PWR: On (powered up), Off (powered down).
- PON: On (registered to PON system), Off (not registered), Blink (registering).
- LOS: Off (received optical signal), Blink (no optical signal).
- WAN: On (connection up), Off (connection down).
- LAN1-5: On (connected properly), Off (not connected), Blink (sending/receiving data).
- USB: On (connected, no transmission), Off (powered off/not connected), Blink (data transmission).
Hardware Installation
Installation Environment Requirements:
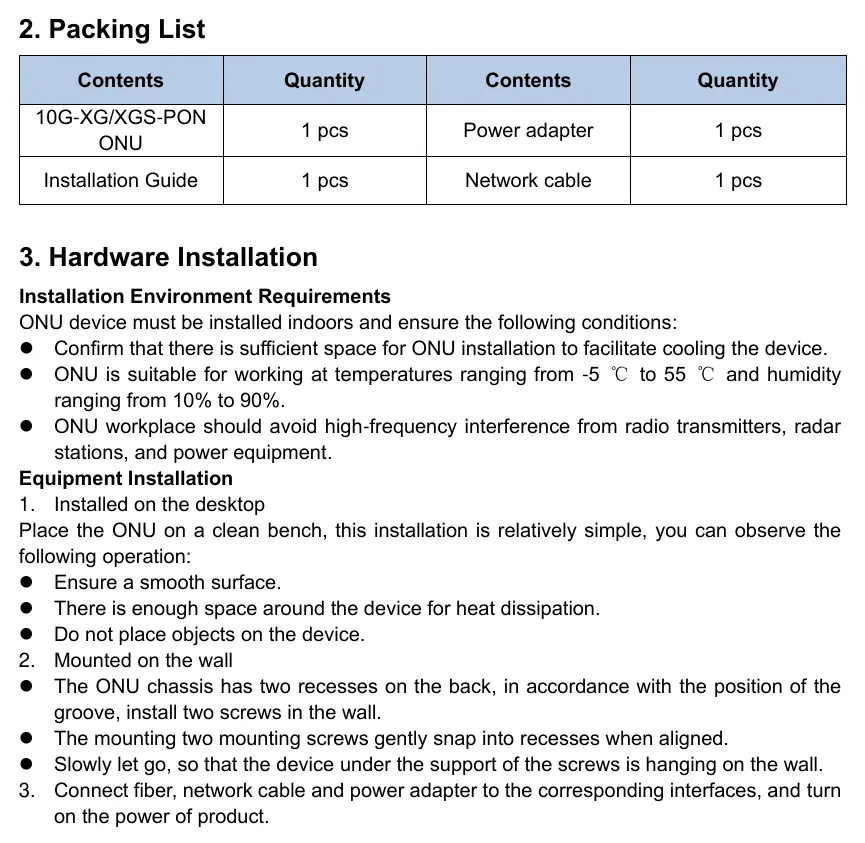
- Install indoors.
- Ensure sufficient space for cooling.
- Operating temperature: -5°C to 55°C.
- Operating humidity: 10% to 90%.
- Avoid high-frequency interference from radio transmitters, radar stations, and power equipment.
Desktop Installation:
- Place on a clean, smooth surface.
- Ensure enough space around the device for heat dissipation.
- Do not place objects on the device.
Wall Mounting:
- Install two screws in the wall aligned with the two recesses on the back of the chassis.
- Align the recesses with the screws and gently snap the device into place.
- Ensure the device is securely hanging on the wall.
Connection: Connect the fiber, network cable, and power adapter to the corresponding interfaces, then turn on the power.
Manufacturer information
AirLive Technology
Practical help
Common problems
Device not registering to PON system
Check the PON LED. If it is blinking, the device is registering. If it is off, it is not registered.
No optical signal
Check the LOS LED. If it is blinking, the device is not receiving an optical signal.
Port connection issues
Check the LAN LED. If it is off, the port is not connected properly.
Before use
- Ensure a clean, smooth surface for desktop installation.
- Verify sufficient space around the device for heat dissipation.
- Check that the power adapter is 12V, 1A.
- Use Cat6a cable for the 10GE port (LAN1).
- Use Cat5 cable for GE ports (LAN2-5).
- Ensure the environment is between -5°C and 55°C.
Images and diagrams
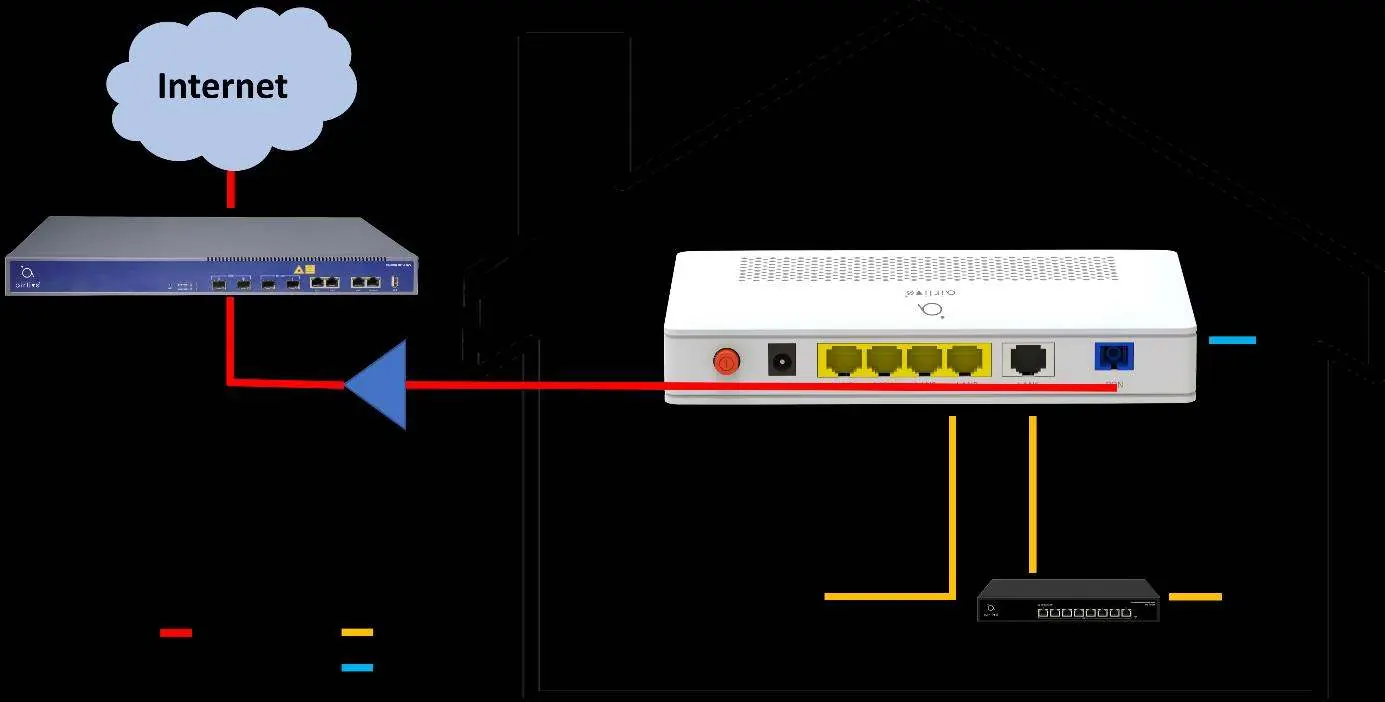
- The application chart illustrates the connection path from the Internet through the OLT/Splitter to the ONU, and subsequently to local devices such as a PC, TV, and NAS.
Model compatibility
- Operating temperature: -5°C to 55°C.
- Operating humidity: 10% to 90%.

Manual page author
Michael Turner
Technical manual editor
Reviews PDF manuals for structure, safety notes, and practical product details so readers can find the right information quickly.