Industrial / Commercial Refrigeration
User Manual for Avantco Commercial School Milk Cooler
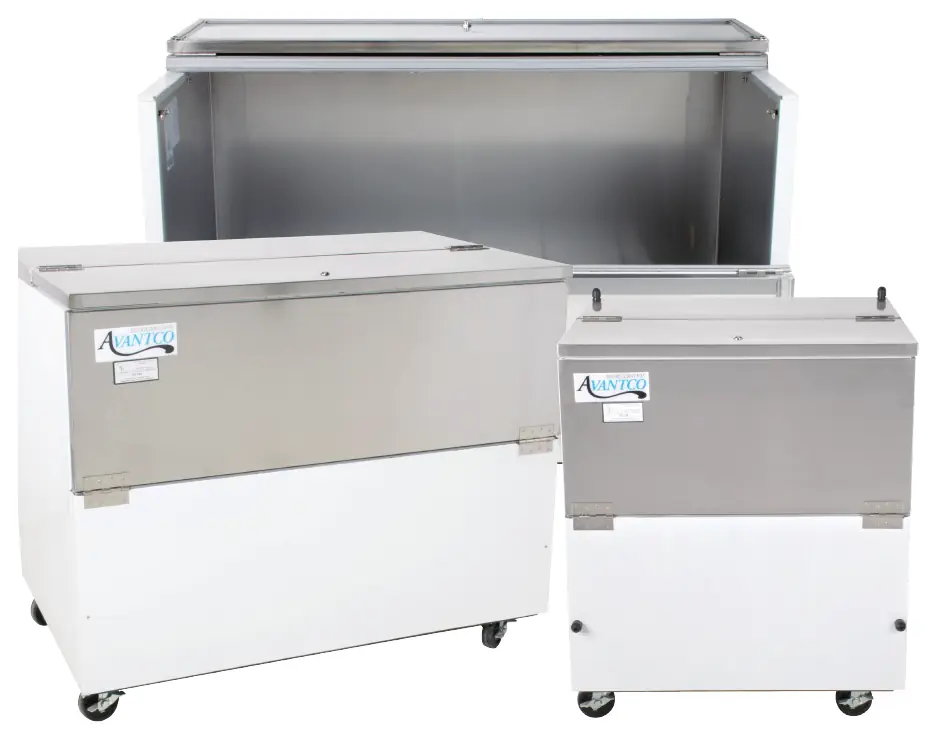
Quick guide for the Avantco Commercial School Milk Cooler. Includes installation, temperature adjustment, maintenance, and troubleshooting steps for models 178MC34HC, 178MC49HC, and 178MC58HC.
Quick answers from the manual
Quick answer
- The Avantco Commercial School Milk Cooler is a convection-cooled unit requiring a 110V outlet and 4-inch side clearance. Temperature settings can be adjusted via the digital control panel, and manual defrosting is initiated by holding the snowflake button for 3 seconds. p. 3, 4, 5
Key actions
- Adjusting Temperature p. 4
- Manual Defrost p. 5
First start
- Inspection and Setup p. 3
Problems and fixes
Compressor will not start
Check service cord, fuses, control settings, and wiring.
p. 6Maintenance and reset
- Condenser Cleaning p. 5
Technical specifications
| Parameter | Value | Meaning | Pages |
|---|---|---|---|
| Refrigerator Temp | 33°F - 40°F | Operating cycle range | p. 4 |
| Freezer Temp | -5°F - 2°F | Operating cycle range | p. 4 |
Where to find it in the PDF
- Safety Warnings p. 2
- Installation p. 3
- Operation p. 4
- Maintenance p. 5
- Troubleshooting p. 6
Table of contents
Manual images
Click an image to enlargeQuick guide from the manual
This manual provides essential instructions for the Avantco Commercial School Milk Cooler. Important: This unit uses flammable refrigerant. Repairs must only be performed by trained service personnel. Do not puncture refrigerant tubing. Ensure the unit is placed with at least 4 inches of clearance on the sides for proper airflow.
Inspection and Installation
Upon receiving the equipment, inspect all crates and cartons against the bill of lading. Uncrate the unit immediately to check for concealed damage. If damage is found, report it to the carrier and file a claim.
- General: Remove the skid carefully to avoid damaging the finish. Do not tip the cabinet to install casters or legs; ensure they are screwed all the way into the base.
- Location: The refrigeration system at the bottom requires free air access. The back may be against a wall, but maintain a minimum 4-inch clearance on the sides. Level the cooler properly to ensure adequate drainage.
- Electrical: Verify that the outlet voltage, phase, and capacity match the cabinet requirements. Plug into a 110V A.C. 60 cycle outlet. Never use an extension cord. All wiring must comply with the National Electric Code and local codes.
General Operation
The milk coolers use convection cooling via copper coils. Airflow through the side louvers must not be restricted. Frost that accumulates during the "on" cycle typically melts during the "off" cycle, and drains are provided to handle this.
Adjusting the Temperature
Units are factory-set for optimum food safety. Refrigerators cycle between 33°F and 40°F. Freezers cycle between -5°F and 2°F.
To adjust the minimum temperature:
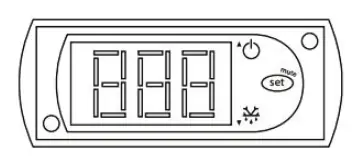
- Hold the SET button for 1 second. The display will flash the current minimum temperature.
- Use the arrow buttons to adjust the desired minimum temperature.
- Press SET again to save the settings.
Note: The cabinet temperature will fluctuate up to +7 degrees over your set minimum as the compressor cycles.
Running a Manual Defrost Cycle
Units are pre-programmed for automatic defrosting. To run a manual cycle:
- Press the defrost button (snowflake symbol and down arrow) for approximately 3 seconds.
- Repeat the process to stop the defrost cycle.
General Maintenance
Periodic Cleaning:
- Interior: Wipe down with a solution of warm water and baking soda to remove odors.
- Exterior: Clean with a commercial-grade glass cleaner or mild soap and water. Never use abrasive cleaners or alkaline solutions.
- Condenser: Clean monthly to maintain efficiency. Remove the louvered panel, use a wire brush to loosen dirt on the fins, and use a vacuum cleaner to remove the particles.
Troubleshooting
If the compressor fails to start, check the service cord, fuses, and wiring. If the compressor hums but trips the overload protector, check for improper wiring, low voltage, or a defective starting capacitor. If the unit short cycles, check for low voltage, defective overload, excessive head pressure, or ventilation restrictions.
Manufacturer information
Avantco Equipment
Practical help
Common problems
Compressor will not start (no hum)
Check if the service cord is plugged in, check for blown fuses, or inspect wiring against the diagram.
Compressor hums but trips overload protector
Check for improper wiring, low voltage to the unit, or a defective starting capacitor/relay.
Compressor short cycles
Check for low voltage, defective overload protector, excessive head pressure, or restricted ventilation.
Before use
- Inspect unit for shipping damage immediately upon arrival.
- Ensure casters or legs are fully screwed into the base.
- Verify 110V A.C. 60 cycle power supply.
- Ensure 4-inch clearance on the sides for airflow.
- Level the unit to ensure proper drainage.
Specs in practice
- Refrigerator Temp Range
- 33°F to 40°F
- Freezer Temp Range
- -5°F to 2°F
- Electrical Requirement
- 110V A.C. 60 cycle outlet; no extension cords allowed.
Images and diagrams
- The control panel features a digital display, a 'SET' button for temperature adjustment, and a defrost button (snowflake icon).
Model compatibility
- Models covered: 178MC34HC, 178MC49HC, 178MC58HC.

Manual page author
David Miller
Documentation analyst
Organizes user manual content into clear summaries, with attention to model details, product context, and everyday usability.