Lighting / Fixtures
Avide 12-24V 48W LED Strip Dimmer with 3-Button Controller User Guide
Quick guide for the Avide 12-24V 48W LED strip dimmer. Includes wiring instructions, remote control functions, and compatibility requirements for 12V and 24V systems.
Table of contents
Manual images
Jump to the sectionQuick guide from the manual
This document provides essential information for the installation and operation of the Avide 12-24V 48W LED strip dimmer. The device is designed to control single-color LED strips using an infrared remote control. Ensure that your power supply and LED strip match the voltage (either 12V or 24V) to prevent damage.
Product description
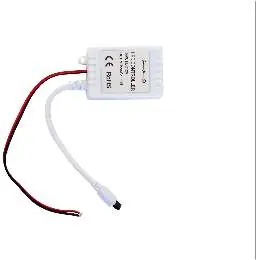
The controller is a compact unit that sits between the power supply and the LED strip. It features a 3-button remote control for adjusting brightness and power states.
Wiring and installation
The controller is installed between the power supply and the LED strip. Follow these steps for connection:
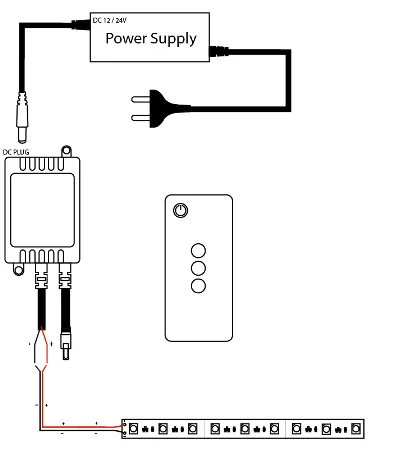
- Connect the LED strip to the output side of the controller using soldering or quick wire connectors.
- Ensure correct polarity: connect the red wire to the positive (+) terminal and the black wire to the negative (-) terminal.
- Connect the power supply to the DC input jack on the controller.
Remote control functions
The remote control includes 4 buttons for managing the lighting:
- Button 1: Power On/Off
- Button 2: Increase brightness
- Button 3: Set to 50% brightness
- Button 4: Decrease brightness
Safety and compatibility
The system is compatible with 12V or 24V setups. It is critical that both the LED strip and the power supply unit match the chosen voltage. Operating temperature range is -20 to +40 degrees Celsius. The device has an IP20 protection rating.
Manufacturer information
Avide Lighting
Practical help
Common problems
System not working or flickering
Verify that the power supply voltage matches the LED strip voltage (both must be 12V or both must be 24V).
Incorrect polarity connection
Ensure the red wire is connected to the positive terminal and the black wire to the negative terminal on the output side.
Before use
- Confirm the LED strip voltage (12V or 24V).
- Confirm the power supply voltage matches the LED strip.
- Check that the controller is placed between the power supply and the LED strip.
- Ensure proper tools for soldering or wire connection are available.
Specs in practice
- Voltage range: 12-24V
- The controller supports both 12V and 24V systems, provided the power supply and LED strip match.
Images and diagrams
- The wiring diagram shows the power supply connecting to the DC input of the controller.
- The output side of the controller connects to the LED strip using red (+) and black (-) wires.
Model compatibility
- Only for use with single-color LED strips.
- Requires matching voltage between power supply and LED strip.

Manual page author
Emily Carter
User documentation editor
Prepares concise manual descriptions and highlights the most useful setup, operation, and maintenance information for readers.