Electronics / Audio
Quickstart Guide for Caliber RMD 120BT-B Car Radio
A concise quickstart guide for the Caliber RMD 120BT-B car radio, covering installation wiring, button functions, Bluetooth pairing, and system settings.
Table of contents
Quick guide from the manual
This document provides essential information for the installation and operation of the Caliber RMD 120BT-B car radio. It includes wiring diagrams, button functions for various modes (Radio, MP3/WMA, Bluetooth), and safety precautions.
Installation and Wiring
The unit requires a 12V negative ground connection. Refer to the wiring diagram for proper connection of speakers and power:
- Connector A: Includes Memory +12V (yellow), Remote +12V output (blue), +12V ignition (red), and Ground (black).
- Connector B: Dedicated to speaker outputs (Front L/R, Rear L/R).
- External Mic: Dedicated port for the external microphone.
Device Operation
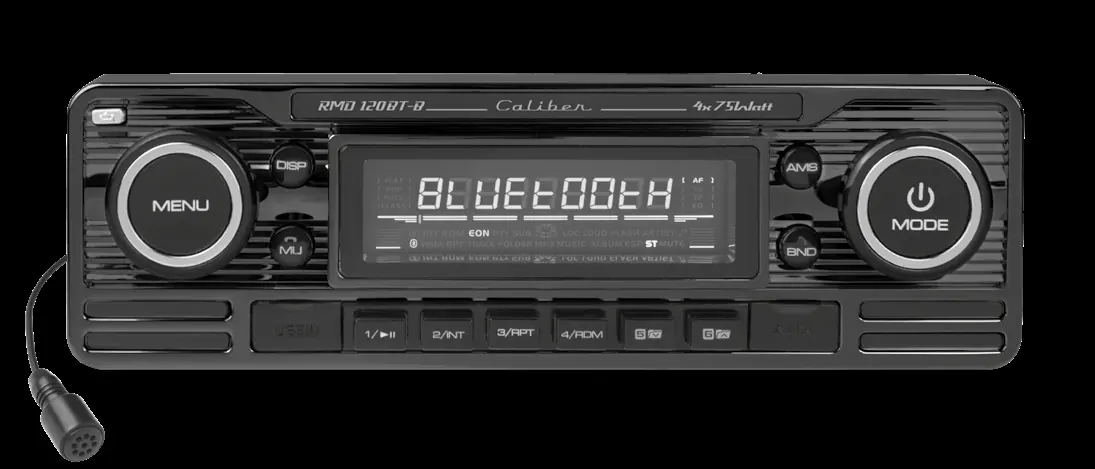
The front panel features a rotary volume knob, mode selection, and various playback controls. To access the system menu, press and hold the VOL/SEL button for several seconds to cycle through settings like AF, TA, PTY, and Area selection.
Bluetooth Pairing
To pair your mobile phone:
- Press and hold the MENU button for more than 3 seconds to open the Bluetooth menu.
- Activate Bluetooth on your phone and search for available devices.
- Select Car Audio and enter the password 8888.
- Upon successful connection, BT ON will be displayed.
System Reset
If the unit becomes unresponsive, use a non-metallic pointed object to press and hold the reset button (located behind the front panel) for 5 seconds to restore factory settings.
Safety and Maintenance
Ensure the vehicle temperature is between 0°C and +45°C before turning on the unit. Do not attempt to disassemble or modify the device. Clean the unit periodically with a soft, dry cloth.
Manufacturer information
Caliber Europe
Practical help
Common problems
Unit unresponsive
Use a non-metallic pointed object to press and hold the reset button behind the front panel for 5 seconds.
Bluetooth connection fails
Ensure you are using the correct password '8888' and that the device name 'Car Audio' is selected.
Radio stations not saved
Ensure the yellow memory wire (+12V) is correctly connected to a constant power source.
Before use
- Verify vehicle has 12V negative ground system.
- Ensure all speaker wires are correctly connected to Connector B.
- Check that the yellow memory wire is connected to constant 12V.
- Ensure the red ignition wire is connected to the ignition key.
- Remove front panel to access SD card slot if needed.
Specs in practice
- Power Supply
- DC 11-15V required.
- Load Impedance
- 4 Ohm speakers required.
Images and diagrams
- Connector A handles power and ignition signals.
- Connector B handles all four speaker channels.
- RCA outputs are provided for external amplifiers.
Model compatibility
- SD card slot on the main unit is for music/JPEG files only.
- SD card with navigation data must be inserted into the slot on the back of the front panel.

Manual page author
Emily Carter
User documentation editor
Prepares concise manual descriptions and highlights the most useful setup, operation, and maintenance information for readers.