Garden / Watering Equipment
User Manual for Chapin 1-2 Gallon SureSpray Sprayer
Quick guide for the Chapin 1-2 Gallon SureSpray lawn and garden sprayer. Includes assembly instructions, filling, pressurizing, maintenance, and troubleshooting steps.
Table of contents
Manual images
Click an image to enlargeQuick guide from the manual
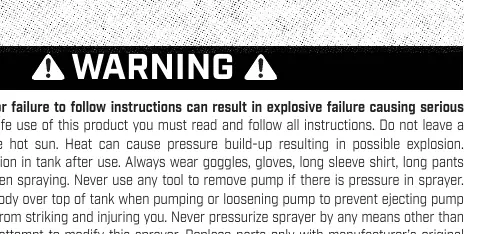
This manual provides instructions for the Chapin 1-2 Gallon SureSpray lawn and garden sprayer. Always wear protective gear (goggles, gloves, long sleeves, long pants, and full foot protection) when spraying. Never pressurize the sprayer using any means other than the original pump. Do not store solution in the tank after use.
Assembly
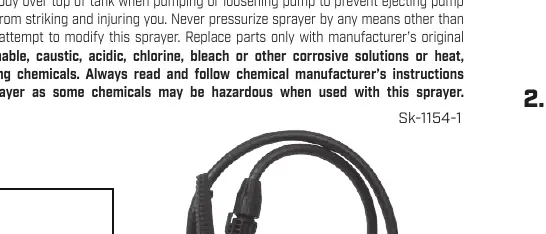
Hose to Tank
To prevent the hose from blowing off, it must cover both barbs and touch the flange before the nut is tightened.
- Place the end of the hose under hot tap water for 1 minute to soften it.
- Push the hose until it covers both barbs and touches the flange.
- Slide the nut down over the threads and turn clockwise until tight.
Shut-off to Hose
Slide the nut onto the hose, push the hose until it touches the flange, and turn the nut clockwise until the safety catch makes a clicking sound.
Nozzle
Attach the extension wand to the shut-off handle.
Pre-Use Check
Before using the sprayer, perform the following checks:
- Ensure the hose nut is tight and the hose is securely attached.
- Inspect the hose for cracks, softness, or brittleness. Replace if necessary.
- Inspect the tank interior and exterior for signs of deterioration.
- Test the unit with water only first (pump 10-20 strokes) to check for leaks.
- Ensure the discharge is not clogged.
- Inspect all metal parts (wand, nozzle, fittings) for rust or corrosion.
Operation
Filling
- Turn the pump handle counterclockwise to remove the pump.
- Prepare the spray solution according to the chemical manufacturer's instructions.
- Fill the tank to the proper gallon marker. Do not overfill.
- Check the pump for debris, replace it in the tank, and tighten securely.
Pressurizing and Spraying
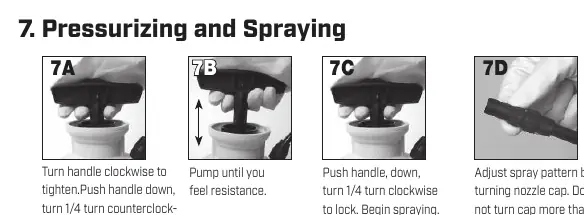
- Turn the handle clockwise to tighten.
- Pump until you feel resistance.
- Push the handle down and turn 1/4 turn clockwise to lock.
- Adjust the spray pattern by turning the nozzle cap (do not turn more than 2 turns).
Releasing Pressure
- With the pump facing away, turn the locked handle counterclockwise until air begins to escape.
- Stay away from the sprayer until all air has escaped.
Care and Maintenance
- Follow chemical manufacturer's instructions for cleaning.
- Rinse thoroughly with the recommended solvent.
- Open the shut-off and allow water to run through the discharge assembly.
- Release pressure, remove the pump, and empty the sprayer.
- Store the tank upside down with the pump removed in a warm, dry location.
- Periodically oil the pump by dropping 10-12 drops of light oil down the pump rod.
Troubleshooting
If the tank pressurizes but does not spray, clean the shut-off assembly:
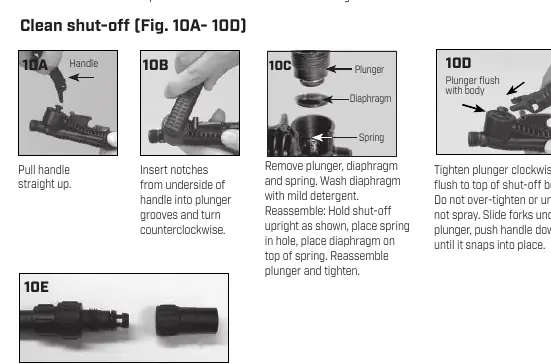
- Pull the handle straight up.
- Insert notches from the underside of the handle into the plunger grooves and turn counterclockwise.
- Remove the plunger, diaphragm, and spring. Wash the diaphragm with mild detergent.
- Reassemble: Hold the shut-off upright, place the spring in the hole, place the diaphragm on top of the spring, and reassemble the plunger.
- Tighten the plunger clockwise until flush with the top of the shut-off body.
Practical help
Common problems
Tank pressurizes but does not spray
Clean the shut-off assembly. Remove the plunger, diaphragm, and spring, wash with mild detergent, and reassemble.
Hose blows off
Ensure the hose covers both barbs and touches the flange before tightening the nut.
Before use
- Check hose nut tightness.
- Inspect hose for deterioration, cracks, or brittleness.
- Inspect tank interior and exterior for signs of deterioration.
- Test with water only first (10-20 pump strokes).
- Ensure discharge is not clogged.
- Inspect metal parts for rust or corrosion.
Images and diagrams
- Hose assembly: Push hose over barbs until it touches the flange.
- Troubleshooting: Clean shut-off by removing plunger, diaphragm, and spring.
Model compatibility
- Use only original manufacturer's parts.
- Do not use flammable, caustic, acidic, chlorine, bleach, or corrosive solutions.

Manual page author
Michael Turner
Technical manual editor
Reviews PDF manuals for structure, safety notes, and practical product details so readers can find the right information quickly.