Software / Apps Services
Installation Guide for Cisco Room Kit Pro Precision 60
Quick installation guide for the Cisco Room Kit Pro Precision 60, covering box contents, cable connections, rack mounting, ventilation requirements, and initial software setup.
Table of contents
Manual images
Jump to the sectionQuick guide from the manual
This document provides the essential steps for installing the Cisco Room Kit Pro Precision 60 system. It covers hardware identification, proper cable connections, rack mounting options, and the initial software configuration process. Ensure all components are present before beginning the installation.
Box contents
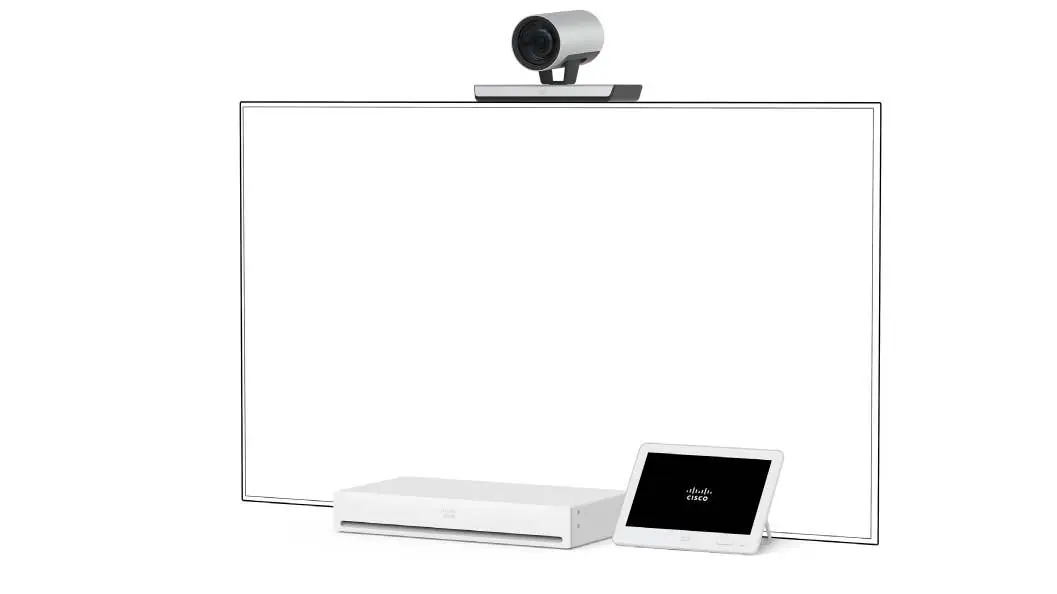
The system includes the following core components:
- Cisco Codec Pro
- Cisco TelePresence Precision 60 Camera
- Cisco Touch 10 or Cisco Room Navigator
- Power adapter and cable for Precision 60
- Ethernet cable for Touch 10 / Room Navigator
- Antennas for Codec Pro
- Power cable for Codec Pro
- Optional rack ears for Codec Pro
Installation and setup
Follow these steps to set up your system:
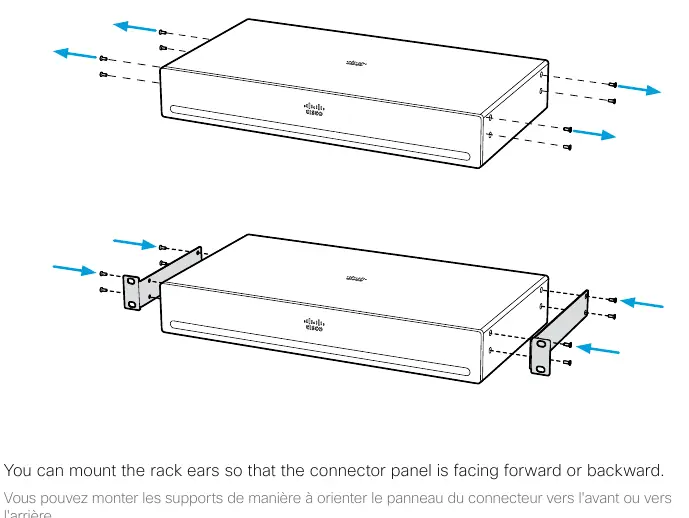
- Mounting: If rack-mounting the codec, attach the rack ears. The connector panel can face forward or backward. Ensure the wall and mounting hardware are installed by qualified personnel according to local regulations.
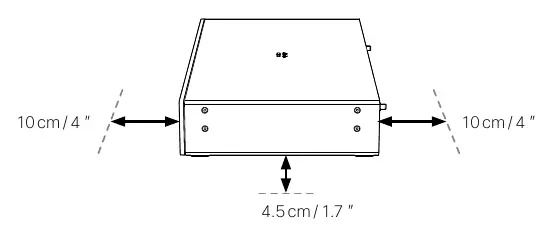
- Ventilation: Maintain at least 10 cm of free space in front and behind the codec, and 4.5 cm of space below the unit to prevent overheating.
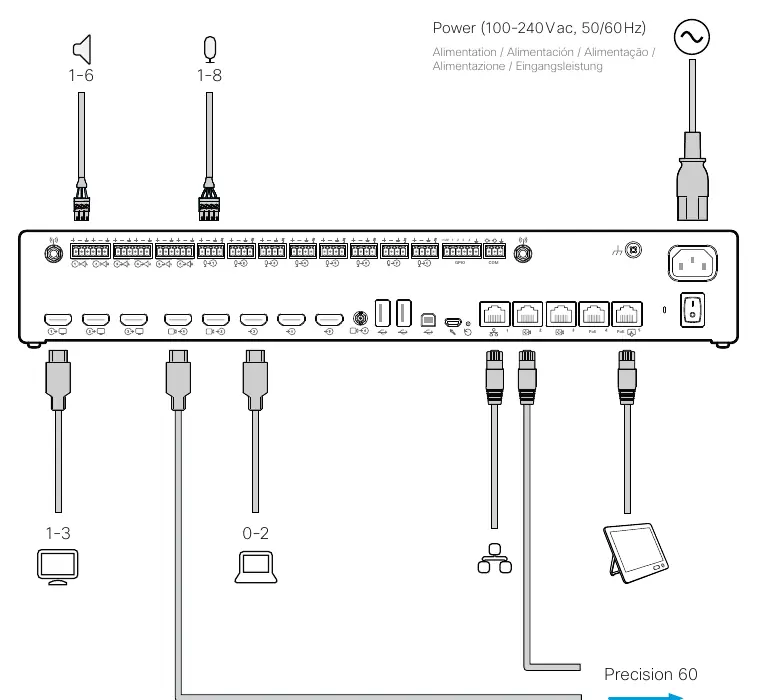
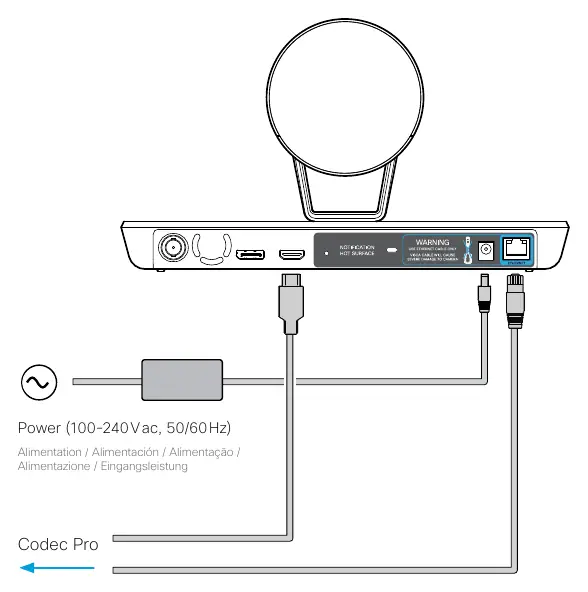
- Connecting cables: Connect the necessary HDMI, Ethernet, and power cables to the Codec Pro as indicated on the rear panel diagram. Use only certified HDMI cables (High Speed 1.4b for presentations, Premium High Speed for screens).
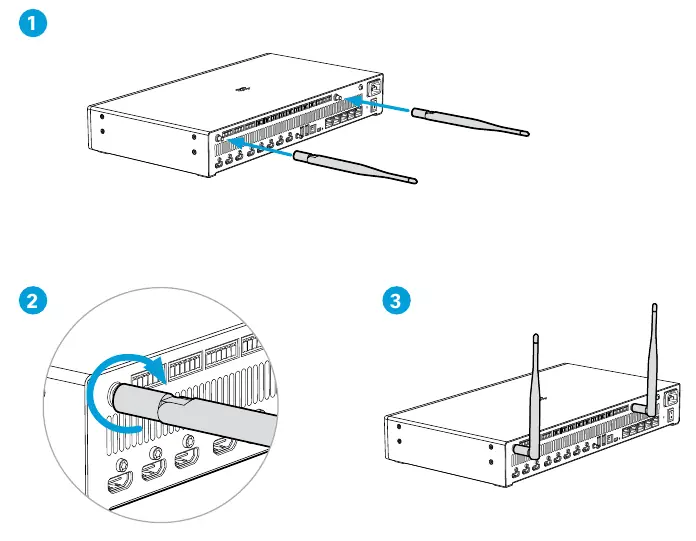
- Antennas: Attach the provided antennas to the Codec Pro.
- Camera connection: Connect the Precision 60 camera to the codec using the supplied power adapter and an Ethernet cable for control. Warning: Do not use a VISCA cable, as it will cause severe damage to the camera.
- Powering on: Connect the power cable to the codec and turn it on using the power switch.
Software setup
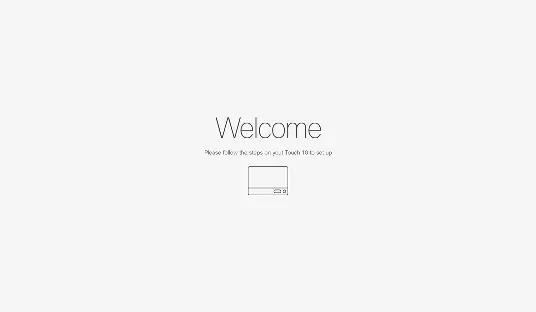
Once the hardware is connected and powered on, turn on your display. The system will power up automatically. When the Welcome screen appears on the touch interface, follow the on-screen instructions to complete the configuration. It is recommended to upgrade the software on your Codec Pro before use via the official Cisco documentation portal.
Safety and technical notes
Always use the provided power cables. The device is designed for connection to TN and IT power systems. If using a coaxial cable for video, a BNC to HD-BNC cable or adapter is required to connect the Precision 60 to the Codec Pro. For network connectivity, use either Ethernet LAN or Wi-Fi (note that 'NR' labeled devices do not support Wi-Fi).
Manufacturer information
Cisco Systems, Inc.
Practical help
Common problems
System does not power up
Check the power switch on both the codec and the camera.
Camera damage
Never use a VISCA cable for camera control; always use the provided Ethernet cable.
Overheating
Ensure at least 10 cm of clearance at the front/rear and 4.5 cm below the codec.
Wi-Fi connectivity issues
Check if your device has 'NR' in the product identifier (PID); these models do not support Wi-Fi.
Before use
- Verify all box contents are present.
- Ensure wall/rack mounting is performed by qualified personnel.
- Use only certified HDMI cables.
- Confirm power source is 100-240 V AC, 50/60 Hz.
- Check that ventilation openings are not blocked.
Specs in practice
- Power cable rating
- 10 A, 250 V; connector type EL 701B (IEC 60320/C13).
- HDMI requirements
- High Speed 1.4b for presentations; Premium High Speed for screens.
- Camera control
- Must use Ethernet cable; VISCA cables are incompatible and harmful.
Images and diagrams
- The rear panel of the Codec Pro features various ports including HDMI inputs/outputs, camera control, and network ports.
- The Precision 60 camera rear panel includes a 3G-SDI video output and an Ethernet port for camera control.
Model compatibility
- Devices with 'NR' in the PID do not support Wi-Fi.
- Precision 60 (BNC) requires a BNC to HD-BNC cable/adapter for connection to Codec Pro (HD-BNC).

Manual page author
Emily Carter
User documentation editor
Prepares concise manual descriptions and highlights the most useful setup, operation, and maintenance information for readers.