Garden / Camping Equipment
User Manual for CORE Hypercore G3 158wh Battery Pack
Quick guide for the CORE Hypercore G3 158wh battery pack. Learn about charging, storage mode, LCD display settings, RGB LED customization, and safety guidelines.
Table of contents
Quick Guide: Getting Started
The Hypercore G3 battery ships in Storage Mode. To awaken the battery, press the LED button on the side or fully charge the pack. While in storage mode, the LCD remains blank, and smart data transmission is disabled, though the battery remains functional.
Operation and Display
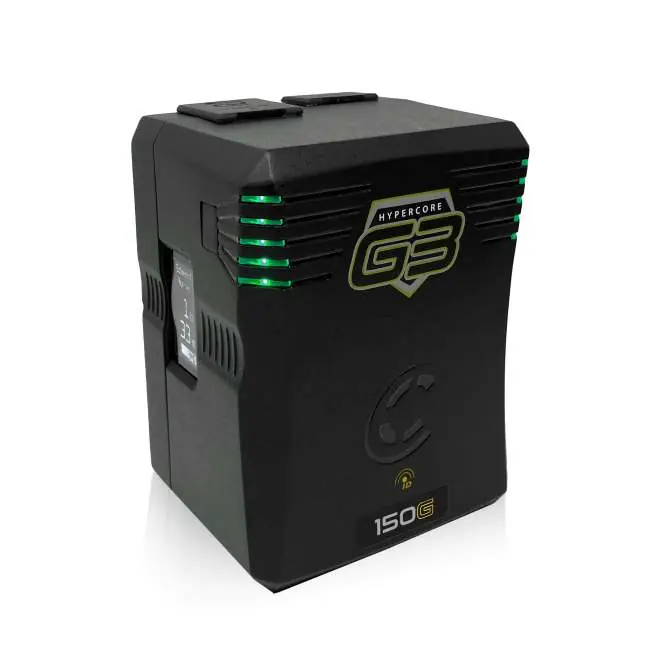
LCD Backlight: The display activates automatically when charging or discharging. To manually activate the backlight, press the button on the side of the pack. The display refreshes every 3-5 seconds to provide real-time power management data.
Changing Display Orientation: When the pack is in standby mode (not charging or discharging), hold the LED backlight button for 10 seconds. Release the button to cycle through the three available display orientations.
Wraparound LED Power Gauge: Press the button on top of the pack to check the charge status when not in use. The segments indicate the following levels:
- 1 Segment: 0-20%
- 2 Segments: 21-39%
- 3 Segments: 40-59%
- 4 Segments: 60-79%
- 5 Segments: 80-100%
RGB LED Customization: You can customize the LED color for identification. Quickly press the side button three times to start the LED array flashing. A single quick press cycles through colors (green, blue, red, yellow). A long press confirms your selection.
Connections and Charging
USB-C PD: The integrated PDPRO/USB-C PD connection functions as both input and output. It supports a voltage range of 5V-28V with up to 185W of I/O power. Note that the battery cannot be charged and discharged simultaneously.
P-tap: The integrated P-tap provides DC 11-16.8V output and supports charging input. It is fused according to the battery's overall output capabilities.
Charging: Charge in ambient temperatures between 0°C and 45°C (10°C to 35°C is optimal). Use only compatible chargers to avoid damage.
Maintenance and Storage
Storage: If storing for an extended period, charge the battery to 40% and keep it in an environment between 10°C and 35°C. Perform a full charge/discharge cycle at least once every 2 months to maintain capacity accuracy.
Cleaning: Use a soft, lint-free microfiber cloth to wipe the Nexcore polycarbonate casing. Avoid abrasive materials or harsh chemicals.
Specifications
- Capacity: 158Wh (14.8v, 11Ah)
- Max Continuous Discharge: 20A (240W)
- Weight: 2.4 lbs
- Dimensions: 4.72" x 3.54" x 3.04"
- Normal Runtime: 6.3 hours at 25W
Practical help
Common problems
Battery LCD is blank and not transmitting data
The battery is in Storage Mode. Press the LED button to awaken it or charge the battery fully.
LCD display orientation is incorrect
While in standby mode, hold the LED backlight button for 10 seconds to cycle through the three available orientations.
Charger not working or battery not charging
Ensure you are using a compatible charger. CoreSWX batteries are designed for CoreSWX chargers; 3rd party chargers may not work or could damage the battery.
Before use
- Check the battery charge level using the LED gauge
- Ensure the battery is not in Storage Mode
- Verify charger compatibility before connecting
- Clean battery contacts with a lint-free cloth if necessary
Model compatibility
- Available in V-mount (HCG3-150V) and G-mount (HCG3-150AG) versions
- Camera must support SMBUS or single-line data communication for real-time data
- Compatible with USB-C PD chargers and cables

Manual page author
David Miller
Documentation analyst
Organizes user manual content into clear summaries, with attention to model details, product context, and everyday usability.