Home Appliances / Refrigerators
Installation Guide for Dometic NRX 115C Refrigerator
Quick installation and setup guide for the Dometic NRX 115C refrigerator. Includes instructions for airflow requirements, electrical connections (AC/DC), door reversal, and maintenance.
Table of contents
Manual images
Click an image to enlargeQuick guide from the manual
This document provides essential installation and setup instructions for the Dometic NRX series refrigerators. Proper installation is critical for cooling performance and unit longevity. Ensure the unit is installed in a stable location and that all electrical connections are performed by qualified personnel.
Airflow and Ventilation
Insufficient air flow results in a shortened lifespan and reduced cooling performance. You must observe the minimum spacing requirements when installing the refrigerator into furniture:
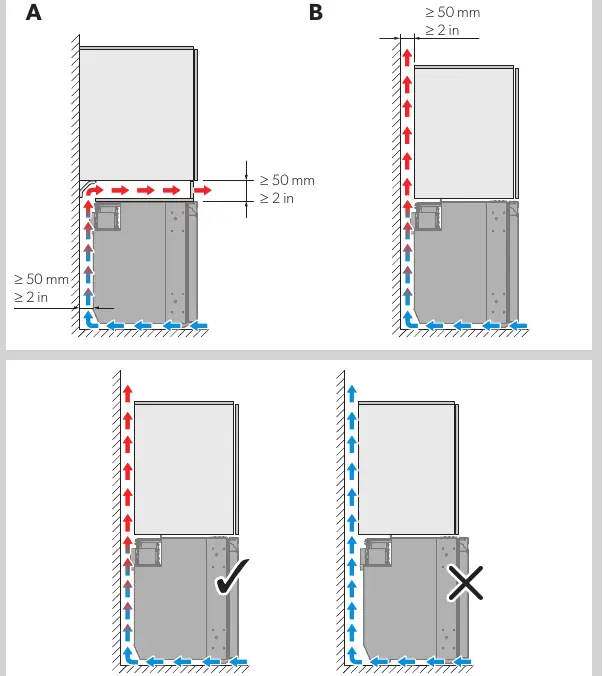
- Maintain a minimum clearance of 50 mm (2 in) around the unit to ensure adequate ventilation.
- Do not block air intake or exhaust paths.
Electrical Connections
The refrigerator supports both DC and AC power sources depending on the model configuration.
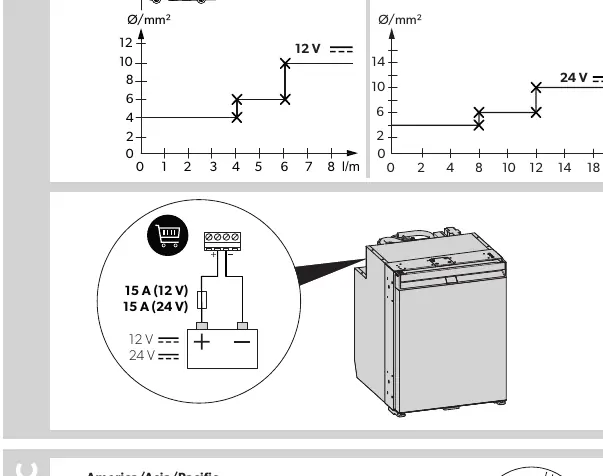
DC Power (12/24 V)
- Use a wire cross-section of at least 4 mm².
- Ensure correct polarity when connecting to the power source.
- Install a fuse as specified in the technical diagrams.
AC Power (100-240 V)
- Connect the power cable to a suitable AC outlet.
- Ensure the installation complies with local electrical safety standards.
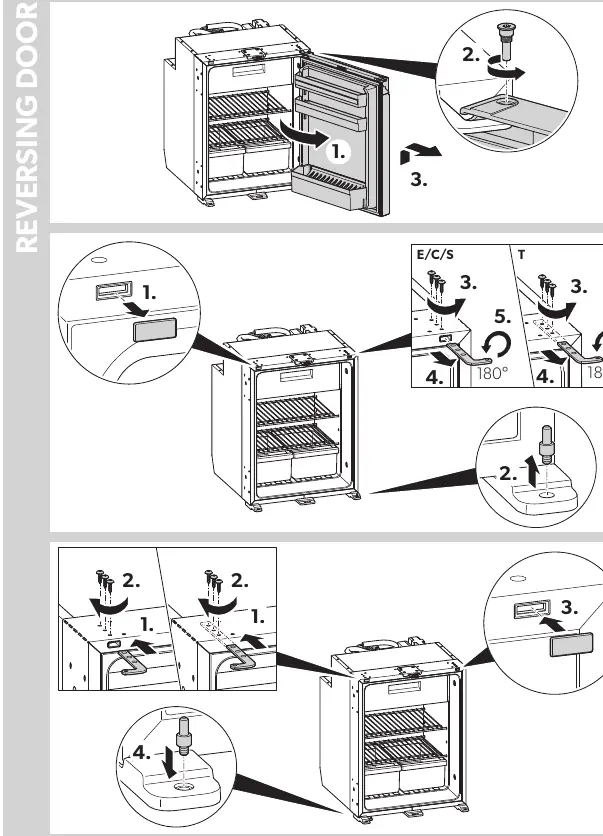
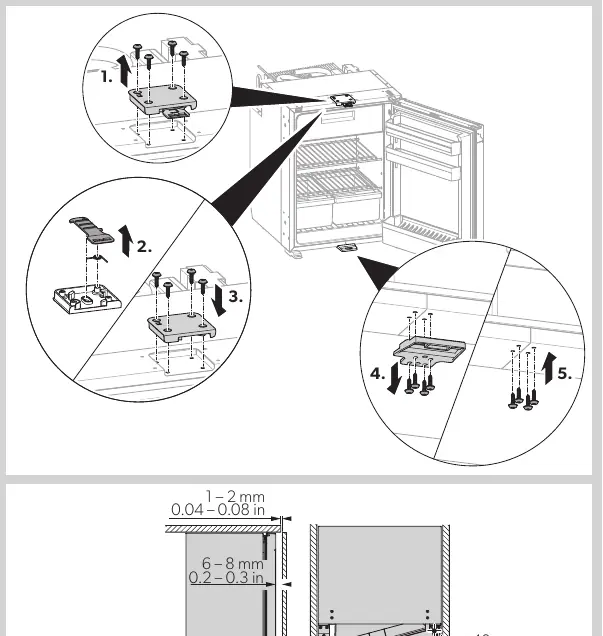
Door Reversal
The door hinge can be reversed to accommodate different installation layouts. Follow the specific steps provided in the manual for your model type (E/C/S or T). Ensure all screws are tightened securely after reassembly.
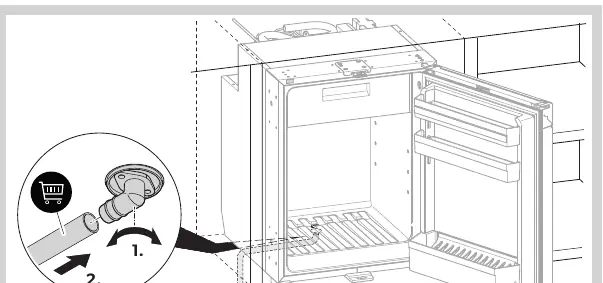
Condensation Drain
Proper drainage is required to prevent moisture buildup inside the unit. Ensure the condensation drain is clear and the hose is routed correctly to the exterior or collection point as shown in the installation diagrams.
Installation and Fixing
Secure the refrigerator into the furniture using the provided fixing points. Ensure the frame is flush and the sliding hinge mechanism operates smoothly without obstruction.
Manufacturer information
Dometic
Practical help
Common problems
Reduced cooling performance
Check that there is at least 50 mm (2 in) of clearance around the unit for proper airflow.
Electrical failure or unit not starting
Verify that the DC wire cross-section is at least 4 mm² and that the fuse is correctly installed.
Before use
- Verify the power supply matches the unit specifications (12/24V DC or 100-240V AC).
- Ensure minimum 50 mm (2 in) clearance for ventilation.
- Check that the condensation drain is clear and properly routed.
- Confirm the door hinge orientation is correct for your installation space.
- Ensure the unit is securely fixed to the furniture.
Images and diagrams
- Airflow diagrams illustrate the required 50mm clearance around the unit.
- DC wiring diagrams show the correct polarity and fuse placement.
- Sliding hinge diagrams detail the mounting process for the door mechanism.
- Condensation drain diagrams show the routing of the drain hose.
Model compatibility
- The installation procedure varies slightly between E/C/S and T model types.
- Ensure the power source (12/24V or 100-240V) matches the specific model configuration.

Manual page author
Michael Turner
Technical manual editor
Reviews PDF manuals for structure, safety notes, and practical product details so readers can find the right information quickly.