Home / Garage Door Openers
User Manual for Genie Universal 2-Button Remote
Quick guide for programming and using the Genie Universal 2-Button Remote. Includes step-by-step instructions for pairing with various garage door opener brands, clearing the remote, and battery replacement.
Quick answers from the manual
Quick answer
- This manual provides instructions for programming the Genie Universal 2-Button Remote to work with various garage door opener brands, including pairing, clearing, and battery replacement. p. 1
Key actions
- Programming p. 1
- Clearing p. 1
First start
- Pull the battery activation tab, locate the Learn button on your opener, and follow the programming steps for your specific brand. p. 1
Problems and fixes
Remote not responding
Check battery or re-program using the correct Learn Method ID.
p. 1Maintenance and reset
- Clear remote by holding both buttons until LED blinks. p. 1
Technical specifications
| Parameter | Value | Meaning | Pages |
|---|---|---|---|
| Battery | CR2032 | Required battery type | p. 1 |
Where to find it in the PDF
- Programming Instructions p. 1
- Maintenance p. 1
Table of contents
Manual images
Click an image to enlargeQuick guide from the manual
This document provides instructions for the Genie Universal 2-Button Remote. Before starting, ensure the garage door opener is clear of people and obstructions. Do not hold the Learn button on the garage door opener for more than 2-3 seconds, as this may erase existing remotes and keypads.
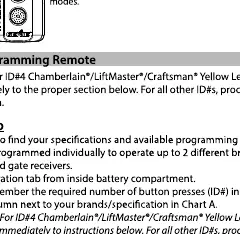
Programming the remote
1. Locate the Learn/Program button on your garage door opener. 2. Pull the battery activation tab from the remote. 3. Consult Chart A in the manual to identify the correct Learn Method ID for your opener brand. 4. Press and hold the remote buttons as instructed in the 'Learn Method' section. 5. Follow the specific button press sequence (number of presses corresponds to the ID) until the LED blinks and turns off.
Clearing the remote
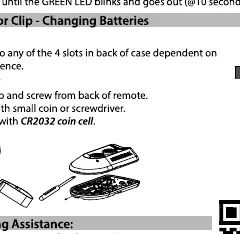
To clear any existing programming, press and hold both buttons on the remote simultaneously. Continue holding until the LED blinks and goes out (approximately 10 seconds).
Maintenance and installation
Battery: The remote uses a CR2032 battery. To change it, open the back of the remote using a small coin or screwdriver. Visor Clip: Insert the visor clip into the slots on the back of the remote for mounting.
Manufacturer information
Genie
Practical help
Common problems
Remote not working after programming
Ensure the garage door opener is clear of obstructions and the Learn button was not held too long (2-3 seconds max) during the initial setup.
Programming failed
Verify the correct Learn Method ID from Chart A for your specific opener brand and repeat the button press sequence.
Before use
- Ensure the garage door opener is clear of people or obstructions.
- Locate the Learn/Program button on your garage door opener.
- Pull the battery activation tab from the remote.
Specs in practice
- Learn Method ID
- Number of button presses required to match the remote to your specific garage door opener brand.
Images and diagrams
- Activation Tab: Pull to activate the remote.
- Visor Clip: Attaches to the back of the remote for car visor mounting.
Model compatibility
- Not compatible with garage door openers manufactured prior to 1993.

Manual page author
David Miller
Documentation analyst
Organizes user manual content into clear summaries, with attention to model details, product context, and everyday usability.