Furniture / Kitchen Furniture
Installation Guide for Homcom Kitchen Island Cart 801-175
Step-by-step assembly instructions for the Homcom Kitchen Island Cart (801-175). This guide includes a complete parts list, hardware identification, and detailed procedures for frame assembly, drawer installation, and caster attachment.
Quick answers from the manual
Quick answer
- This document is an installation guide for the Homcom Kitchen Island Cart (801-175). It provides step-by-step instructions for assembling the frame, installing the drawer, and attaching the hardware. p. 1, 14
Key actions
- Assemble the main frame using cam locks and quickfit connectors p. 5, 6, 7, 8
- Install the drawer slides and assemble the drawer unit p. 11, 12
Problems and fixes
Drawer alignment issues
Be careful to push in the board when both sides slide way have been aligned.
p. 13Where to find it in the PDF
- Cam Lock Usage Guide p. 2
- Parts List p. 3
- Hardware List p. 4
- Assembly Steps p. 5, 6, 7, 8
Table of contents
Manual images
Click an image to enlargeImportant Information
This manual provides assembly instructions for the Homcom Kitchen Island Cart. It is recommended to have two people for assembly. The estimated assembly time is approximately 1.5 hours. Please use a manual screwdriver for assembly; the use of a power drill is not recommended as it may damage the furniture.
Parts and Hardware
Before beginning assembly, verify that all parts and hardware are present. The manual includes a detailed list of panels (numbered 1-18) and hardware components (labeled A-V). Ensure you do not confuse similar screws during the sorting process.
Assembly Instructions
Follow the steps in numerical order to assemble the cart:
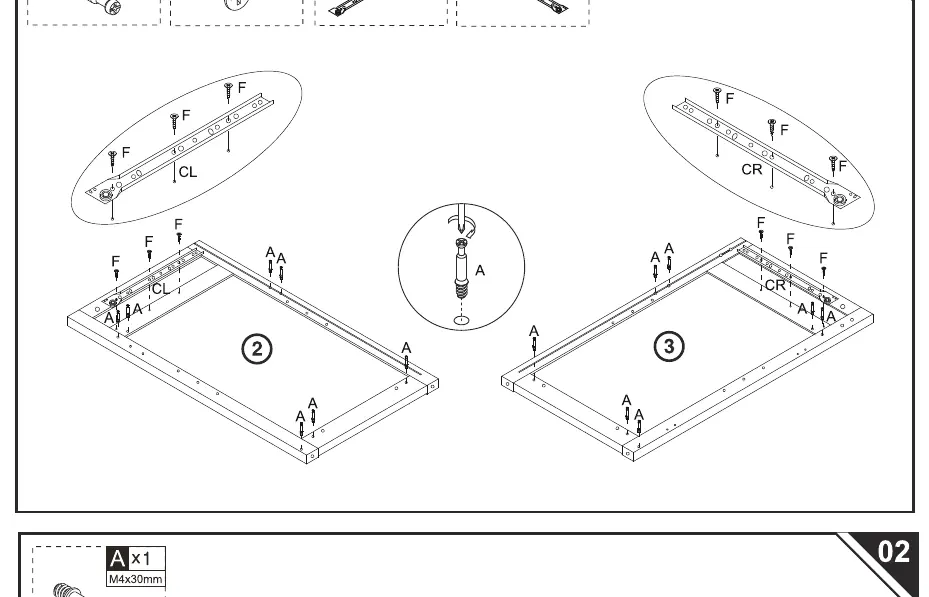
- Step 01-02: Prepare side panels and attach drawer runners (CL/CR) using screws (F). Insert cam bolts (A) and wooden dowels (C).
- Step 03-04: Connect the side panels to the base and back panels using cam locks (B).
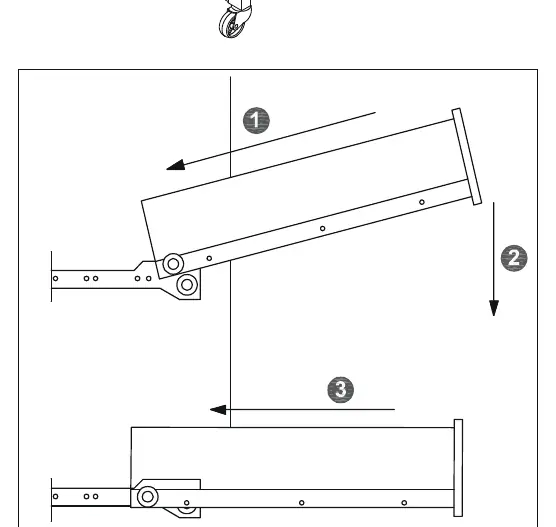
- Step 05-07: Assemble the main frame, attach the top panel, and install the caster wheels (M, N) using the provided wrench (O).
- Step 08-09: Install the towel rack (8, 9) and secure the top panel.
- Step 10-12: Attach the door hinges and magnetic catch (L) to the door (11) and the main frame.
Drawer Installation
To assemble the drawer, connect the side panels (12, 14) to the back panel (13) and insert the bottom board (15). Attach the drawer front (16) using cam locks. Finally, attach the drawer runners (DL, DR) to the bottom of the drawer. When inserting the drawer into the cart, ensure both sides of the drawer slides are aligned before pushing the drawer in.
Customer Support
If you have any questions or require assistance, please contact the customer service center relevant to your region. Contact details are provided on the final page of the manual for US, CA, UK, DE, IT, ES, and FR regions.
Manufacturer information
HOMCOM
Practical help
Common problems
Drawer does not slide smoothly
Ensure both sides of the drawer slides are aligned correctly before pushing the drawer into the cart.
Cam lock not tightening
Ensure the cam lock is inserted into the hole before the quickfit (cam bolt) and turned clockwise to lock.
Before use
- Clear a large, clean workspace for assembly
- Verify all parts (1-18) and hardware (A-V) are present
- Have a second person available to assist with assembly
- Use a manual screwdriver (do not use a power drill)
- Check the orientation of cam locks before inserting
Images and diagrams
- Page 2: Detailed guide on how to use Cam Lock and Quickfit connectors correctly
- Page 13: Visual guide on how to align and insert the drawer into the cart

Manual page author
Emily Carter
User documentation editor
Prepares concise manual descriptions and highlights the most useful setup, operation, and maintenance information for readers.