Furniture / Kitchen Furniture
User Manual for HOMCOM 801-076 2-Tier Kitchen Cart
Assembly guide and user manual for the HOMCOM 801-076 2-Tier Kitchen Cart. Includes step-by-step assembly instructions, parts list, and customer support contact information.
Quick answers from the manual
Quick answer
- This document is an assembly manual for the HOMCOM 801-076 2-Tier Kitchen Cart, providing step-by-step instructions to build the unit in approximately 30 minutes. p. 1
Key actions
- Assemble the frame and shelves using screws (C) and brackets (B). p. 2, 3
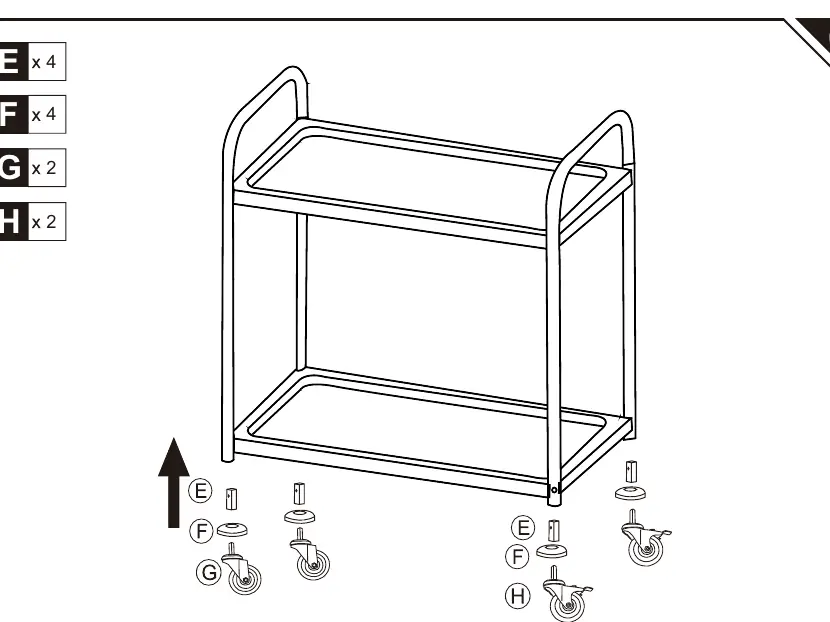
- Install the wheels (G, H) into the frame legs using parts (E, F). p. 3
Where to find it in the PDF
- Cover and Assembly Time p. 1
- Parts List and Step 01 p. 2
- Assembly Steps 02 and 03 p. 3
- Customer Support Contacts p. 4
Table of contents
Manual images
Click an image to enlargeQuick guide from the manual
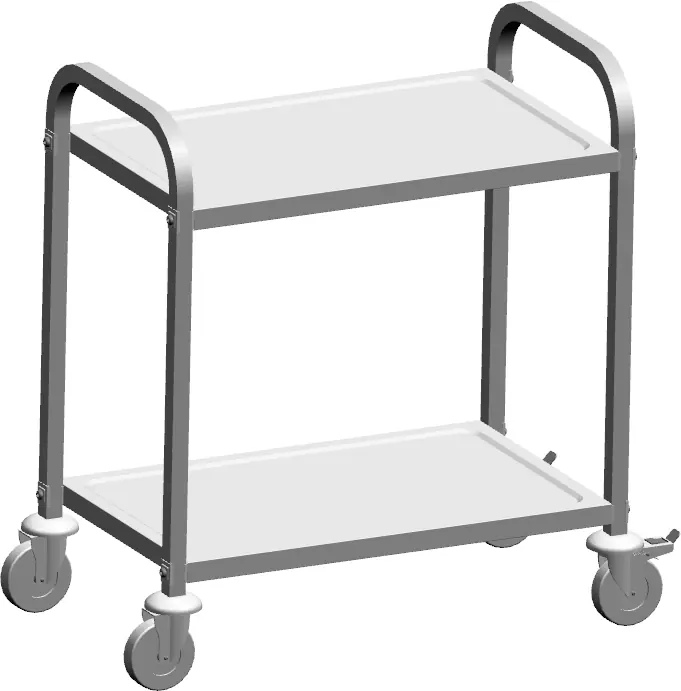
The HOMCOM 801-076 2-Tier Kitchen Cart is a storage solution designed for home use. The assembly process is estimated to take approximately 0.5 hours and consists of 3 main steps. Before beginning, ensure you have a clear workspace and all parts listed in the manual.
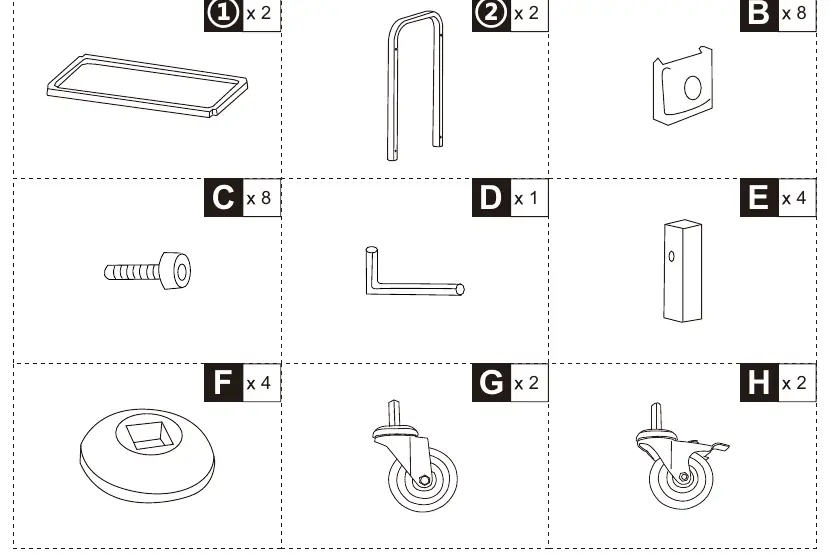
Parts List
Before starting assembly, verify that all components are present. Refer to the parts list on page 2 of the manual, which includes shelves, side frames, screws (C), brackets (B), wheels (G, H), and assembly hardware (E, F).
Assembly Instructions
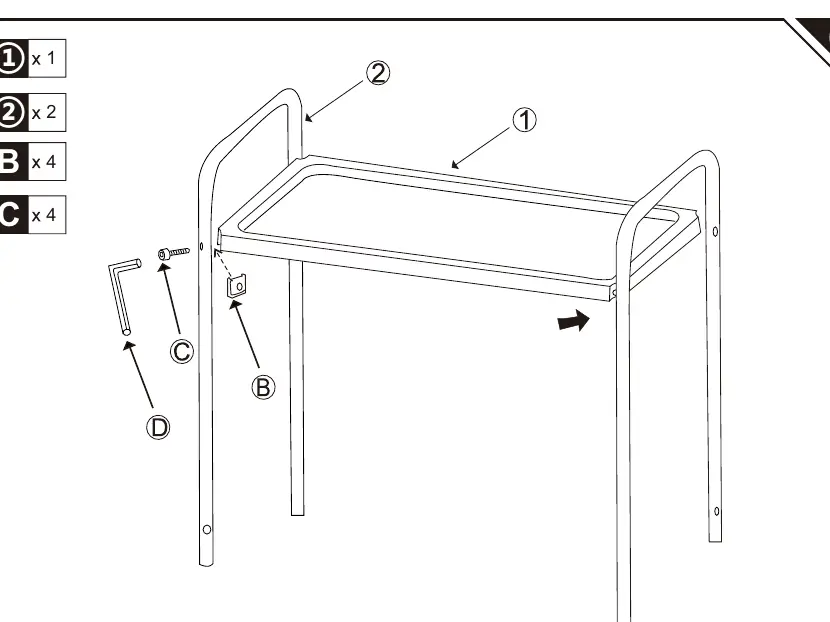
Step 01
Align the shelves with the side frames. Secure the shelves to the frames using the provided screws (C) and brackets (B). Use the included Allen key (D) to tighten the connections.
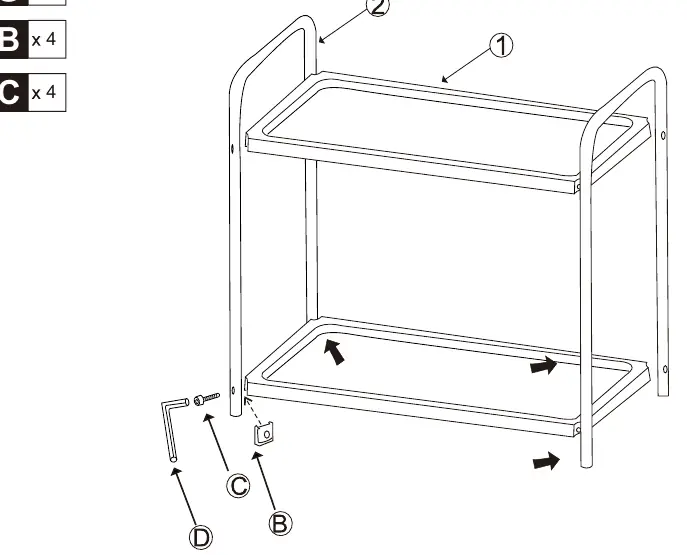
Step 02
Continue the assembly by securing the remaining frame connections. Ensure all screws (C) are tightened firmly to ensure the stability of the cart.
Step 03
Install the wheels (G and H) into the bottom of the frame legs. Use parts (E) and (F) to secure the wheels in place.
Customer Support
If you have any questions or require assistance, please contact the customer service center for your specific region. Contact details, including phone numbers and email addresses for US, CA, UK, FR, ES, PT, DE, IT, and RO, are provided on page 4 of the manual.
Manufacturer information
HOMCOM
Practical help
Common problems
Wobbly cart after assembly
Ensure all screws (C) are tightened evenly and the cart is on a level surface.
Difficulty inserting wheels
Ensure parts (E) and (F) are correctly aligned with the frame legs before inserting the wheels (G/H).
Before use
- Verify all parts against the parts list on page 2.
- Ensure you have the provided Allen key (D).
- Clear a sufficient workspace for assembly.
- Check that all screws are tightened securely.
Images and diagrams
- Page 2: Parts list showing all components required for assembly.
- Page 2: Step 01 diagram showing the attachment of shelves to side frames.
- Page 3: Step 02 diagram showing the completion of the frame structure.
- Page 3: Step 03 diagram showing the installation of wheels.

Manual page author
Michael Turner
Technical manual editor
Reviews PDF manuals for structure, safety notes, and practical product details so readers can find the right information quickly.