Lighting / Holiday Lighting
Assembly and Operation Instructions for Home Accents Holiday 7 FT Animated THD 3000
Quick guide for assembling and operating the Home Accents Holiday 7 FT Animated THD 3000. Includes setup steps, sensor settings, troubleshooting, and power specifications.
Quick answers from the manual
Quick answer
- The THD 3000 is an animated decoration. Assemble by connecting the base, poles, torso, and limbs, then plug in the adapter. Use the control box to select between Sensor, Try Me, or Lights Only modes. p. 1, 2, 3, 4
Key actions
- Assemble the base and frame p. 1, 2
- Connect limbs and torso p. 2, 3
- Select operation mode p. 4
First start
- Plug the power adapter into the control box and a standard wall outlet. p. 4
Show 3 more answers Show less
Problems and fixes
Item not functioning
Check cable connections, ensure adapter is plugged in, check sensor blockage, and verify volume level.
p. 1, 4Technical specifications
| Parameter | Value | Meaning | Pages |
|---|---|---|---|
| Input | 100-240VAC 50/60Hz | Power adapter input requirements | p. 1, 4 |
| Output | 5.9V 3A | Power adapter output specifications | p. 1, 4 |
| Sensor Range | 2m / 6.5ft | Maximum detection distance | p. 4 |
Where to find it in the PDF
- Parts List and Troubleshooting p. 1
- Assembly Steps 1-6 p. 2
- Assembly Steps 7-8 p. 3
- Operation and Care p. 4
Table of contents
Manual images
Click an image to enlargeQuick Guide
The Home Accents Holiday 7 FT Animated THD 3000 is an indoor animated decoration. To begin, ensure you have all parts listed, assemble the base and frame, connect the torso and limbs, and plug in the power adapter. Use the control box to select your preferred animation mode.
Parts List
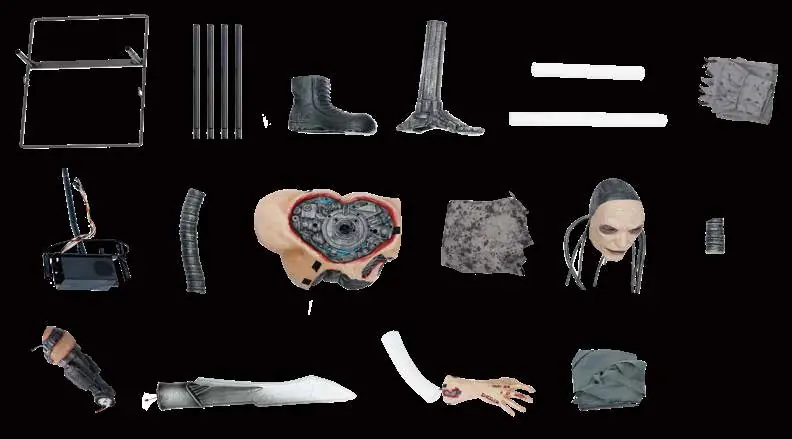
- Base, Poles (x4), Boot, Robotic Leg
- Long Foam Tube, Short Foam Tube, Pants
- Lower Body Frame, Spine, Chest, Shirt
- Head, Neck, Left Arm, Arm Blade, Right Arm, Cloak
- Power Adapter
Assembly Instructions
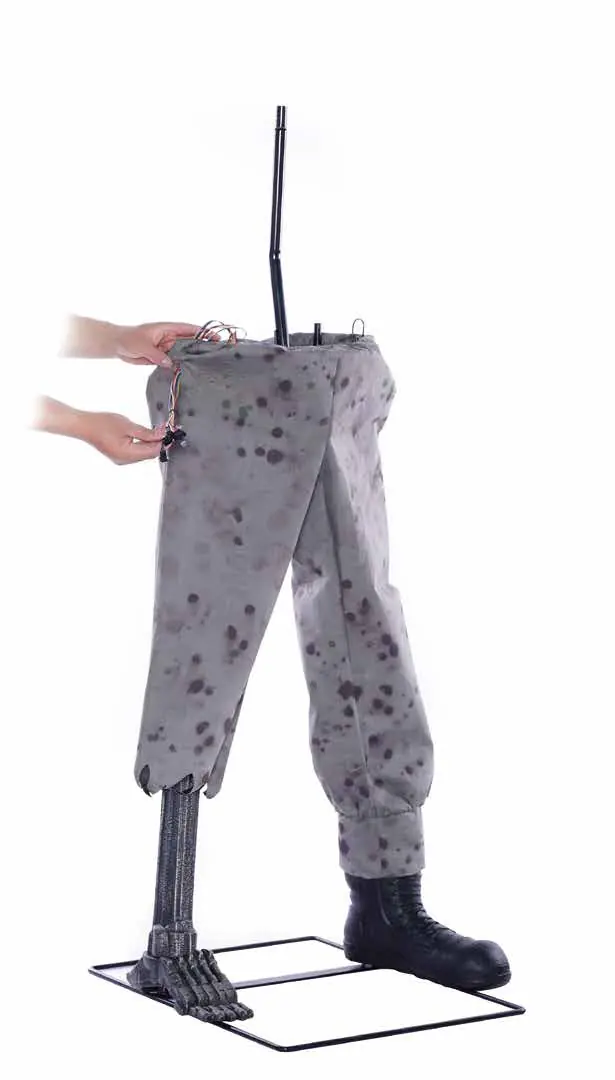
1. Base and Lower Body: Assemble the base and poles. Attach the robotic leg and boot. Slide the pants over the hip hoop on the lower body frame, passing cables through the hole in the pants.
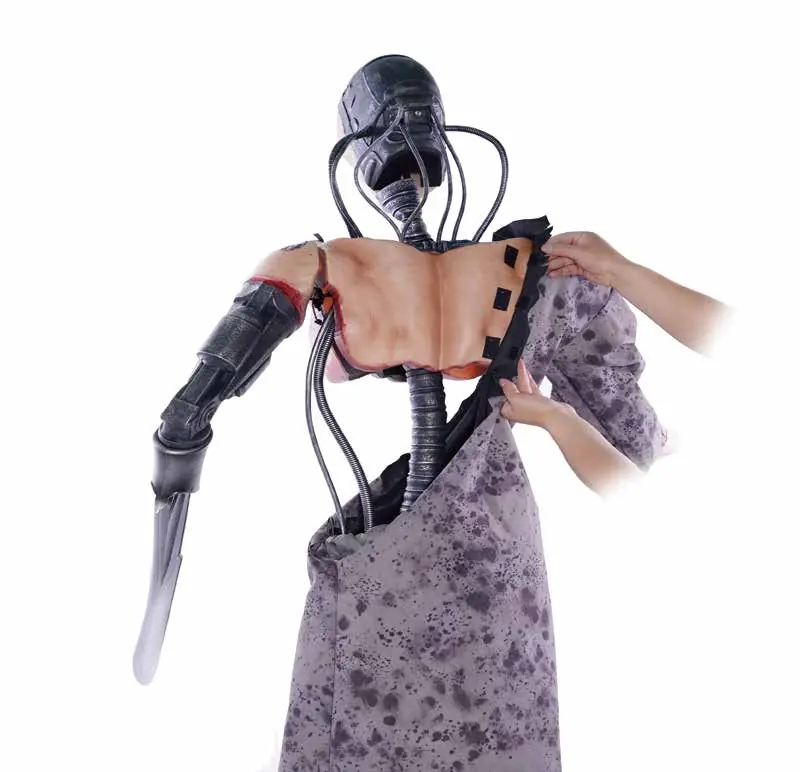
2. Torso and Spine: Orient the spine as shown and slide it onto the lower body frame. Connect the chest piece.
3. Head and Arms: Attach the neck and head to the chest. Connect the left arm (with blade) and right arm. Ensure all cable pairs are connected by matching colors.
4. Finishing Touches: Place the shirt over the torso, concealing cables inside the sleeve using the hook & loop closures. Attach the cloak.
Operation
Plug the power adapter into a standard outlet and adjust the settings on the Function Control Box located on the lower body frame:
- Sensor: Activates lights, sound, and animation when the IR sensor detects motion (up to 2m/6.5ft range, 80-degree angle).
- Off / Try Me: The item remains off unless triggered by a Step Here Try Me Activation Pad (not included).
- Lights Only: Activates lights without animation.
Use the volume control dial to adjust or turn off the sound.
Troubleshooting
- If the item does not function (no movement, lights, or sound), check that the adapter is plugged in at both the control box and the wall.
- Ensure the switch on the control box is set to the desired mode.
- Verify that all cable connections are secure and color-matched.
- Check that the sensor is not blocked and the floor is flat and level.
- Ensure the volume is not turned all the way down.
Care and Storage
Operate the item indoors only. When not in use, store the product in its original packing, keeping it away from heat and moisture.
Manufacturer information
Home Accents Holiday
Practical help
Common problems
Item does not move, light up, or make sound
Check that the adapter is plugged in at both the control box and the wall. Verify that all cable connections are secure and color-matched.
Sensor not triggering
Ensure nothing is blocking the IR sensor. The sensor has a range of up to 2m/6.5ft and an 80-degree angle.
No sound
Check that the volume dial on the control box is not turned all the way down.
Before use
- Verify all parts are present according to the parts list
- Ensure the assembly surface is flat and level
- Connect all cables by matching colors
- Plug the power adapter into the control box and wall outlet
Show more Show less
Specs in practice
- Power Adapter Input
- 100-240VAC 50/60Hz
- Power Adapter Output
- 5.9V 3A
- Sensor Range
- Up to 2m/6.5ft, 80-degree angle
Images and diagrams
- Assembly steps 1.1-8.2 illustrate the sequence of connecting the base, poles, torso, and limbs.
- The control box diagram shows the switch positions for Sensor, Try Me, and Lights Only modes.
Model compatibility
- Indoor use only
- Requires Step Here Try Me Activation Pad (not included) for the 'Try Me' mode

Manual page author
Emily Carter
User documentation editor