HVAC / Heaters & Fireplaces
User Manual for Home Decorators Collection Haswell Petite Foyer Mantel 2291FM-23-259
Comprehensive assembly and operating guide for the Home Decorators Collection Haswell Petite Foyer Mantel (Model 2291FM-23-259). Includes step-by-step installation instructions, safety warnings, remote control operation, and...
Quick answers from the manual
Quick answer
- The Home Decorators Collection Haswell Petite Foyer Mantel (2291FM-23-259) is an electric fireplace. Assembly requires a Phillips screwdriver and approximately 50 minutes. It features a thermostat (65°F-90°F), remote control, and a heater override safety feature. p. 1, 6, 20
Key actions
- Assemble the unit p. 8, 19
- Engage/Disengage Heater Override p. 21
- Replace Remote Battery p. 22
First start
- Ensure unit is on a level surface. p. 3
- Plug into a dedicated 120V grounded outlet. p. 4
Show 5 more answers Show less
Problems and fixes
Error E1/E2
Unplug for 15-20 minutes to reset sensor.
p. 23
Error E3
Heater override is engaged.
p. 23Error codes
| Code | Meaning | Action | Pages |
|---|---|---|---|
| E1 | Overheat sensor engaged. | Unplug for 15-20 minutes. | p. 23 |
| E2 | Thermostat sensor broken or not working. | Unplug for 15-20 minutes. | p. 23 |
| E3 | Heater override function engaged. | See page 21 to disengage. | p. 23 |
Maintenance and reset
- Reset memory p. 21
Technical specifications
| Parameter | Value | Meaning | Pages |
|---|---|---|---|
| Voltage | 120V | Operating voltage | p. 4 |
| Thermostat Range | 65°F - 90°F | Temperature control range | p. 20 |
Where to find it in the PDF
- Safety Information p. 2, 3, 4
- Assembly Instructions p. 8, 19
- Operating Instructions p. 20, 21
- Troubleshooting p. 23
Table of contents
Manual images
Click an image to enlargeQuick Guide from the Manual
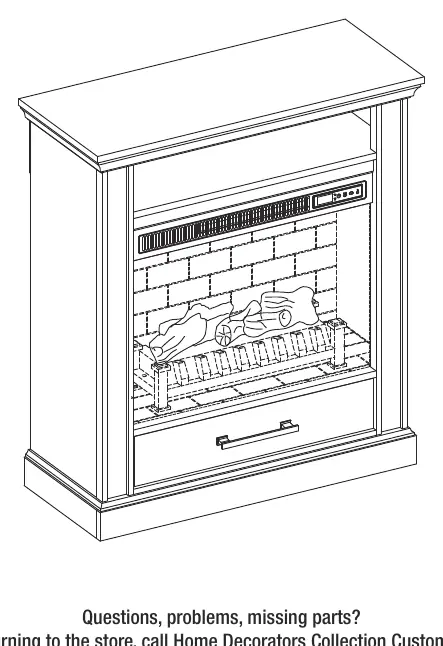
This manual provides instructions for the assembly and operation of the Home Decorators Collection Haswell Petite Foyer Mantel (Model 2291FM-23-259). Before beginning, ensure all parts are present and you have a Phillips screwdriver. The unit requires a dedicated 120V, 60Hz grounded outlet. Always follow safety precautions, including keeping combustible materials at least 3 feet away from the unit.
Safety Information
DANGER: To reduce the risk of electric shock, ensure the product is stable and avoid tipping. Always unplug the appliance before cleaning or servicing.
WARNING: This appliance is hot when in use. Do not let bare skin touch hot surfaces. Keep combustible materials (furniture, pillows, curtains) at least 3 feet away. Do not run the power cord under carpeting or furniture. Do not use in bathrooms, laundry areas, or outdoors.
Assembly Instructions
The assembly process involves 22 steps. Key stages include:
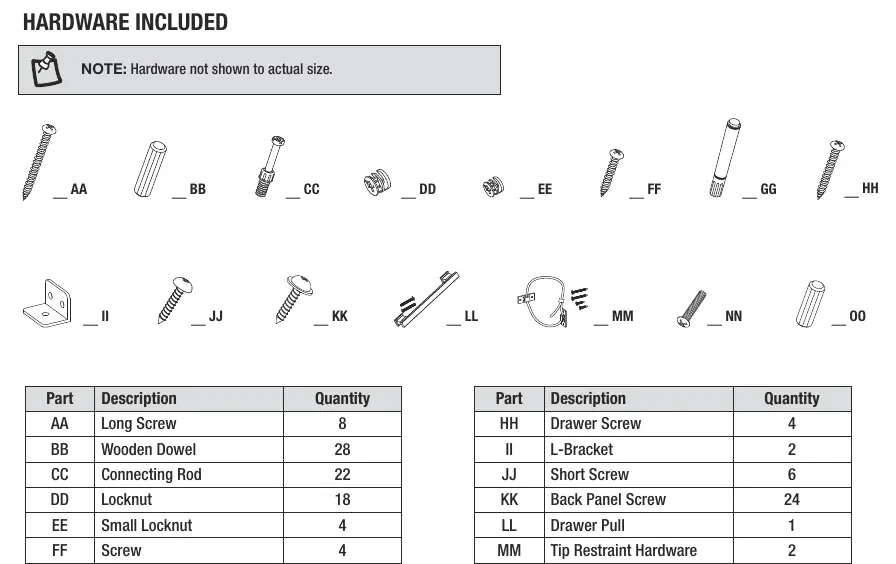
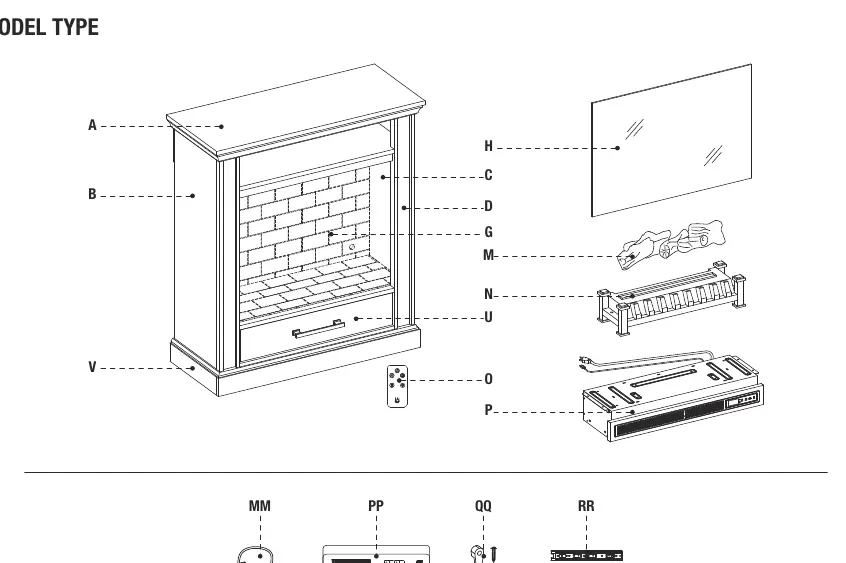
- Preparation: Verify all hardware (AA-OO) and package contents (A-V) are present. Estimated assembly time is 50 minutes.
- Structure Assembly: Assemble the front panels, side walls, and fireplace brick bottom wall using connecting rods (CC), wooden dowels (BB), and locknuts (DD).
- Base and Top: Attach the base (V) using long screws (AA) and install the top (A) using wooden dowels and locknuts.
- Fireplace Components: Install the fireplace glass front (H), fireplace grate (N), and fire log (M).
- Final Steps: Install the L-brackets and fireplace brick wall (G). Secure the unit to the wall using the provided tip restraint hardware to prevent tipping.
Operating Instructions
The unit can be controlled via the control panel or the included remote control.
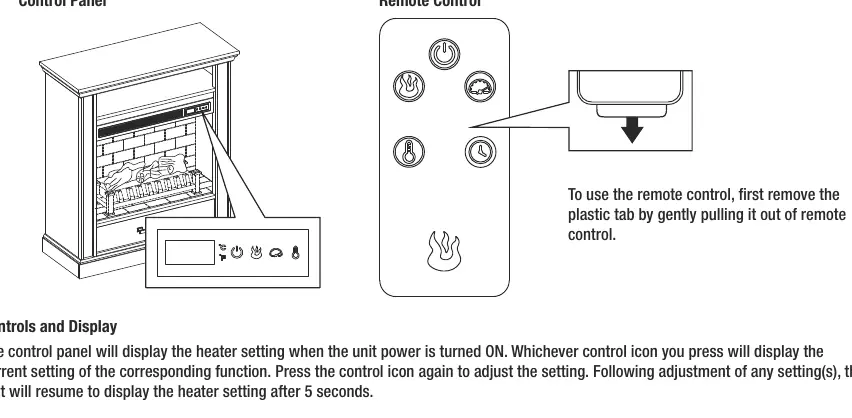
- Power Function: Press the POWER icon to turn the unit ON or OFF. The unit will display the heater setting when powered on.
- Flame Settings: Use the FLAME BRIGHTNESS and FLAME SPEED icons to adjust the visual effects.
- Heater Function: Use the HEATER icon to adjust heat settings. Set to "HI" for continuous operation or "OF" to use flame effects without heat. The thermostat range is 65°F (18°C) to 90°F (43°C).
- Heater Override: To prevent accidental activation (e.g., by children), turn the power OFF, then press and hold the POWER icon for 20 seconds. The E3 symbol will appear. Repeat the process to re-engage.
- Memory Function: The unit retains settings when turned off, excluding the sleep timer. Unplugging the unit resets the memory.
Care and Maintenance
Clean the metal trim with a water-dampened soft cloth; do not use brass polish. Periodically vacuum the air intake/output vents. If the remote control stops working, replace the battery with a CR2025 lithium battery.
Troubleshooting
If the unit malfunctions, check the following:
- Error E1: Overheat sensor engaged. Unplug for 15-20 minutes to reset.
- Error E2: Thermostat sensor issue. Unplug for 15-20 minutes to reset.
- Error E3: Heater override is engaged.
- No Power: Ensure the cord is plugged into a 120V outlet and the unit is powered on.
- Remote Issues: Replace the battery or move closer to the unit (within 20 feet).
Manufacturer information
Home Decorators Collection
Practical help
Common problems
Error E1 or E2 displayed
Unplug the unit for 15-20 minutes to allow the sensor to reset, then plug back in.
Error E3 displayed
The heater override function is engaged. See the Heater Override section on page 21 to disable it.
Remote control not working
Replace the battery with a CR2025 lithium battery or ensure you are within 20 feet of the unit.
Heater does not turn on
Check if the heater is set to 'HI' and ensure the heater override is not active.
Before use
- Verify all parts are present using the package contents list.
- Ensure you have a Phillips screwdriver.
- Confirm the electrical outlet is 120V, 60Hz, and properly grounded.
- Place the unit on a level surface.
- Remove the plastic tab from the remote control.
Show more Show less
Specs in practice
- Thermostat Range
- 65°F (18°C) to 90°F (43°C).
- Remote Range
- Up to 20 feet and 45 degrees to either side.
- Power Requirements
- 120V, 60Hz circuit (15-Amp).
Images and diagrams
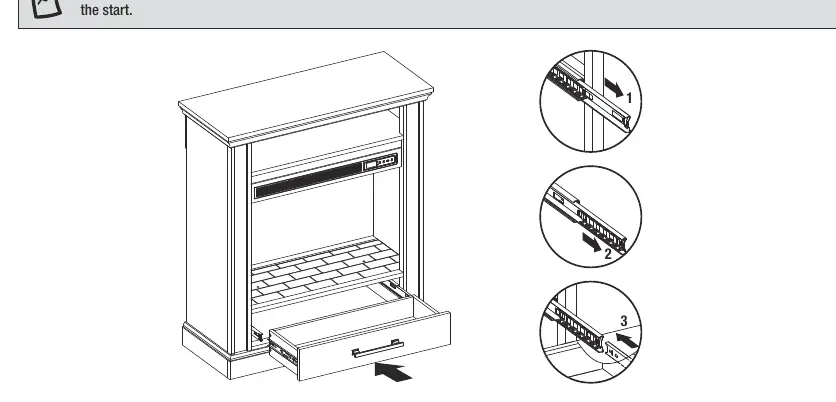
- Assembly steps 1-22 illustrate the step-by-step construction of the mantel and fireplace insert.
- The control panel diagram shows the location of power, flame, and heater icons.
Model compatibility
- Do not use in bathrooms, laundry areas, or near water.
- Do not use with extension cords or power strips.
- Not intended for outdoor use.

Manual page author
Michael Turner
Technical manual editor