Automotive / ECU Tuning
Installation Guide for AeroBall Customs Civic 10th Gen Rear Diffuser
Step-by-step installation guide for the AeroBall Customs rear diffuser on a 10th Gen Honda Civic. Includes tool requirements, drilling instructions, and mounting procedures.
Table of contents
Manual images
Click an image to enlargeQuick Guide
This guide provides instructions for installing the AeroBall Customs rear diffuser on a 10th Gen Honda Civic. Before beginning, ensure you have all necessary tools and that the vehicle is safely raised to allow access to the rear bumper area. Some diffusers may come pre-drilled; if so, you may use those holes as a guide for drilling into the bumper.
Required Tools
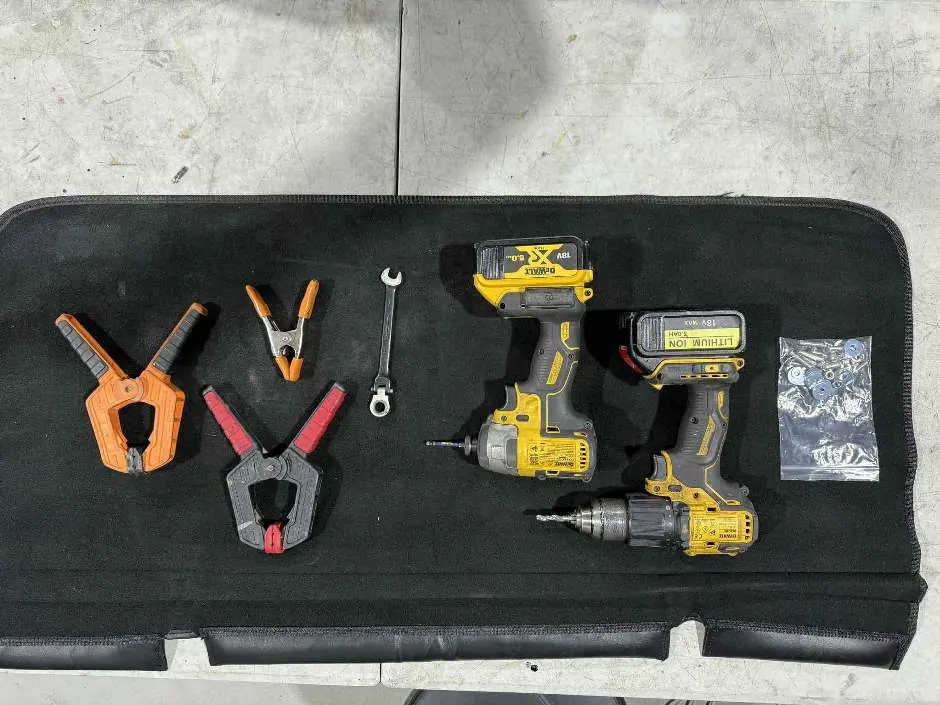
- 4mm Hex Bit and Driver
- 6.5mm Drill Bit and Drill
- 10mm Spanner
- Clamps
- Mounting Hardware (included with kit)
Installation Procedure
Follow these steps to install the rear diffuser:
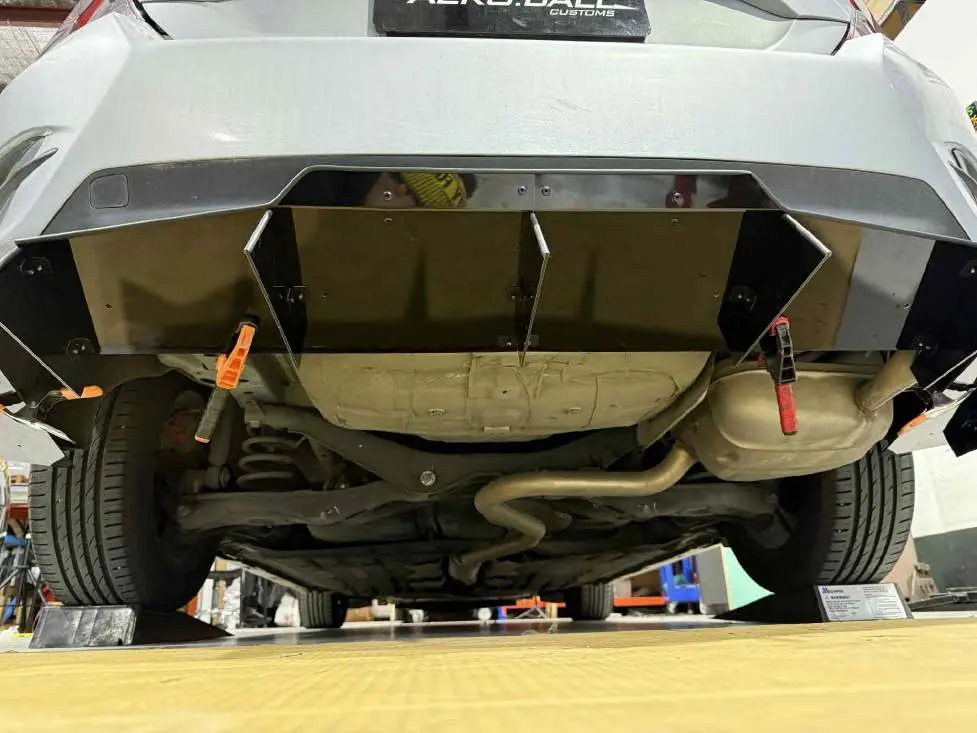
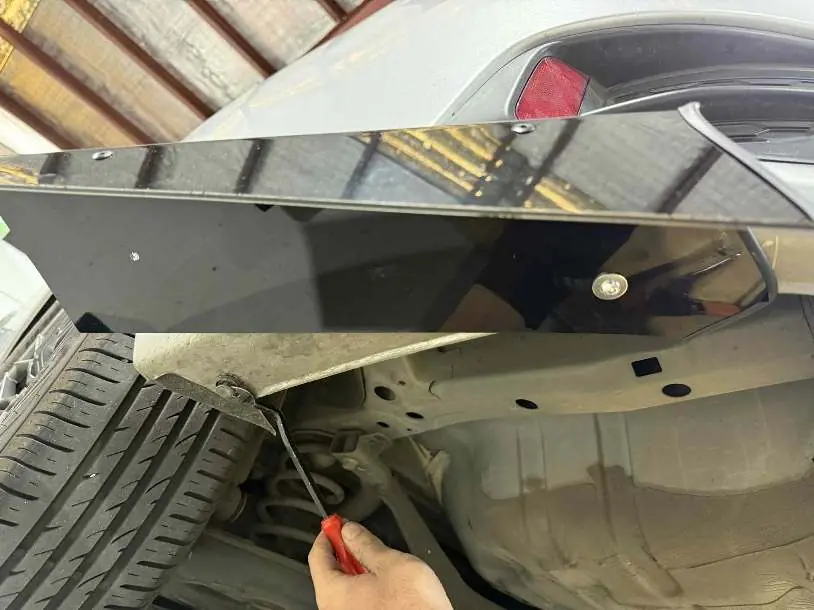
- Positioning: Place the rear diffuser pieces against the rear bumper to determine the desired mounting position. Raise the car to gain better access to the underside.
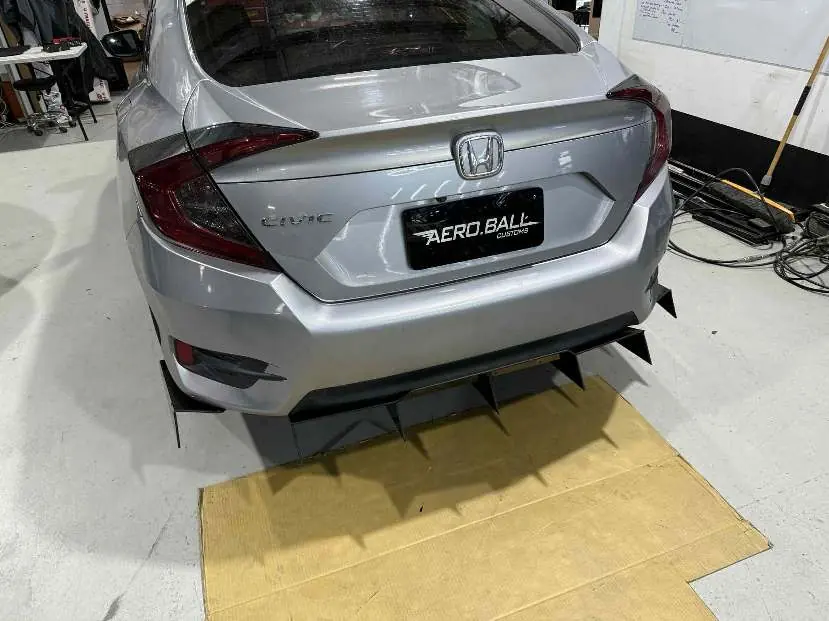
- Clamping: Use clamps to secure the diffuser piece onto the rear bumper. Adjust the alignment and decide how far out you want the diffuser to sit past the bumper.
- Drilling: With the diffuser held firmly in place, use the 6.5mm drill bit to create holes for the mounting hardware. If your diffuser is pre-drilled, use those holes as a guide for drilling into the bumper.
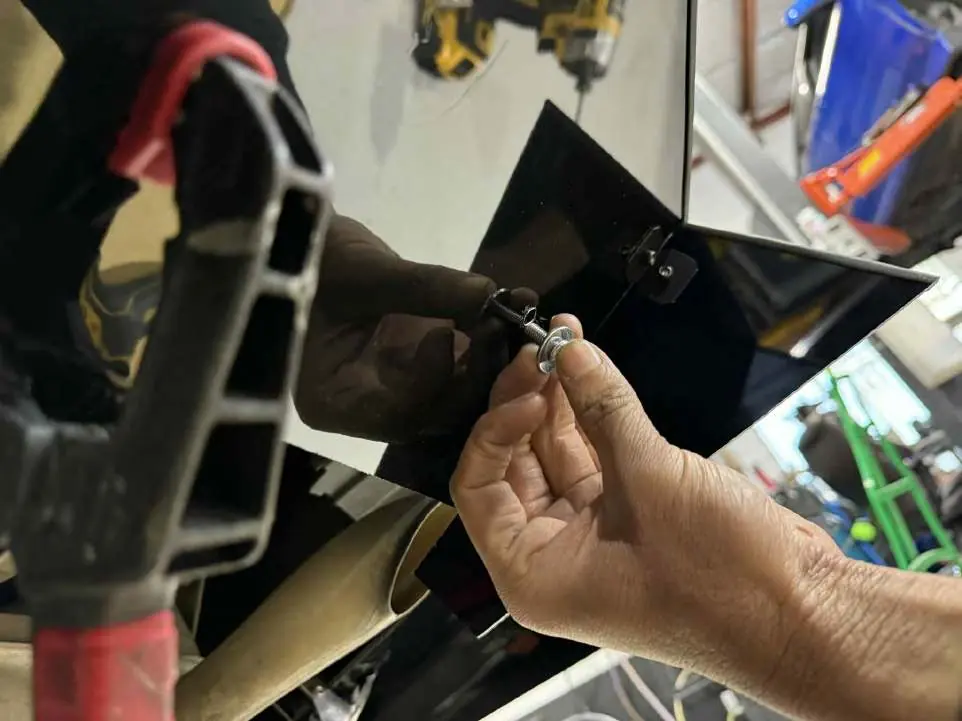
- Hardware Installation: Insert the bolts with the larger washer on the side making contact with the diffuser and the smaller washer on the side making contact with the rear bumper. Thread the nut on by hand to hold the assembly in place.
- Tightening: Use the 4mm hex bit and the 10mm spanner to tighten the nut. Ensure the mount is snug, but do not over-tighten to avoid damaging the material.
- Side Pods: Repeat the installation process for the rear pod pieces if included in your kit. Note that some vehicles may require the removal of stock clips for a proper fit.
Manufacturer information
Honda Motor Co., Ltd.
Practical help
Common problems
Diffuser alignment
Use clamps to hold the diffuser in the desired position on the bumper before drilling any holes.
Difficulty fitting side pods
Check if stock clips need to be removed from the vehicle to allow the pod pieces to sit flush.
Over-tightening hardware
Ensure the mount is snug but not too tight to prevent cracking or deformation of the diffuser.
Before use
- Gather all required tools: 4mm Hex bit, 6.5mm drill bit, 10mm spanner, and clamps.
- Verify you have all mounting hardware provided in the kit.
- Safely raise the vehicle to access the rear bumper area.
- Check if your diffuser is pre-drilled to simplify the alignment process.
Specs in practice
- 6.5mm Drill Bit
- Required size for drilling mounting holes into the rear bumper.
- 10mm Spanner
- Used to hold the nut in place while tightening the bolt.
Images and diagrams
- The tools required are shown on page 1.
- Clamping the diffuser to the bumper is shown on page 2.
- Drilling the mounting holes is illustrated on page 3.
- The correct washer placement (large on diffuser side, small on bumper side) is shown on page 4.
- Removing stock clips for side pod installation is shown on page 5.
Model compatibility
- Designed specifically for the 10th Generation Honda Civic.
- Installation steps may vary slightly depending on the specific diffuser model.

Manual page author
Emily Carter
User documentation editor
Prepares concise manual descriptions and highlights the most useful setup, operation, and maintenance information for readers.