Automotive / Suspension Kits
Installation Manual for ICON 58632 05-Up Tacoma Front 2.5 Exp Coilover
Quick installation guide for the ICON 58632 05-Up Tacoma Front 2.5 Exp Coilover. Includes step-by-step assembly, adjustment, and maintenance instructions.
Table of contents
Manual images
Click an image to enlargeQuick guide from the manual
This document provides installation instructions for the ICON 58632 05-Up Tacoma Front 2.5 Exp Coilover. Installation is estimated to take 3-4 hours and should be performed by a professional technician. The coilover assemblies come factory charged to 250 PSI; do not release nitrogen pressure as this may cause shock malfunction and void the warranty.
Tools required
- Jack and jack stands
- Pliers and circlip retaining ring pliers
- Pry bar and ratchet
- Cutoff wheel
- Coil spring compressor
- Sockets/Wrenches: 10mm, 12mm, 14mm, 17mm, 19mm
Installation procedure
Preparation: Raise the front of the vehicle, support with jack stands, and remove front wheels. Remove the 4 bolts holding the front skid plate (12mm), sway bar linkage (17mm), front cross members (17mm), and sway bar brackets (14mm).
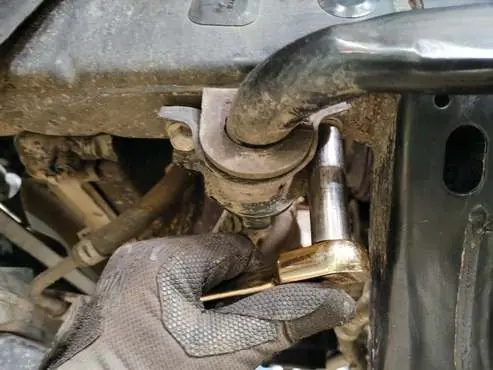
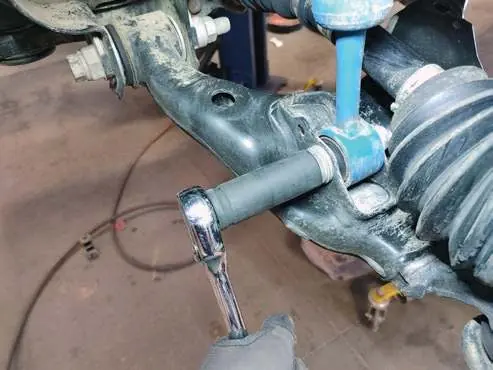
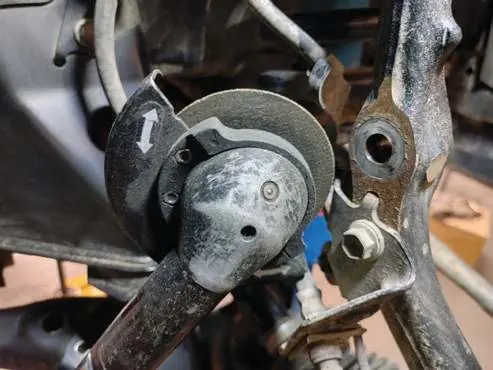
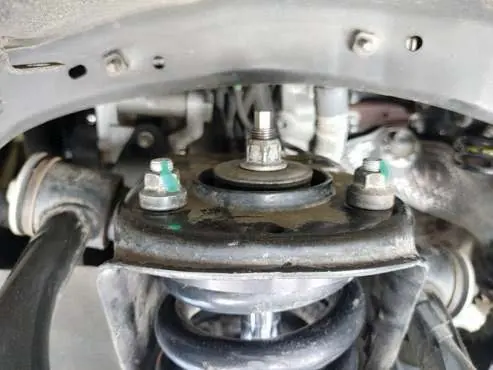
Removal: Remove the tie rod from the spindle. Remove the 3 nuts from the top of the factory coilover mount (14mm) and the lower coilover mounting bolt and nut (19mm). Remove the factory coilover from the vehicle.
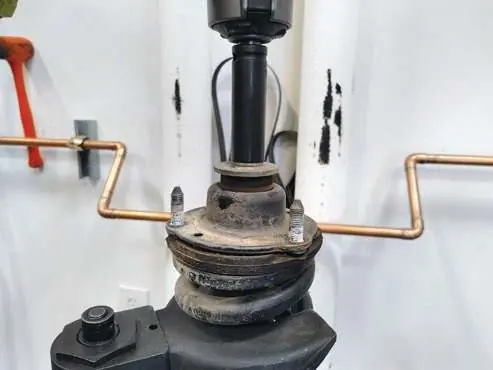
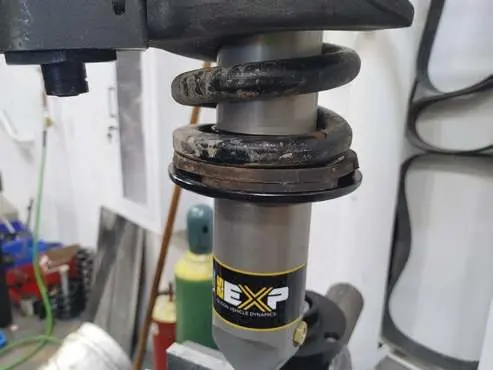
Assembly: Use a spring compressor to remove the factory coil spring. Press the factory bushing out of the upper mount and into the new ICON upper mount. Install the supplied circlip into the desired groove on the new shock. Slide the ICON coil seat over the shock, install the factory rubber isolator, and place the coil spring onto the new shock. Compress the spring to install the upper mount and tighten the nut.
Installation: Modify the ABS/Brake line bracket by cutting the larger portion at the bend to clear the larger coilover. Install the new ICON coilover, aligning the 3 studs with the frame mount. Reinstall the sway bar, tie rod, and wheels. Torque all fasteners to factory specifications.
Coilover adjustment
The ride height is adjustable by moving the circlip to different grooves on the shock body. Groove 1 provides stock height, while Groove 5 provides a 2-inch lift. Refer to the groove specifications diagram for exact lift measurements.
Maintenance
Routine maintenance is required to keep shocks in like-new condition. Guidelines vary by usage:
- Street Use: Factory service every 40,000 miles. Clean with mild soap, wax cylinders yearly, check nitrogen pressure yearly.
- Street/Dirt: Factory service every 15,000 miles. Check nitrogen pressure each dirt outing.
- Dirt Use: Factory service every 1,000 miles. Check nitrogen pressure each outing.
For service kits and tools, contact ICON at 951-689-4266.
Warranty
ICON Vehicle Dynamics offers a 1-year warranty against manufacturer defects. The warranty does not cover damage from improper installation, racing applications, or modifications. Products must be installed as a complete kit.
Practical help
Common problems
Shock malfunction or reduced ride quality
Often caused by low nitrogen pressure. Shocks are factory charged to 250 PSI.
Difficulty clearing the CV boot during removal
For 4WD trucks, turning the spindle may help the lower shock eyelet clear the CV boot.
Brake line bracket interference
The ABS/Brake line bracket must be modified by cutting the larger portion at the bend to clear the larger coilover.
Before use
- Verify all fasteners are properly torqued before driving.
- Ensure jack stands are secure before working under the vehicle.
- Confirm you have all required tools, including a coil spring compressor and circlip pliers.
- Check nitrogen pressure (factory set to 250 PSI).
- Retorque all nuts, bolts, and lugs after 100 miles.
Specs in practice
- Factory Nitrogen Charge
- 250 PSI
- Install Time
- 3-4 hours
Images and diagrams
- Groove Specs: Shows how to adjust ride height from stock to 2 inches using different circlip grooves.
- Installation Steps: Figures show removal of factory components and installation of the new coilover.
Model compatibility
- Designed for 05-Up Toyota Tacoma.
- Not for use on race vehicles or commercial/government vehicles.
- Requires complete kit installation as shown in the application guide.

Manual page author
Emily Carter
User documentation editor
Prepares concise manual descriptions and highlights the most useful setup, operation, and maintenance information for readers.