Furniture / Tables & Desks
Assembly manual for IKEA IDANÄS coffee table
Quick assembly guide for the IKEA IDANÄS coffee table. Includes step-by-step instructions, hardware list, and drawer adjustment tips.
Table of contents
Manual images
Click an image to enlargeQuick guide from the manual
This document provides assembly instructions for the IKEA IDANÄS coffee table. The assembly process relies on visual pictograms. It is recommended to assemble the furniture on a soft surface, such as a rug, to prevent damage to the product or your floor. Ensure you have all the necessary tools before starting.
Tools required
To assemble this furniture, you will need the following tools:
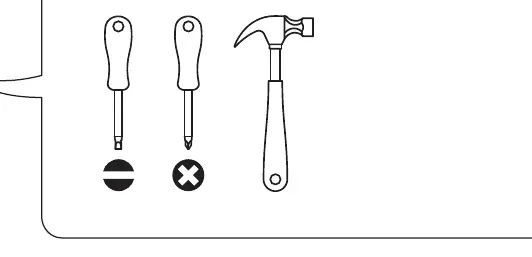
- Flathead screwdriver
- Phillips screwdriver
- Hammer
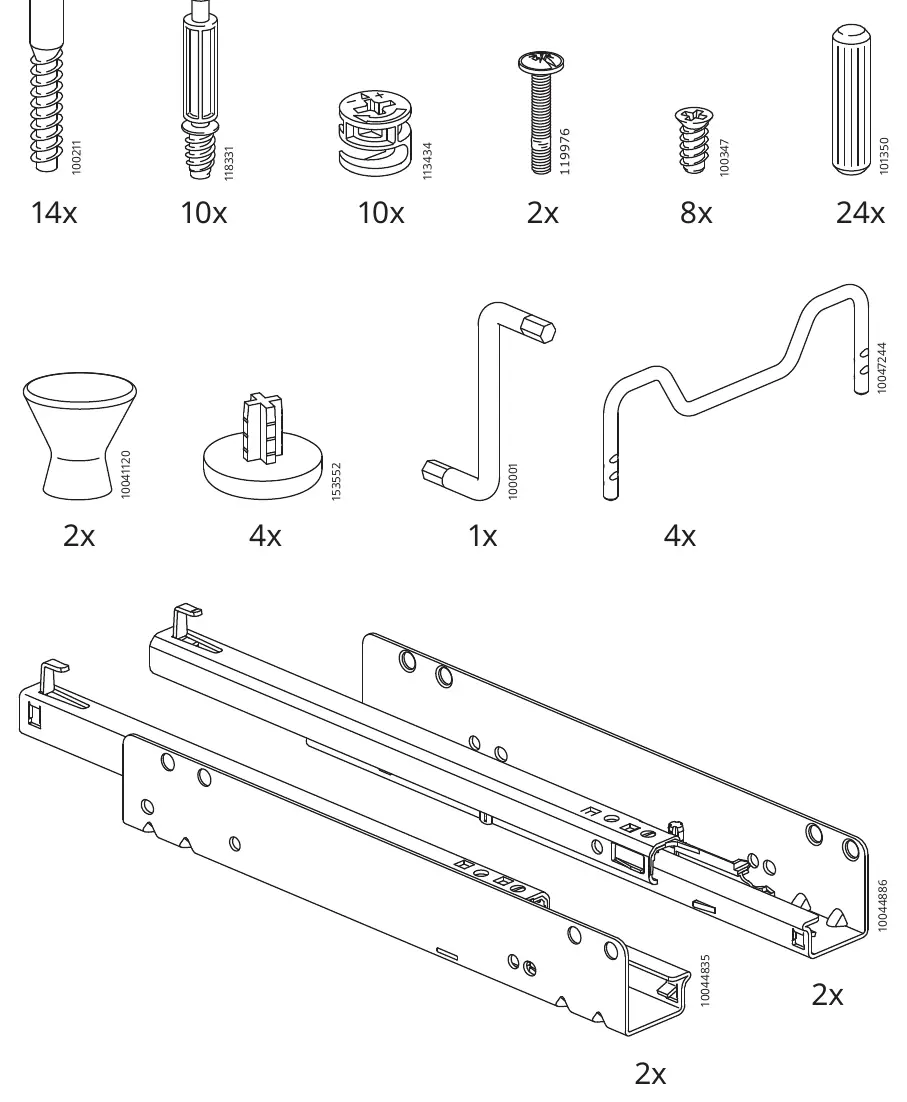
Hardware list
The package includes various screws, dowels, cam locks, and drawer runners. Please verify all parts against the list on page 3 before beginning assembly to ensure nothing is missing.
Assembly instructions
The assembly is divided into logical steps. Follow the sequence carefully:
- Frame assembly: Begin by attaching the drawer runners to the side panels (Steps 1-3). Insert dowels and cam locks as indicated in the diagrams (Steps 4-6).
- Structure construction: Assemble the main frame by connecting the side panels and support beams (Steps 7-15).
- Final frame assembly: Connect the remaining structural elements (Steps 16-25).
- Top panel: Attach the top surface of the table (Step 26).
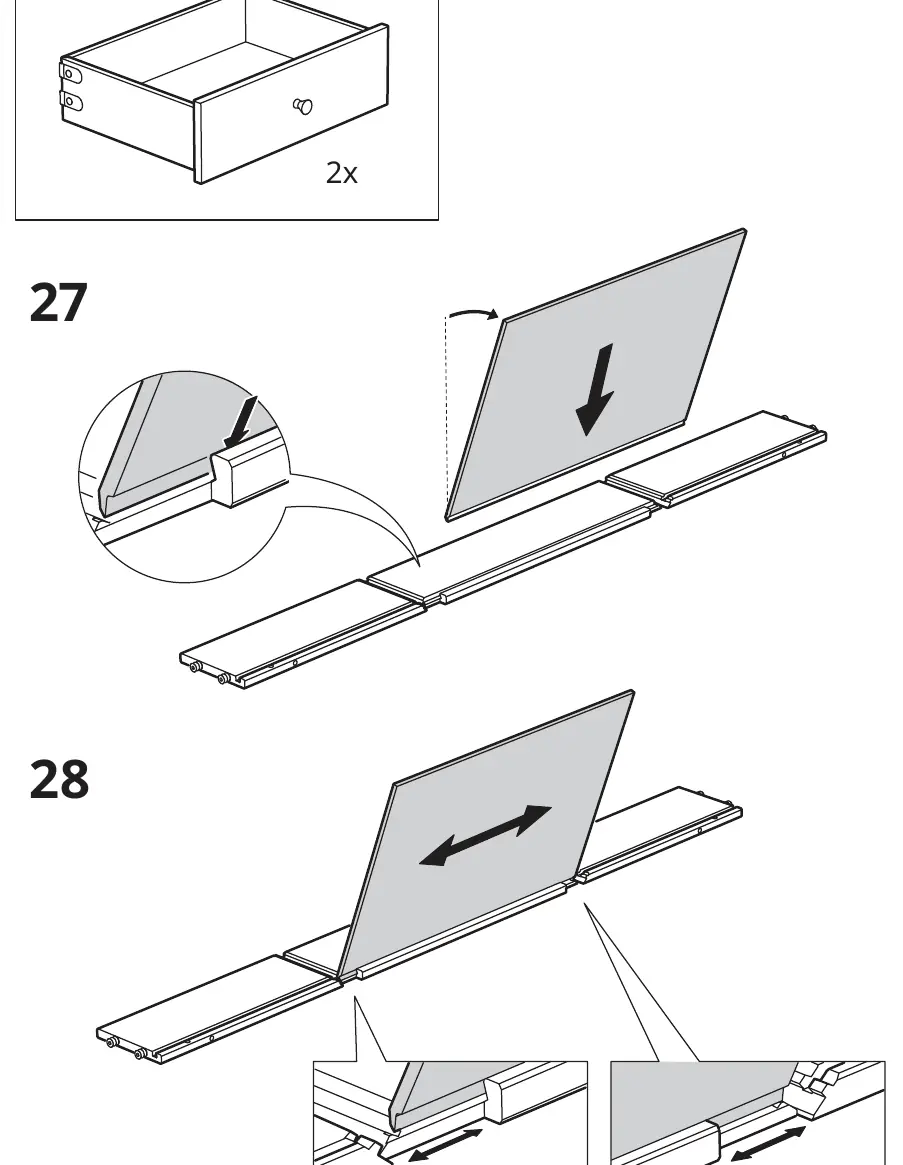
- Drawer assembly: Assemble the drawer boxes by inserting the bottom panels and attaching the front/back panels (Steps 27-30). Attach the drawer handles (Steps 31-32).
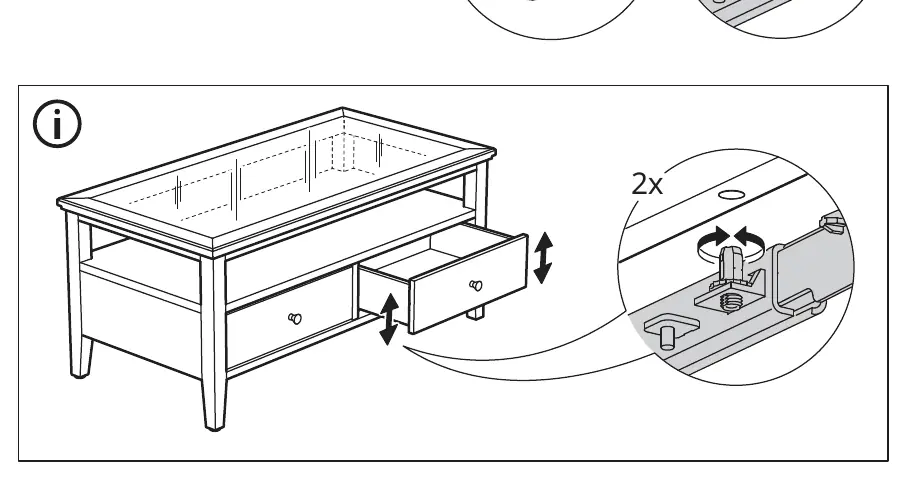
Drawer adjustment
If the drawers do not align correctly or do not slide smoothly, refer to the adjustment instructions on page 20. You can adjust the drawer position using the mechanism located on the drawer runners.
Manufacturer information
IKEA
Practical help
Common problems
Drawer is misaligned or does not close properly
Use the adjustment mechanism on the drawer runners as shown on page 20 to align the drawer.
Before use
- Verify all parts against the hardware list on page 3.
- Prepare a soft surface (like a rug) to protect the furniture during assembly.
- Ensure you have a flathead screwdriver, Phillips screwdriver, and a hammer.
- Do not use power tools to avoid damaging the wood.
Images and diagrams
- Arrows indicate the direction of insertion or rotation.
- Crossed-out symbols indicate actions to avoid (e.g., do not use a hammer on certain parts).
- The manual uses pictograms to show which tool to use for specific screws.

Manual page author
David Miller
Documentation analyst
Organizes user manual content into clear summaries, with attention to model details, product context, and everyday usability.