Toys / Ride-on Toys
User Manual for Kidzone 060-ROT-12L Lamborghini V12 Vision Gran Turismo Ride-On Toy
Quick guide for the Kidzone 060-ROT-12L Lamborghini V12 Vision Gran Turismo ride-on toy. Includes assembly steps, battery charging, remote control pairing, and troubleshooting.
Table of contents
Manual images
Click an image to enlargeQuick Guide for Kidzone Lamborghini V12 Vision Gran Turismo
This ride-on toy is designed for children aged 3 years and older with a maximum weight capacity of 55.12 lbs (25 kg). Adult assembly is required. The vehicle features a 12V battery system and includes a remote control for parental supervision.
Assembly Instructions
Important: This product must be assembled by an adult. Keep small parts away from children during assembly.


- Side Brackets: Assemble the side brackets under the car body using 8 M4 x 12 mm screws on each side.
- Wheels: Assemble the front wheels using M12 big washers and M8 small washers, secured with nuts. Repeat for rear wheels using M8 small washers and nuts. Cover with wheel covers.
- Steering Wheel: Connect the steering rod and steering wheel connectors by matching the colored wires. Insert the steering wheel into the steering column slot.
- Seat: Align and insert the seat joints into the slots on the seat base, then press/snap the seat into the car body.
- Rear Spoiler: Connect the light connectors, retract the wires into the square slot, and snap the spoiler into place. Secure with 2 screws.
Operating the Vehicle
Controls:
- Power Button: Press and hold to turn the vehicle ON or OFF.
- Speed Switch: Select between low and high-speed modes.
- Forward/Reverse Lever: Push or pull to select direction. Keep in the middle for neutral. Note: Only change direction when the vehicle is at a complete stop.
- Accelerator Pedal: Step to move, release to stop.
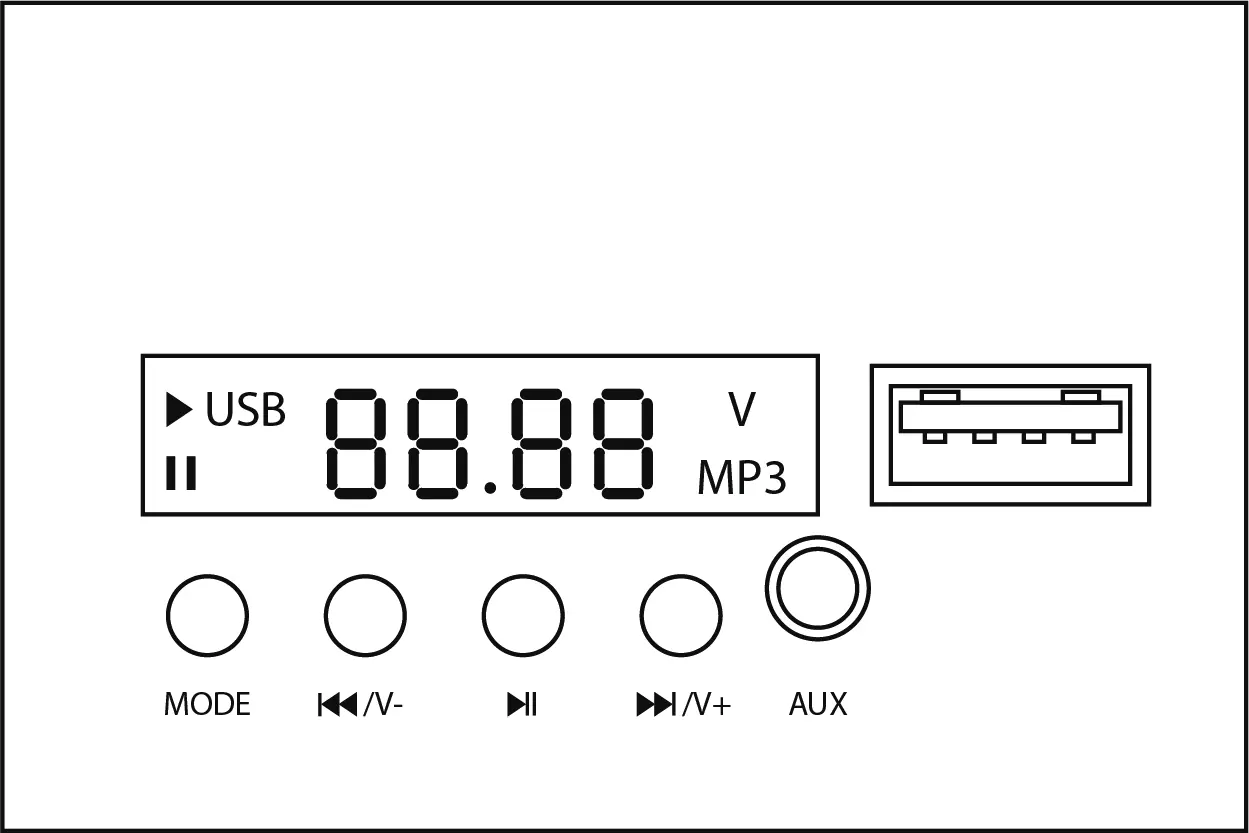
Media Player:
- Use the Mode button to switch between USB, AUX, Bluetooth, and FM radio.
- Connect via Bluetooth by selecting KIDZONE RIDE-ON on your device.
- Use the Previous/Next buttons to change tracks or hold to adjust volume.
Remote Control
To pair the remote, press and hold the forward and reverse buttons for 3 seconds until the speed indicator flashes. Power on the vehicle; the indicator will remain on if the connection is successful. The remote requires two AAA (LR03) batteries.
Charging the Battery
Important: The battery must be charged by an adult. The vehicle must be OFF during charging.
- Locate the charging port on the car body (near the seat) or directly on the battery.
- Connect the charger to the port and plug into a wall outlet.
- Charge for 8-10 hours. Do not exceed 20 hours.
- Charge at least once a month to maximize battery life.
Troubleshooting
- Vehicle does not move: Check battery connections, ensure the fuse is not tripped (it resets automatically in 10 seconds), or charge the battery.
- Vehicle runs slow: Charge the battery, check for overload (ensure weight is under 25 kg), or avoid harsh terrain.
- Battery does not charge: Ensure the charger is firmly connected to both the wall outlet and the charging port.
Manufacturer information
Kidzone Toys
Practical help
Common problems
Vehicle does not move
Check battery connections, ensure the fuse is not tripped (resets in 10 seconds), or fully charge the battery.
Vehicle runs very slow
Fully charge the battery, ensure the user weight is under 55.12 lbs (25 kg), or avoid using on harsh terrain.
Battery does not charge
Check if the charger is firmly plugged into the power source and the charging port.
Before use
- Charge the battery for 8-10 hours before the first use.
- Ensure the vehicle is fully assembled by an adult.
- Verify the child is 3+ years old and weighs under 25 kg.
- Ensure the seatbelt is securely fastened.
- Check that the area is safe, well-lit, and free of obstacles.
Images and diagrams
- Assembly diagrams illustrate the correct placement of wheels, washers, and nuts.
- Media player diagram identifies the USB port, AUX port, and control buttons.
- Remote control diagram shows the pairing process and speed indicator lights.
Model compatibility
- Not suitable for children under 36 months.
- Only use the charging device and battery provided by the manufacturer.

Manual page author
David Miller
Documentation analyst
Organizes user manual content into clear summaries, with attention to model details, product context, and everyday usability.