Toys / Ride-on Toys
User Manual for Kidzone Unicorn Ride On 060-ROT-30
Quick guide for the Kidzone Unicorn Ride On (060-ROT-30). Includes assembly instructions, charging procedures, safety warnings, and troubleshooting tips.
Table of contents
Manual images
Click an image to enlargeQuick guide from the manual
The Kidzone Unicorn Ride On (060-ROT-30) is designed for children aged 18-36 months with a maximum weight capacity of 44 lbs (20 kg). This product requires adult assembly and supervision. It is intended for use on flat, smooth surfaces only and should not be used in traffic, near water, or on slippery ground.
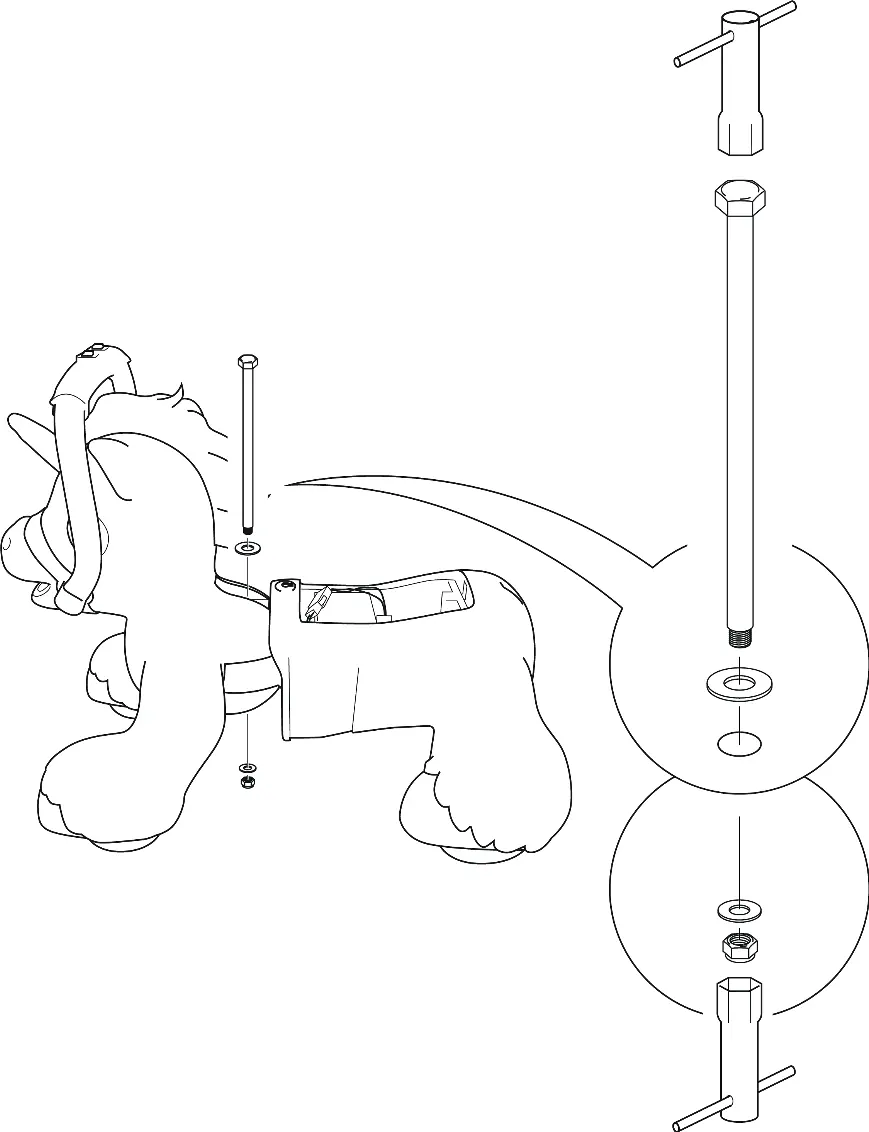
Assembly Instruction
Assembly must be performed by an adult. Ensure all parts are present before beginning.
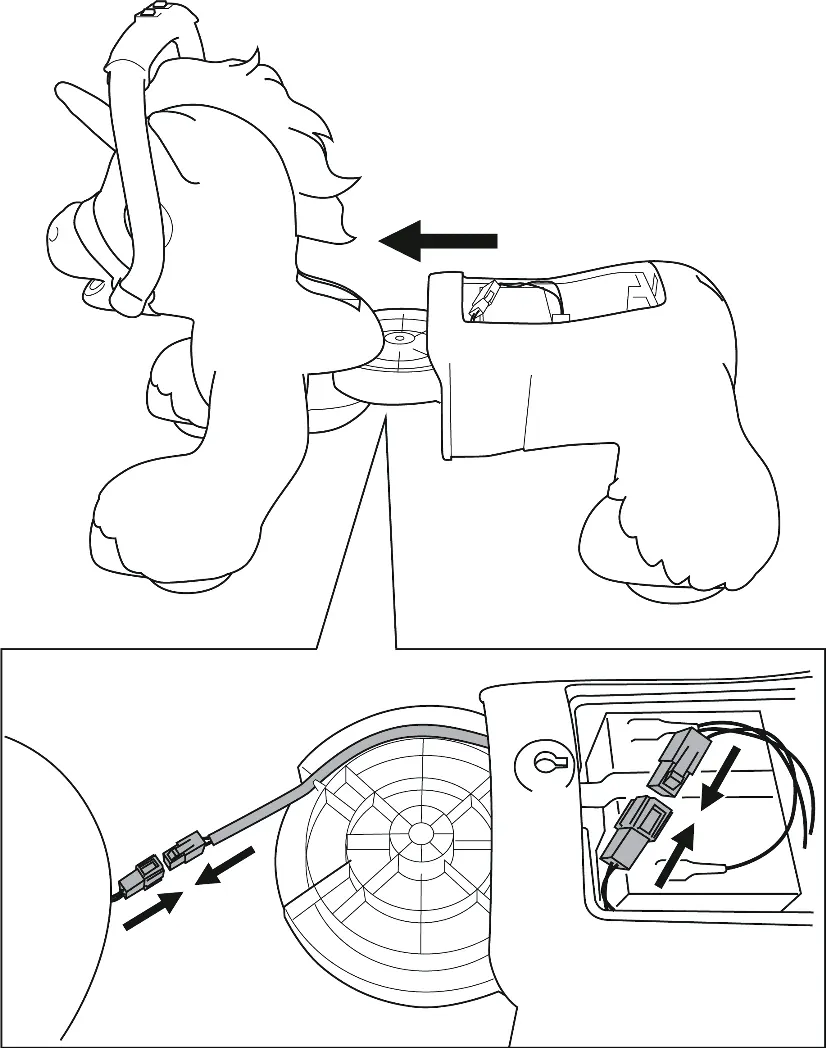
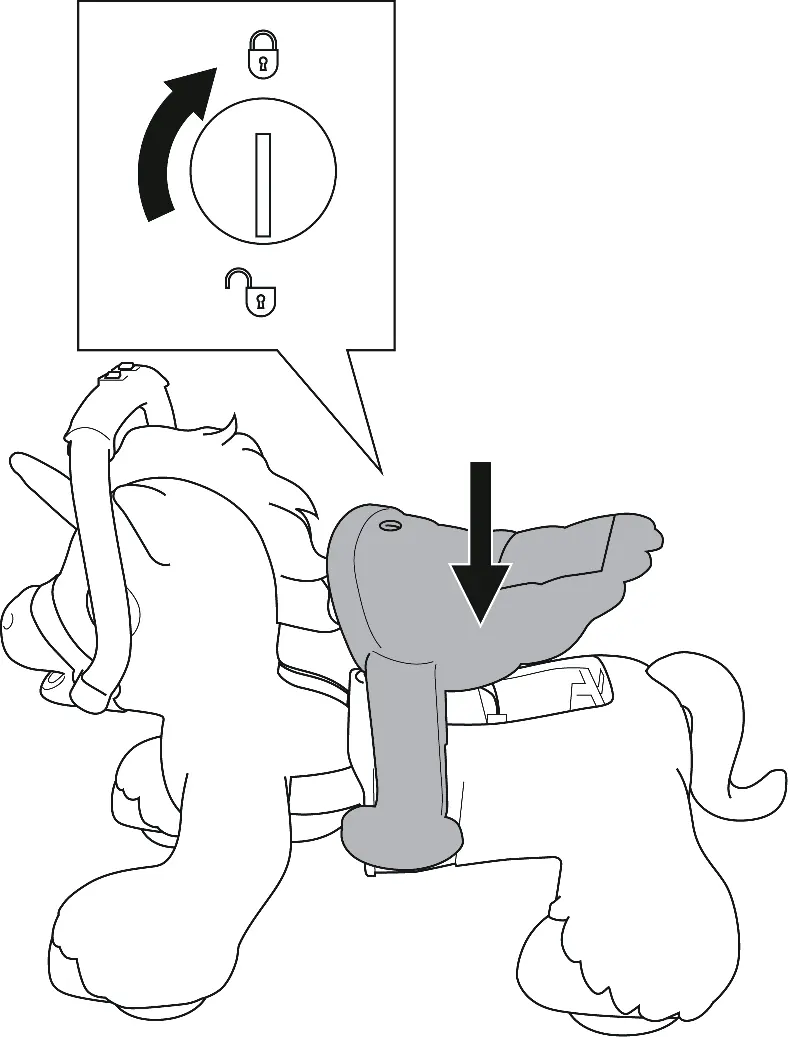
- Remove the saddle: Unlock and remove the saddle from the unicorn backend.
- Connect wires: Connect the electrical connectors from the unicorn frontend to the backend. Ensure wires are placed in the inner square hole of the frontend to avoid pinching.
- Join body: Slide the backend to the frontend.
- Secure body: Connect the unicorn body using the connecting bolt, washers, and nut. Ensure bolt holes are aligned before insertion.
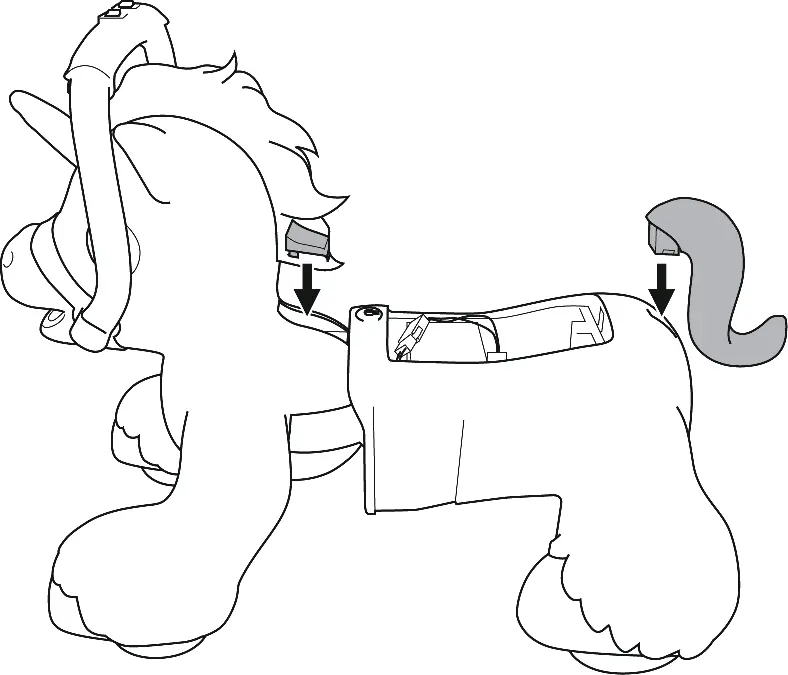
- Final touches: Attach the bolt cover and the tail.
- Reattach saddle: Place the saddle back onto the unicorn and lock it in place.
User Instruction
The unicorn features interactive play modes:
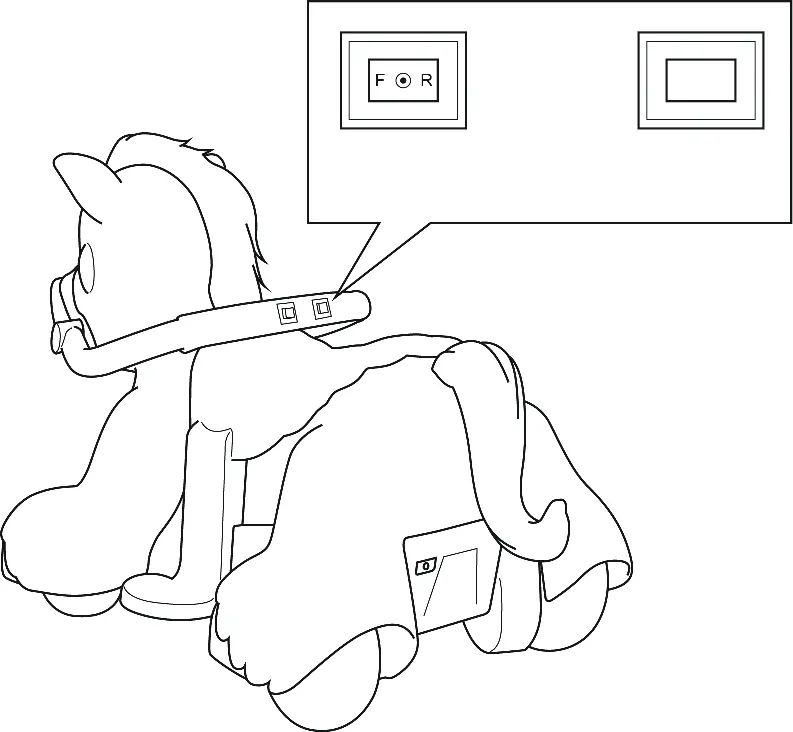
- Direction Switch: Select forward or rear direction. Do not change direction until the vehicle comes to a complete stop to avoid motor damage.
- Go Button: Press and hold the button to move the unicorn.
- Interactive Play: The unicorn makes different sounds when you feed it (carrot toy), brush it (press button), or pet it (touch the nose).
- Storage: The carrot toy and comb can be stored inside the saddle.
Charging
The battery must be charged by an adult.
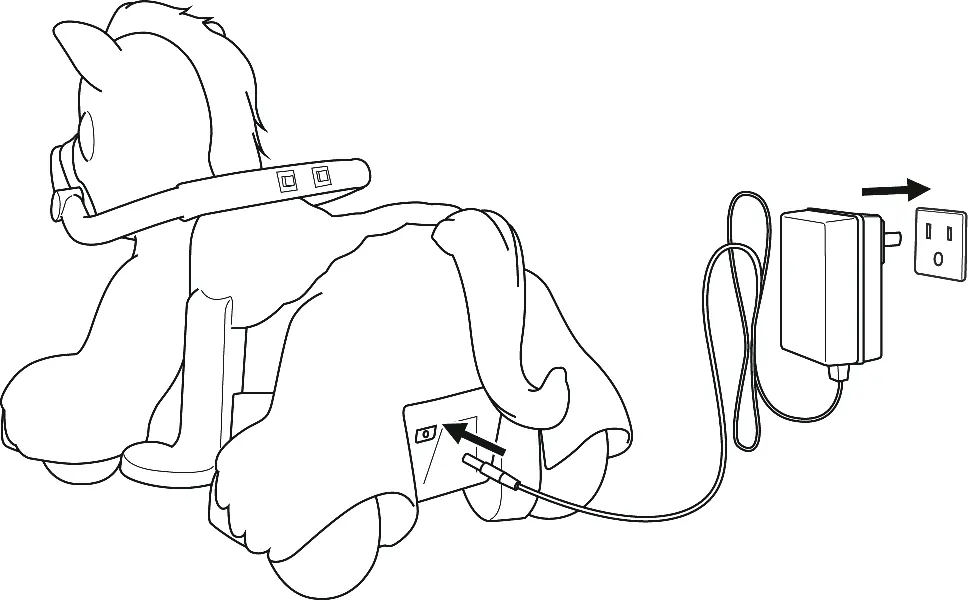
- Ensure the vehicle is OFF when charging.
- Connect the charger to the charging port, then plug into a wall outlet.
- The indicator light turns red when charging and green when completed.
- Charge for 8-12 hours after use. Do not charge for more than 20 hours.
- Charge at least once a month if the vehicle is not in use to maintain battery life.
Care and Maintenance
- Regularly check for loose parts and re-tighten if necessary.
- Clean with a cloth; do not use a hose or immerse in water.
- Use non-wax furniture polish for plastic parts.
- Store away from heat sources and wet weather.
- Occasionally use lightweight oil to lubricate moving parts.
Troubleshooting
If the vehicle does not move, check the battery connections, ensure it is fully charged, or wait 10 seconds for the fuse to reset. If the vehicle runs slowly, check if the user weight exceeds 44 lbs or if the battery is old/damaged. For grinding sounds or motor issues, contact customer service.
Manufacturer information
Kidzone Toys
Practical help
Common problems
Vehicle does not move
Check battery connections, fully charge the battery, or wait 10 seconds for the fuse to reset automatically.
Vehicle runs very slow
Ensure user weight is under 44 lbs (20 kg), charge the battery, or replace the battery if it is old.
Battery does not charge
Ensure the charger is firmly plugged into the power source and the charging port; check for loose connections.
Vehicle needs a push to go forward
Check for poor wire connections or a 'dead spot' on the motor; contact customer service if the issue persists.
Before use
- Ensure the child is between 18 and 36 months old.
- Verify the user's weight is under 44 lbs (20 kg).
- Charge the battery for 8-12 hours before the first use.
- Ensure all parts are assembled and bolts are tightened.
- Check that the battery is connected.
- Ensure the area is flat, smooth, and safe for riding.
Images and diagrams
- Assembly requires connecting the electrical wires between the frontend and backend before securing the body.
- The saddle must be removed to access the internal assembly points.
- The charging port is located on the rear of the vehicle.
Model compatibility
- For residential use only.
- Not for use on grass, mud, or slippery surfaces.
- Do not use in the dark; operate only in well-lit areas.

Manual page author
Emily Carter
User documentation editor
Prepares concise manual descriptions and highlights the most useful setup, operation, and maintenance information for readers.