Toys / RC Models & Drones
User Manual for Maisto 1739888 2.4GHz Radio Control Vehicle
Quick guide for the Maisto 1739888 2.4GHz Radio Control Vehicle. Learn how to charge the battery, install batteries, sync the controller, and operate your RC vehicle safely.
Quick answers from the manual
Quick answer
- The Maisto 1739888 is a 2.4GHz radio-controlled vehicle. This manual covers battery charging, controller setup, and operation instructions. p. 1
Key actions
- Charge the battery pack p. 1
- Sync the controller p. 1
First start
- Install batteries and charge the vehicle battery pack before first use. p. 1
Problems and fixes
Vehicle does not run
Check battery levels and ensure the controller and vehicle are synced.
p. 1Technical specifications
| Parameter | Value | Meaning | Pages |
|---|---|---|---|
| Frequency | 2.4GHz | Operating frequency | p. 1 |
Where to find it in the PDF
- User Manual p. 1
Table of contents
Quick guide from the manual
This document provides instructions for the Maisto 1739888 2.4GHz Radio Control Vehicle. Before operating, ensure the battery pack is fully charged and the controller is equipped with fresh batteries. The vehicle and controller must be synced by turning both on simultaneously.
Package contents
- RC Vehicle
- Controller
- USB Cable (Input: DC 5V 2A; Output: DC 6.4V 1A)
- 6.4V Li-ion Rechargeable Battery Pack (for vehicle)
- 2 x 1.5V AA LR6/R6 non-rechargeable batteries (for controller)
Battery installation and charging
Vehicle: Connect the battery pack to the USB cable. The LED indicator inside the cable will turn red while charging and green when fully charged. Charging takes approximately 2.5 hours. Once charged, insert the battery pack into the vehicle battery compartment, ensuring correct polarity. Close the cover securely.
Controller: Open the battery cover and insert 2 x 1.5V AA batteries, matching the polarity (+/-) indicated inside the compartment. Close the cover securely.
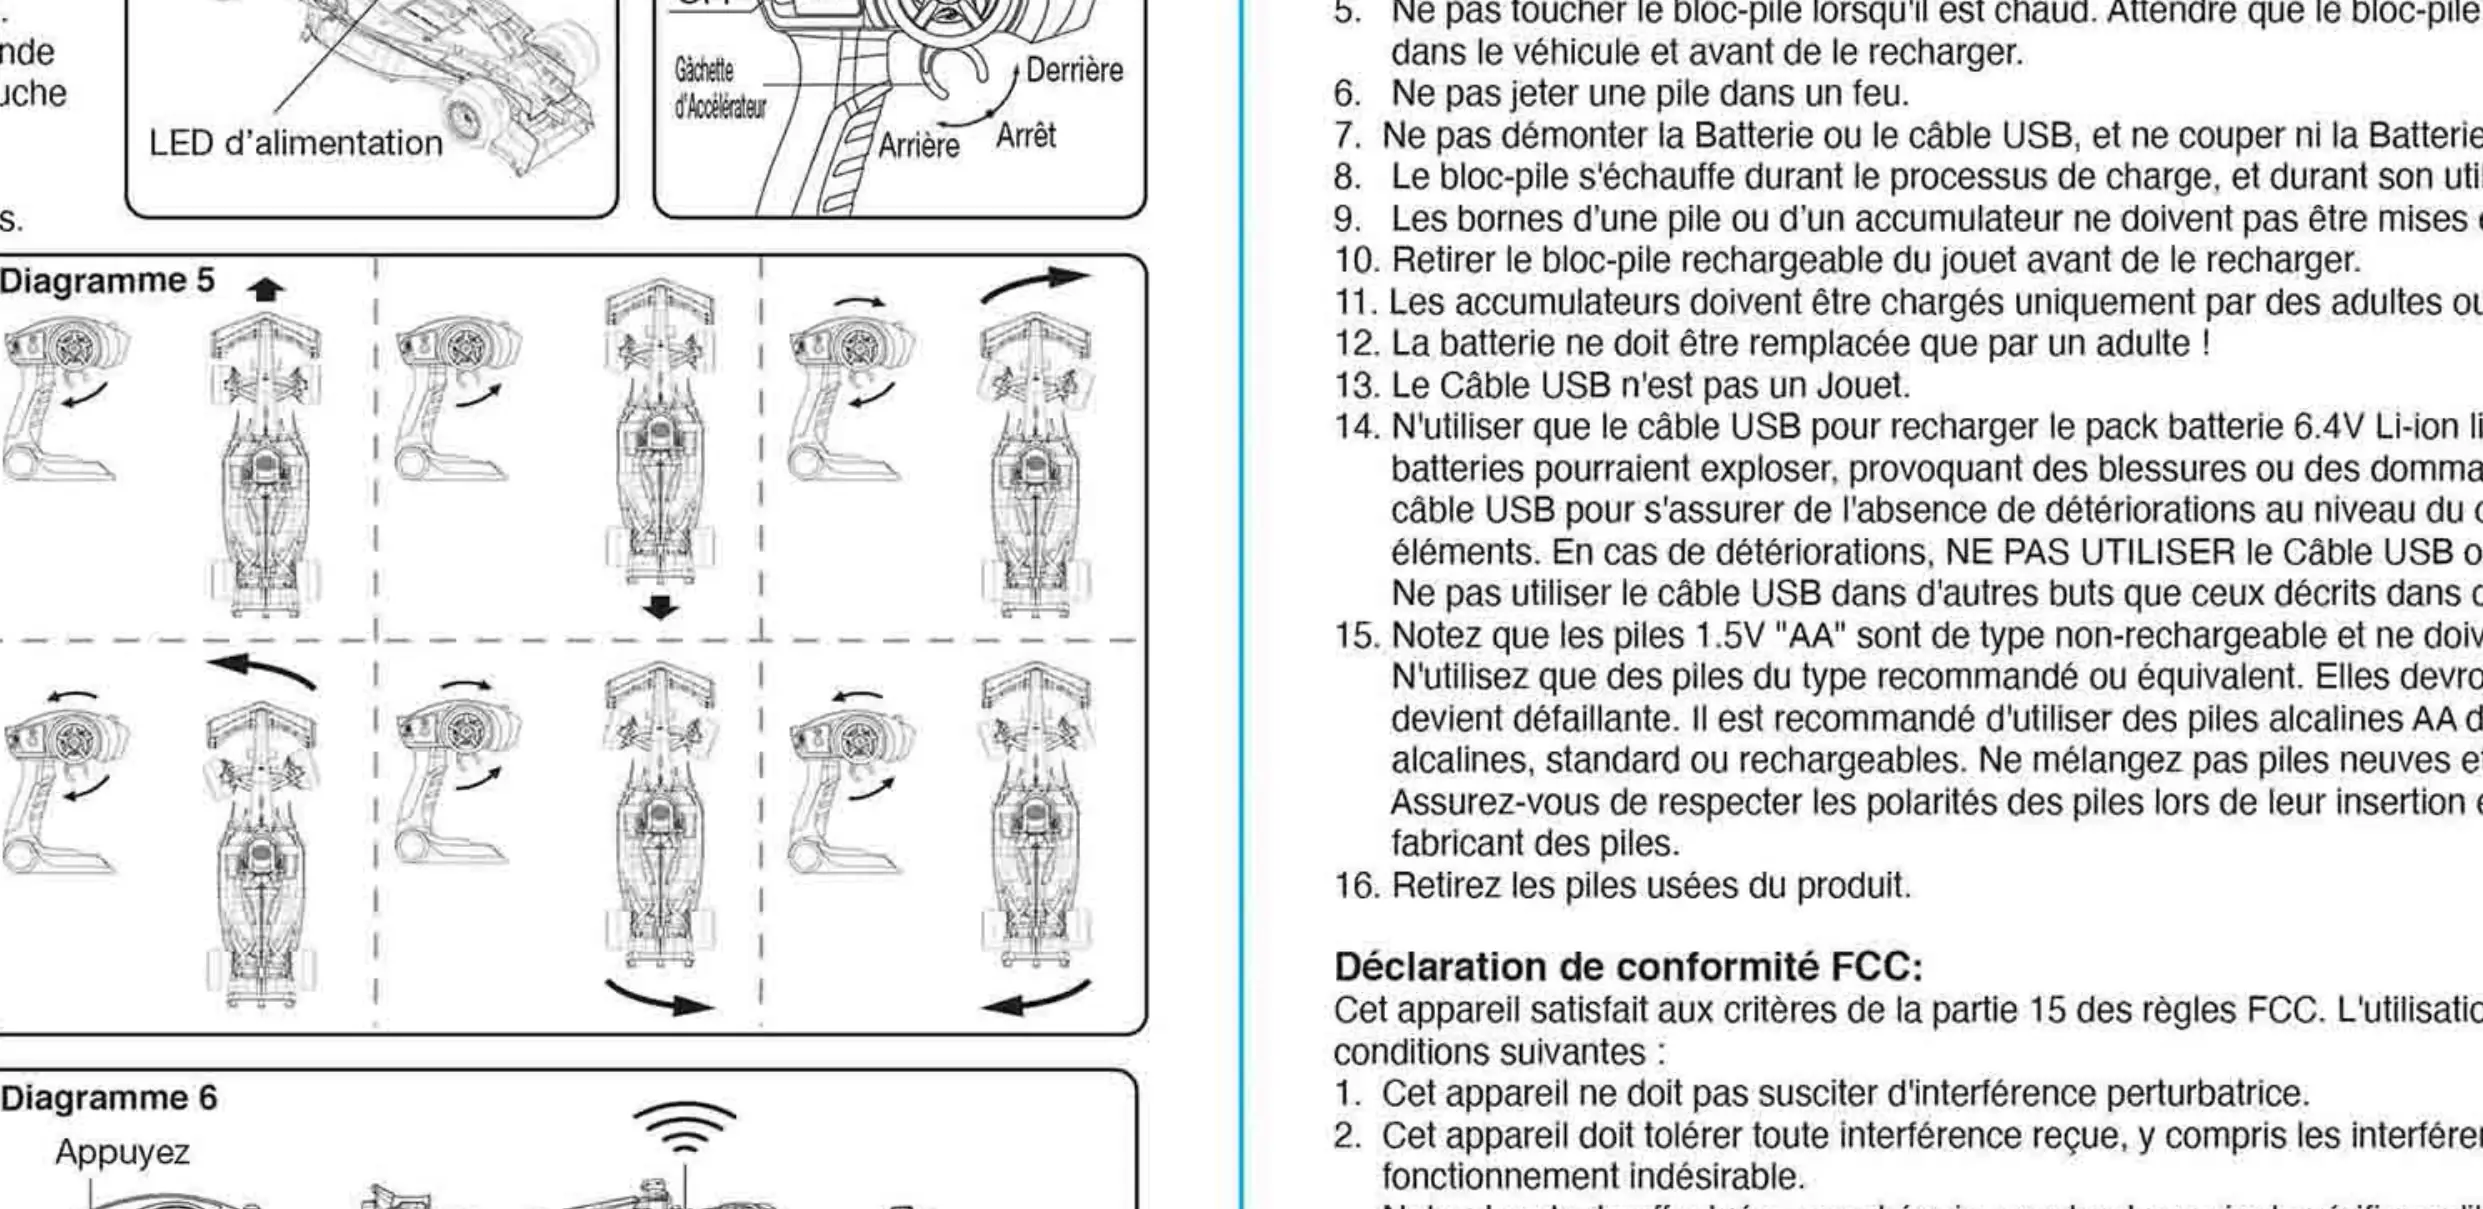
Operation and syncing
To operate the vehicle, follow these steps:
- Turn on the power switch on both the vehicle and the controller.
- The Power LED on both units will flash and then stay on, indicating they are synced.
- Use the trigger on the controller to move forward or backward.
- Use the steering wheel on the controller to steer the vehicle left or right.
- If the vehicle does not run in a straight line, adjust the wheel alignment dial located under the chassis.
Safety and cautions
- Do not operate on grass, sand, or through water.
- Do not drive the vehicle in heavy or rainy weather.
- Keep fingers, hair, and loose clothing away from the vehicle.
- Do not recharge the battery pack if it is hot or damaged.
- Use only the provided USB cable for charging.
Manufacturer information
Maisto
Practical help
Common problems
Vehicle does not run
Check if the controller and vehicle are synced, batteries are charged, and the power switch is ON.
Vehicle runs slowly
Charge the battery pack fully.
Vehicle does not drive straight
Adjust the wheel alignment dial located under the chassis.
Before use
- Charge the battery pack fully using the provided USB cable.
- Install 2 AA batteries into the controller.
- Ensure the vehicle battery pack is installed correctly.
- Turn on both the vehicle and the controller.
- Wait for the Power LED to stop flashing to confirm syncing.
Images and diagrams
- Diagram 1: Battery installation for the vehicle.
- Diagram 2: Battery installation for the controller.
- Diagram 3-8: Operation and steering controls.
Model compatibility
- Use only the provided USB cable for charging.
- Do not use rechargeable batteries in the controller.

Manual page author
Michael Turner
Technical manual editor
Reviews PDF manuals for structure, safety notes, and practical product details so readers can find the right information quickly.