Toys / RC Models & Drones
User Manual for Maisto 2.4GHz Radio Control Vehicle 82672
Quick guide for the Maisto 2.4GHz Radio Control Vehicle (82672). Learn how to charge the vehicle, install controller batteries, pair the remote, and operate the RC car safely.
Quick answers from the manual
Quick answer
- To pair the vehicle, turn on the vehicle, then turn on the controller. The 'Power LED' will flash for 3 seconds and then stop when the connection is established. p. 1
Key actions
- Charging the vehicle p. 1
- Pairing the controller p. 1
First start
- Install batteries in the controller and charge the vehicle via USB before the first use. p. 1
Problems and fixes
Vehicle does not drive straight
Adjust the wheel alignment dial on the bottom of the vehicle.
p. 1Where to find it in the PDF
- User Manual p. 1
Table of contents
Manual images
Click an image to enlargeQuick Guide
To pair the vehicle with the controller, follow these steps:
- Turn on the vehicle using the ON/OFF switch.
- Turn on the controller.
- The 'Power LED' on the controller will flash for 3 seconds.
- Once the LED stops flashing, the vehicle is paired and ready to use.
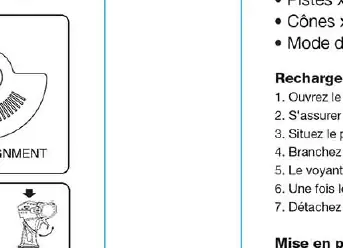
Charging the Vehicle
The vehicle features a built-in rechargeable battery.
- Open the charging port cover on the vehicle.
- Connect the provided USB cable to a certified USB port (e.g., computer, smartphone adapter).
- The LED indicator will light up while charging.
- The LED will turn off when the battery is fully charged.
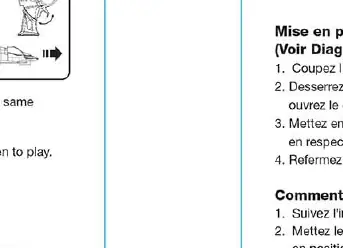
Battery Installation
The controller requires 2 x 1.5V 'AAA' (LR03/R03) non-rechargeable batteries (not included).
- Use a screwdriver to loosen the screw on the battery cover.
- Insert the batteries according to the correct polarity (+/-).
- Replace the cover and tighten the screw.
Operation
Use the controller to operate the vehicle:
- Trigger: Pull the trigger to drive the vehicle forward. Push the trigger forward to drive the vehicle backward.
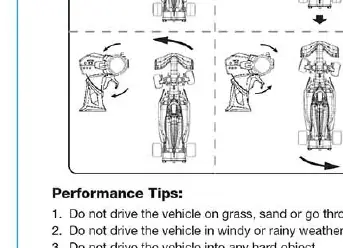
- Steering Wheel: Turn the steering wheel to the left or right to steer the vehicle.
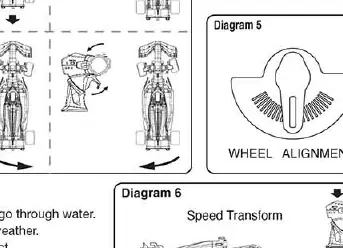
- Wheel Alignment: If the vehicle does not run in a straight line, adjust the wheel alignment dial located on the bottom of the vehicle.
Performance Tips
- Do not drive the vehicle in water, sand, or on grass.
- Avoid driving in windy or rainy weather.
- Keep hair, fingers, and loose clothing away from the vehicle.
- The operating range can be affected by other radio frequency sources, such as other R/C items, CB radios, or high-voltage lines.
Safety and Disposal
- Do not touch the vehicle while it is hot; wait until it cools down.
- Do not dispose of the battery in fire.
- Do not disassemble the battery or cut the USB cable.
- The USB cable is not a toy and should be used under adult supervision.
- Batteries should be removed from the product when not in use for long periods.
- Dispose of batteries according to local regulations.
Manufacturer information
Maisto
Practical help
Common problems
Vehicle does not move
Ensure the vehicle is switched on, the controller is switched on, and the batteries in the controller are fresh. Check if the vehicle battery is charged.
Vehicle does not drive in a straight line
Adjust the wheel alignment dial located on the bottom of the vehicle.
LED on controller keeps flashing
The controller is attempting to pair. Ensure the vehicle is switched on and within range.
Before use
- Charge the vehicle using a certified USB port.
- Install 2 x AAA batteries in the controller.
- Ensure the vehicle and controller are switched to the ON position.
- Wait for the pairing LED to stop flashing before driving.
Images and diagrams
- Diagram 1: Charging port location and USB connection.
- Diagram 2: Battery compartment access and installation in the controller.
- Diagram 3: Steering wheel and trigger operation.
- Diagram 5: Wheel alignment adjustment dial location.
Model compatibility
- Requires 2 x 1.5V AAA (LR03/R03) batteries for the controller (not included).
- Charging requires a certified USB port (computer or smartphone adapter).

Manual page author
Emily Carter
User documentation editor
Prepares concise manual descriptions and highlights the most useful setup, operation, and maintenance information for readers.