Toys / RC Models & Drones
User Manual for Robbe Sapphire RC Glider
Comprehensive user manual for the Robbe Sapphire RC glider. Includes assembly instructions for ARF and PNP versions, flight setup, control throws, center of gravity (CG) settings, and safety guidelines.
Quick answers from the manual
Quick answer
- The Robbe Sapphire is a high-quality all-round RC glider available in PNP (2678) and ARF (2677) versions. This manual provides assembly, setup, and flight instructions. p. 1, 4
Key actions
- Set Center of Gravity (CG) p. 15
First start
- Ensure servos are in neutral position before assembly. p. 4
Problems and fixes
Vibrations when motor runs
Rebalance the propellers.
p. 4Technical specifications
| Parameter | Value | Meaning | Pages |
|---|---|---|---|
| Span | 2900 mm | Wingspan | p. 8 |
| Weight | 2480 g | Flying weight | p. 8 |
Where to find it in the PDF
- Technical Data p. 8
- Assembly Instructions p. 9, 10, 11, 12
Table of contents
Manual images
Click an image to enlargeQuick guide from the manual
The Robbe Sapphire is a high-performance all-round RC glider. This manual covers both the PNP (Plug and Play, Nr. 2678) and ARF (Almost Ready to Fly, Nr. 2677) versions. Before starting, ensure you have read all safety instructions. The most critical setup parameter is the Center of Gravity (CG), which should be set between 83-88mm behind the leading edge. For beginners, start at 83mm.
General Information
The model is designed for the components specified by Robbe. If using alternative servos, motors, or batteries, ensure they are compatible. Before assembly, always set servos to their neutral position using your remote control.
Assembly Instructions
Fuselage
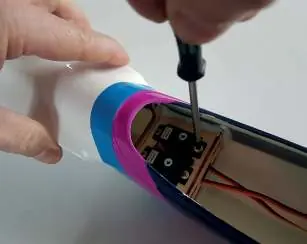
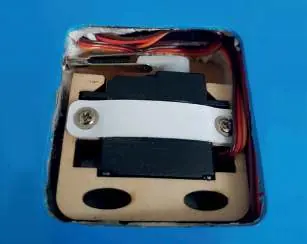
Install the motor with cables pointing down using threadlocker. Secure the V-tail servos into the servo board. Ensure all rotating components are firmly seated.
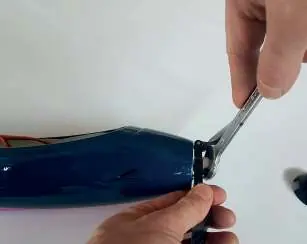
V-Tail
Glue the tail halves using epoxy resin. Use the provided 110° template to maintain the correct angle while the glue cures. Once cured, transfer the 3mm holes to the tailplane.
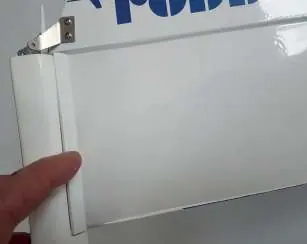
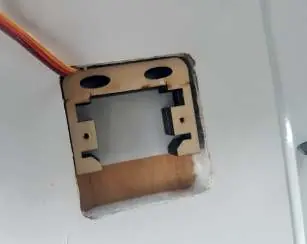
Wing
Install servo extension cables into the cable bays. Glue servo frames flush with the servo bays. Ensure servo outputs point outward toward the leading edge. Adjust linkages to the specified lengths (Ailerons approx. 66mm, Flaps approx. 63mm).
Flight Recommendations
- Choose a day with minimal wind for the first flight.
- Perform a functional test of the drive train and remote control before takeoff.
- A helper is recommended for the initial hand launch.
- Do not stall the model near the ground.
- Initiate landing with sufficient speed.
Technical Data
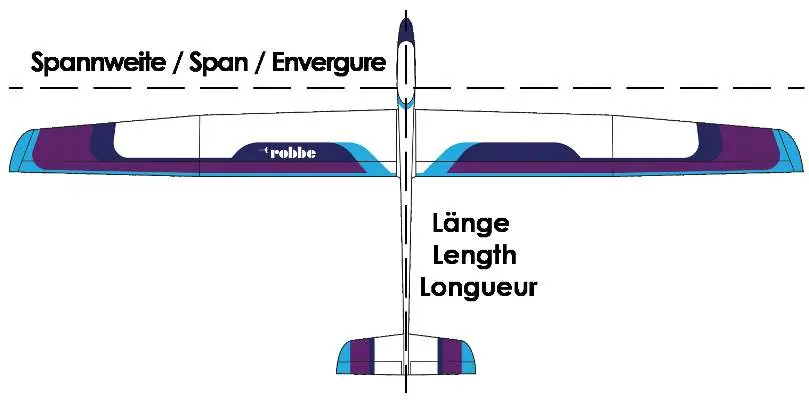
- Span: 2900 mm
- Length: 1290 mm
- Flying weight: approx. 2480 g
- Wing Area: 69.1 dm²
- Airfoil: HQ 2,5/9
- C.G.: 83 - 88 mm behind the leading edge
Practical help
Common problems
Motor vibration
Rebalance the propellers if vibrations are noticeable when the motor is running.
Bubble formation in covering foils
This is normal due to temperature/humidity changes; remove using a foil iron or hairdryer.
Burrs on shell construction
Carefully remove burrs at the seams using fine sandpaper or a file.
Before use
- Check symmetry of wings, tail, and fuselage.
- Ensure all components (wing, tail, motor, linkages) are firmly fastened.
- Perform a functional test of the drive train and remote control.
- Set Center of Gravity (CG) to 83-88mm behind the leading edge.
- Ensure battery is charged and polarity is correct.
- Remove all batteries from the model after flying.
Specs in practice
- Flying weight
- approx. 2480 g
Images and diagrams
- Assembly steps for fuselage, V-tail, and wings.
- Control throw settings for different flight modes (Normal, Speed, Thermal, Landing).
- Servo installation and linkage setup.
Model compatibility
- Designed for components specified by Robbe.
- Standard supply voltage for servos.
- Recommended LiPo: 4S 2300mAh.

Manual page author
Emily Carter
User documentation editor
Prepares concise manual descriptions and highlights the most useful setup, operation, and maintenance information for readers.