Hvac / Air Conditioners
Noaton TRITON Ceiling Fan User Manual
Quick guide for the Noaton TRITON ceiling fan, including installation steps, remote control functions, maintenance tips, and troubleshooting.
Table of contents
Manual images
Jump to the sectionQuick guide from the manual
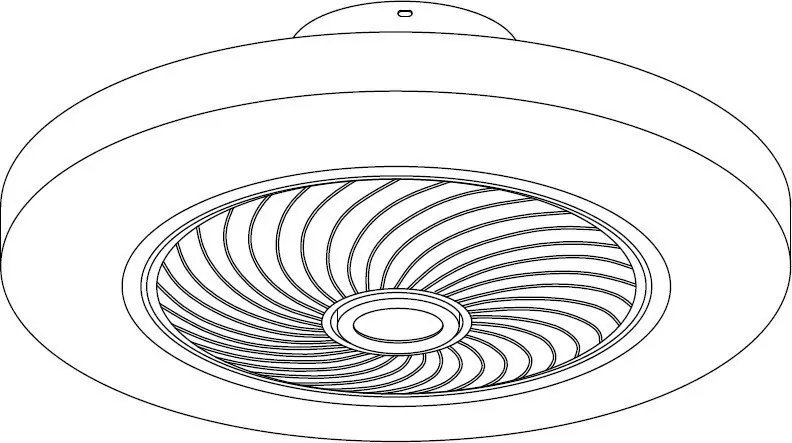
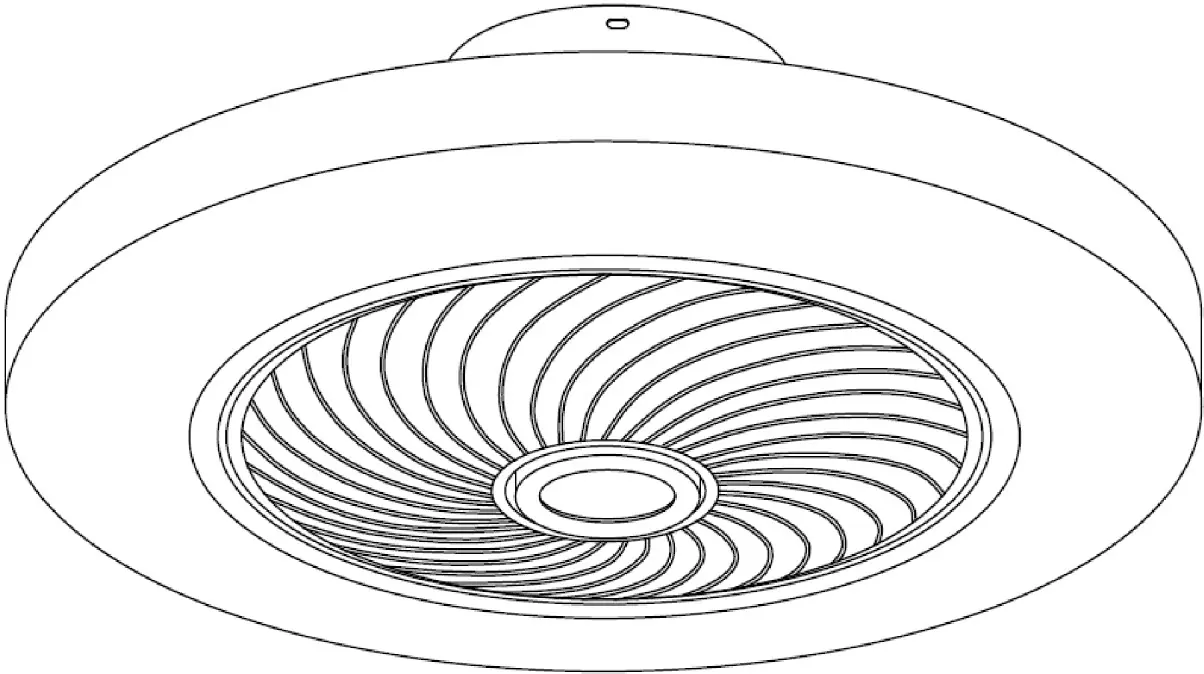
The Noaton TRITON ceiling fan is designed for indoor domestic use. It features an integrated LED light and is controlled via the included infrared remote control. Proper installation by a qualified electrician is mandatory to ensure safety and warranty validity.
Installation

- Mount the provided bracket to the ceiling or wall using the supplied dowels and screws.
- Disconnect the household power supply before starting any electrical work.
- Connect the household circuit wires to the corresponding fan wires.
- Attach the fan body to the bracket using the provided screws, ensuring no wires are pinched.
- Verify all screws are securely tightened.
- Restore power.
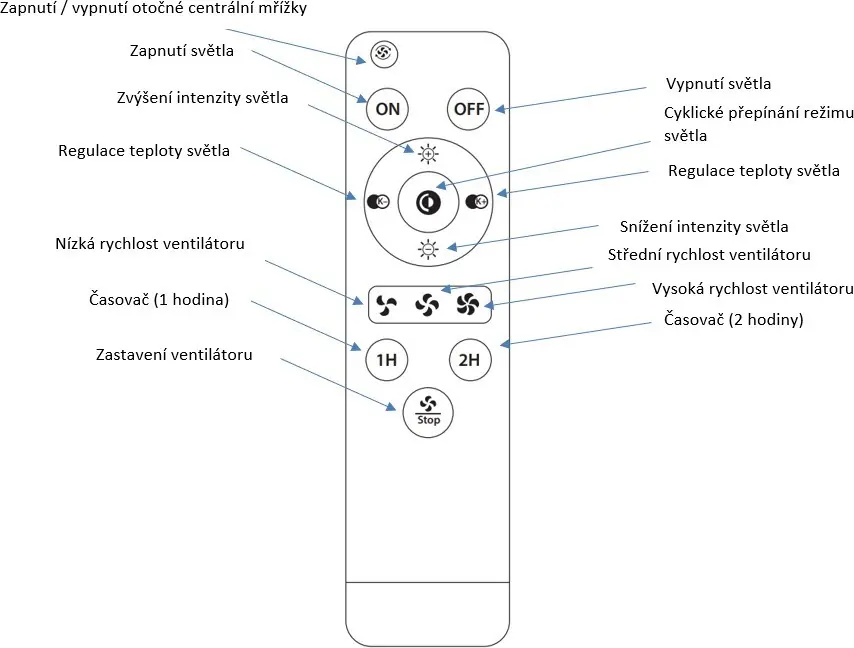
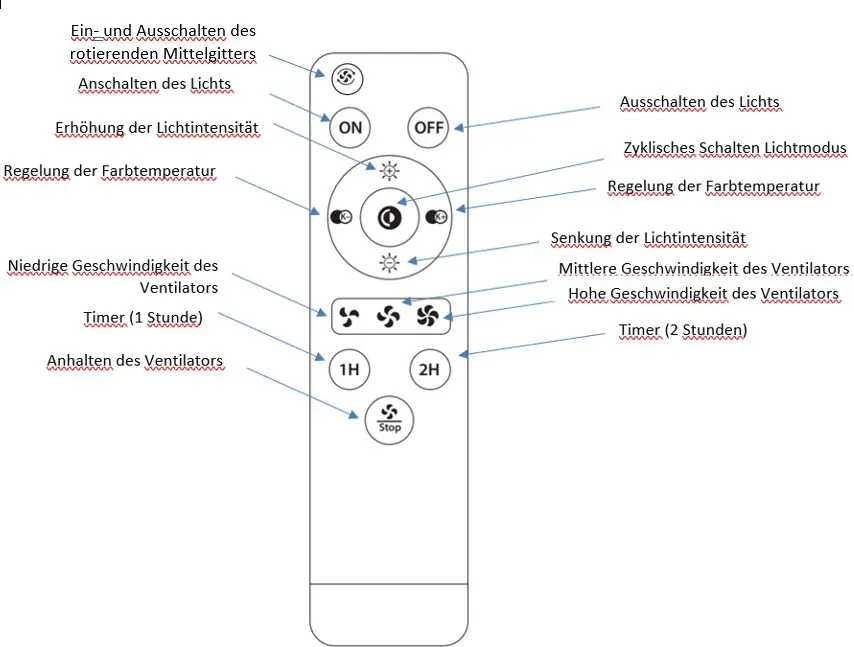
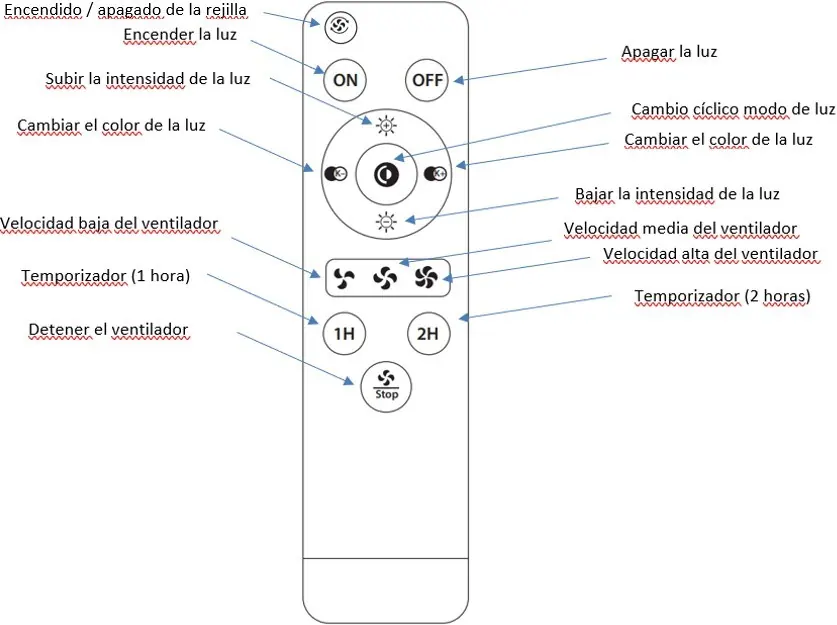
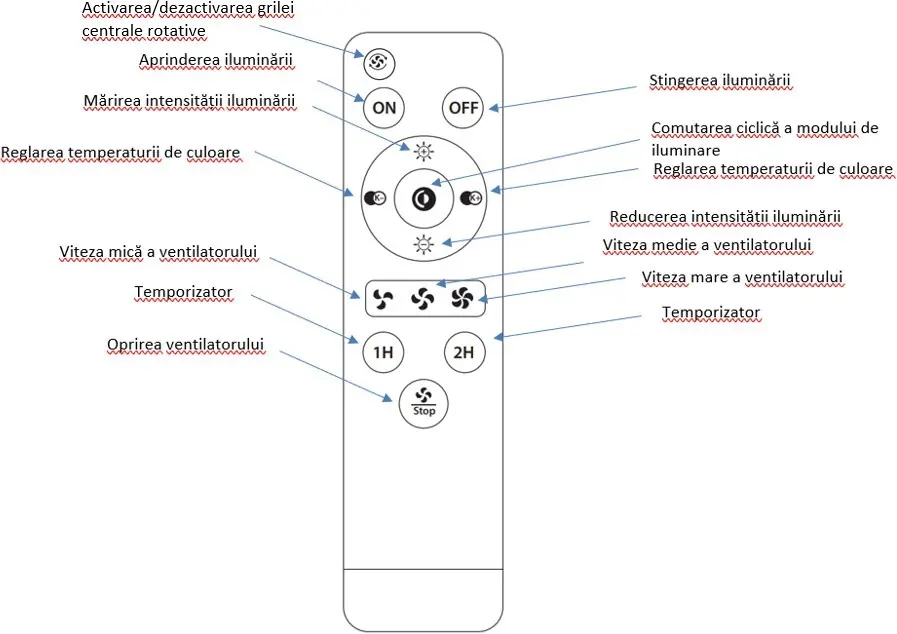
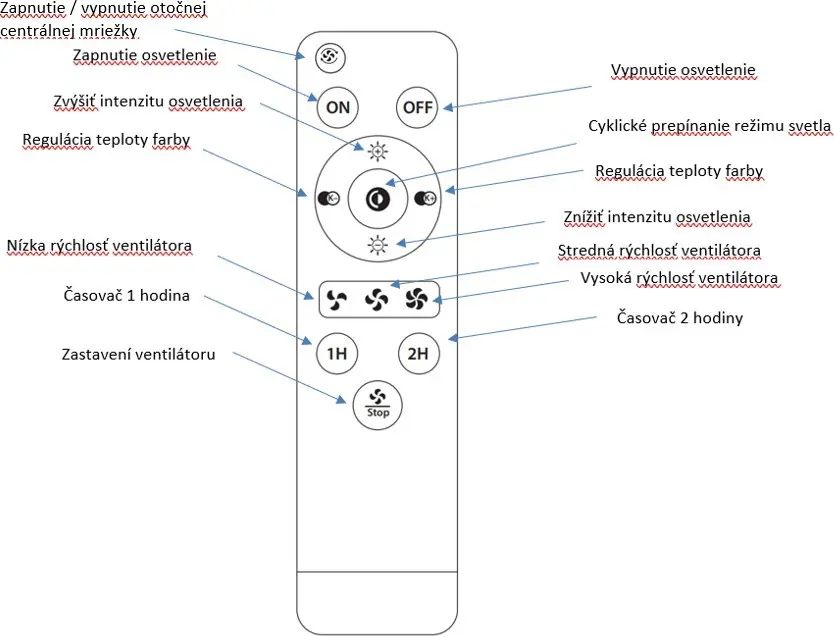
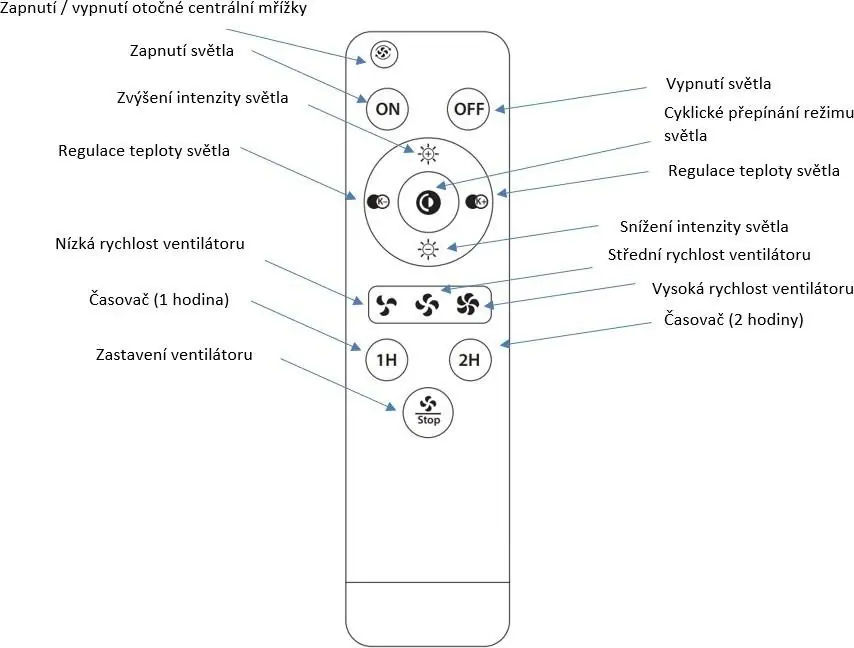
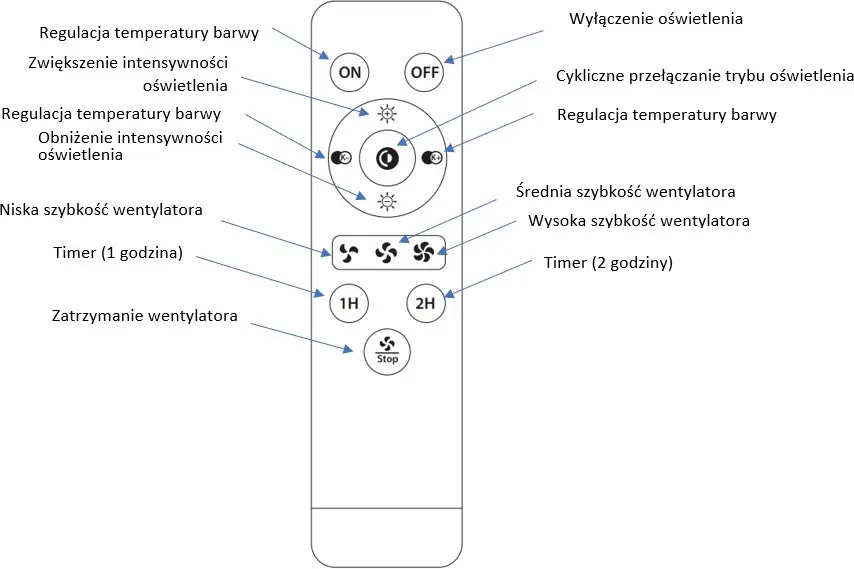
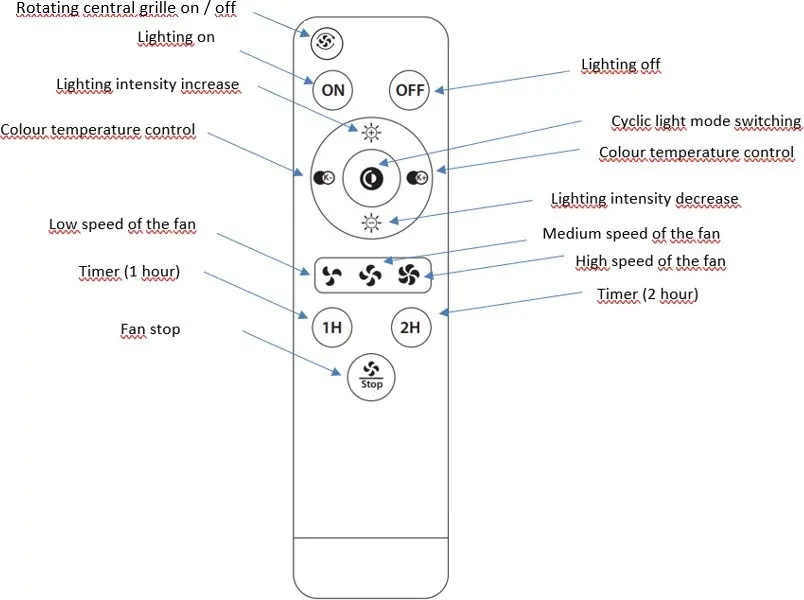
Remote control
The remote control uses infrared signals and does not require pairing. For optimal performance, keep the remote within 4 meters of the fan and ensure there are no obstacles between the remote and the fan. Point the top of the remote (where the IR diode is located) directly at the fan.
Maintenance
Due to the fan's rotation, screws may loosen over time. Check and tighten all screws at least twice a year. Clean the fan regularly using a soft, damp cloth or a fine-bristled brush. Do not use water, chemicals, detergents, or abrasive materials, as these can damage the motor or electronic components.
Troubleshooting
- Fan does not rotate: Check fuses, ensure electrical connection is secure (requires a qualified electrician), replace remote batteries, or re-sync the remote.
- Noisy operation: Tighten loose screws or the mounting bracket. Ensure only the original remote is used.
- Mechanical noise: Allow the fan to run for at least 8 hours during the first use to let parts settle.
- Light does not turn on: Contact the service department.
- Insufficient airflow: Ensure no objects are obstructing the airflow and that the fan diameter is appropriate for the room size.
Manufacturer information
Noaton
Practical help
Common problems
Fan does not rotate
Check fuses, verify electrical connections, replace remote batteries, or re-sync the remote using the central button.
Noisy operation
Tighten all screws and the mounting bracket. Ensure you are using the original remote control.
Insufficient airflow
Remove objects near the fan that may restrict airflow or ensure the fan diameter is suitable for the room size.
Before use
- Ensure the installation surface can support at least 30 kg.
- Verify the fan is installed at least 230 cm above the ground.
- Ensure there is at least 30 cm of clearance from walls or obstacles.
- Check that all screws are tightened after installation.
- Ensure the fan is connected to a protected circuit.
Specs in practice
- Protection class
- Class II for model 12050, Class I for model 12058.
- Remote control
- Infrared (IR) technology; requires line-of-sight and max 4m distance.
Images and diagrams
- The remote control features a central pad for light intensity and color temperature adjustment.
- Timer buttons (1H/2H) allow for automatic shutdown.
- The fan symbol button (on selected models) controls the motor for the central grille.
Model compatibility
- Not suitable for rooms with high humidity (e.g., bathrooms, swimming pools).
- Do not connect to dimmers, potentiometers, or wall switches.
- Only use the supplied remote control.

Manual page author
Emily Carter
User documentation editor
Prepares concise manual descriptions and highlights the most useful setup, operation, and maintenance information for readers.