Electronics / Monitors
Philips 190S8 LCD Monitor User Guide
Quick guide for the Philips 190S8 LCD monitor, covering setup, OSD menu navigation, SmartImage features, and troubleshooting.
Table of contents
Manual images
Jump to the sectionQuick guide from the manual
This document provides essential information for setting up and using your Philips 190S8 LCD monitor. It covers physical installation, connection to your PC, OSD menu navigation, and troubleshooting common issues.
Device Description
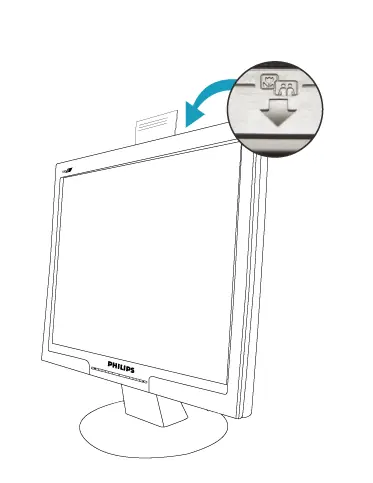
The 190S8 is a 19-inch LCD monitor featuring SmartImage technology for optimized display settings, SmartContrast for dynamic contrast adjustment, and dual-input support (VGA and DVI). It includes an ergonomic stand with tilt adjustment and is TCO'03 certified.
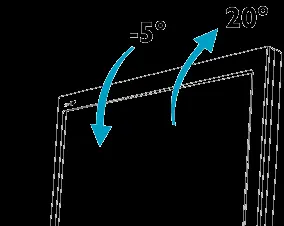
Installation and Connection
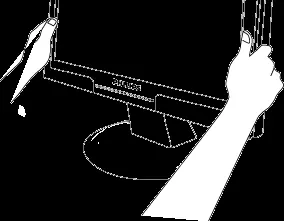

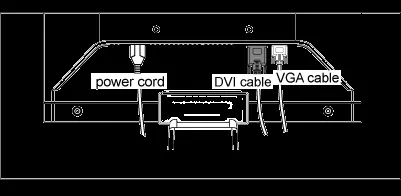
- Connect the power cord to the back of the monitor.
- Connect the VGA or DVI signal cable from the monitor to your computer.
- Plug the power cords of both the monitor and the computer into a nearby power outlet.
- Turn on the computer and the monitor.
OSD Menu and Settings
The On-Screen Display (OSD) allows you to adjust monitor settings such as brightness, contrast, color temperature, and input source. Use the buttons on the front bezel to navigate the menu and confirm selections.
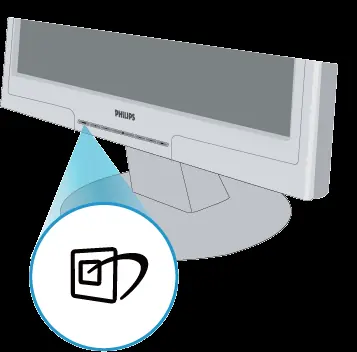
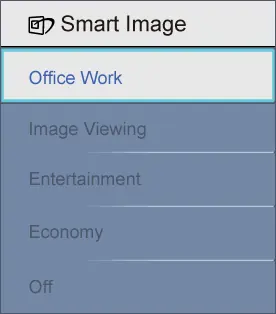
SmartImage and SmartControl II
SmartImage provides preset modes (Office Work, Image Viewing, Entertainment, Economy, Off) to optimize display settings for different content. SmartControl II is software that allows you to adjust monitor settings directly from your computer via a graphical interface.
Troubleshooting
If you encounter issues, check the following:
- No image/Power LED off: Ensure the power cable is securely connected and the monitor is turned on.
- No image/LED amber or yellow: Ensure the computer is on and the signal cable is properly connected. Check for bent pins on the cable.
- Image position incorrect: Press the 'Auto' button or adjust Phase/Clock settings in the OSD menu.
Technical Specifications
- Panel Type: LCD TFT
- Screen Size: 19" visual
- Resolution: 1280 x 1024 @ 60Hz (recommended)
- Power Consumption:< 36W (normal)
Manufacturer information
Philips
Practical help
Common problems
No image (Power LED off)
Ensure the power cable is plugged into the wall outlet and the back of the monitor. Check that the power button on the front is in the ON position.
No image (Power LED amber/yellow)
Ensure the computer is turned off, the signal cable is properly connected, and there are no bent pins on the cable. The monitor may be in power-saving mode.
Image position incorrect
Press the 'Auto' button or adjust the Phase/Clock settings in the OSD menu.
Before use
- Unpack all parts from the accessory package.
- Ensure the monitor is placed away from direct sunlight and heat sources.
- Verify that the power outlet and signal cable are easily accessible.
- Ensure the computer is turned off before connecting the signal cable.
- Check that the monitor is set to the recommended resolution of 1280x1024 at 60Hz.
Specs in practice
- Power Consumption
- Normal operation uses less than 36W; power-saving modes use less than 1W.
Images and diagrams
- Front panel buttons: 1 (Power), 2 (OSD Menu), 3 (Adjust), 4 (Brightness), 5 (Auto/Back), 6 (Input), 7 (SmartImage).
- Rear panel: Kensington lock, VGA input, Power input, DVI-D input.
Model compatibility
- Compatible with standard PC, Mac, and workstation systems.
- Plug-and-Play compatible with Windows 95, 98, 2000, XP, and Vista.
- SmartControl II requires a compatible graphics card and DDC/CI interface.

Manual page author
David Miller
Documentation analyst
Organizes user manual content into clear summaries, with attention to model details, product context, and everyday usability.