Electronics / Monitors
Service Manual for Philips 190EW9 TFT LCD Monitor
Comprehensive service manual for the Philips 190EW9 TFT LCD monitor, including technical specifications, disassembly instructions, firmware update procedures, DDC data, and troubleshooting guides.
Table of contents
Manual images
Jump to the sectionQuick guide from the manual
This service manual provides technical information for the Philips 190EW9 TFT LCD monitor. It is intended for qualified service personnel. Key procedures include disassembly, firmware (F/W) updates, and DDC data re-programming. Always use an isolation transformer when servicing the unit to prevent electrical shock.
Safety and maintenance
- High Voltage: The chassis contains high-voltage components. Always use an isolation transformer (>800 VA) during service.
- Handling: Handle the LCD module with care; do not press on the panel or frame. Use a wristband to prevent ESD damage.
- Cleaning: Use a soft material to clean the panel. Never use alcohol, solvents, or ammonia-based liquids.
- Safety Checks: After repair, perform leakage current tests (cold and hot) to ensure the unit is safe for the customer.
Mechanical instructions
To disassemble the monitor, follow these steps:
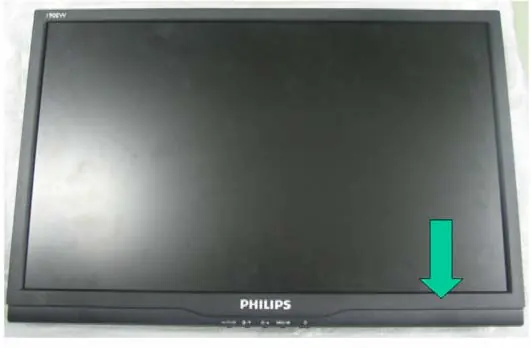
- Press the release button to remove the base.
- Press the release button to remove the stand.
- Remove the front bezel.
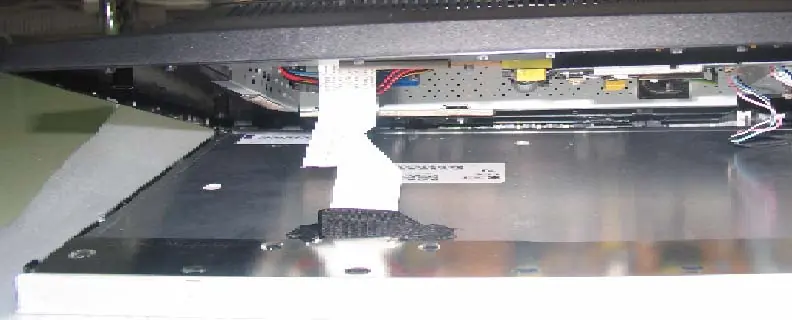
- Disconnect the LVDS cable and tape from the panel.
- Tear off the tape from the lamp cable and disconnect it from the power board.
- Remove screws to release the chassis, function key cable, and internal boards.
Electrical instructions
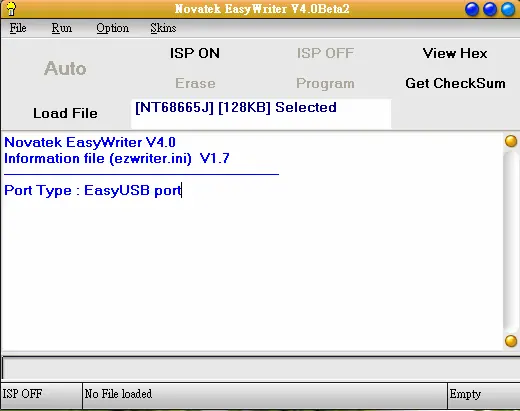
Firmware updates require the "ISP Tool" (EasyUSB Writer V4.0) and a Windows-based PC. Connect the monitor via VGA and the ISP tool via USB. Load the appropriate hex file (H00 or H01) and verify the checksum before programming.
Troubleshooting
Common issues and solutions:
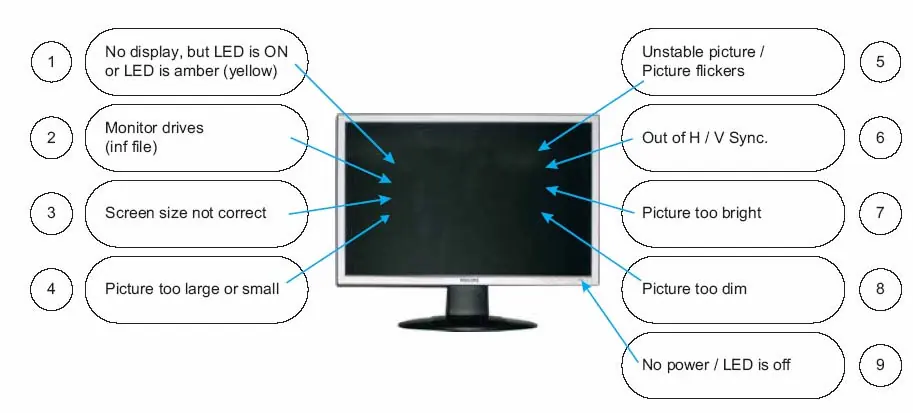
- No Picture (LED not lit): Check power cord connection and ensure the power button is in the ON position.
- No Picture (LED amber/yellow): Ensure the computer is on, the signal cable is connected, and pins are not bent.
- Incorrect Display Position: Press the AUTO button or adjust Phase/Clock in the OSD menu.
- Vertical/Horizontal Flicker: Press the AUTO button or adjust Phase/Clock settings.
Technical specifications
- Resolution: 1440 x 900 (WXGA+)
- Panel: 19-inch TN+film
- Power Consumption: ≤ 42W (Max)
- Operating Temperature: 0 to 40°C
Manufacturer information
Philips
Practical help
Common problems
No picture, LED not lit
Check power cord connection and ensure the power button is in the ON position.
No picture, LED amber/yellow
Verify the computer is on, the signal cable is properly connected, and check for bent pins on the cable.
Incorrect display position or flicker
Press the AUTO button or manually adjust Phase/Clock settings in the OSD menu.
OSD menu locked
Press and hold the MENU button for more than 6 seconds to unlock.
Before use
- Ensure the monitor is placed in a well-ventilated area.
- Verify the power source is within the 90-264V AC range.
- Use the recommended resolution of 1440x900 at 60Hz.
- Ensure the signal cable is securely connected to the PC graphics card.
- Avoid placing the monitor in direct sunlight or high humidity.
Specs in practice
- Power Consumption
- Maximum 42W during operation; ≤ 2W in power saving mode.
- Viewing Angle
- 170° horizontal and 160° vertical (typical at CR>10).
- Response Time
- 5ms typical for smooth motion display.
Images and diagrams
- Wiring Diagram: Shows connections between the function PCBA, power board, and LCD panel.
- Block Diagram: Illustrates the signal path from input to the NT68625 scaler and panel.
- Exploded View: Provides a breakdown of all mechanical parts and screw locations for disassembly.
Model compatibility
- Supports VESA/DPMS power management standards.
- Compatible with standard Macintosh and IBM-compatible PCs.
- Analog input only (15-pin D-Sub).

Manual page author
David Miller
Documentation analyst
Organizes user manual content into clear summaries, with attention to model details, product context, and everyday usability.