Electronics / Monitors
Philips 190SW8 LCD Monitor User Guide
Quick guide for the Philips 190SW8 LCD monitor, covering setup, OSD adjustments, SmartManage software, troubleshooting, and warranty information.
Table of contents
Manual images
Jump to the sectionQuick guide from the manual
This guide provides essential information for setting up and using your Philips 190SW8 LCD monitor. Key procedures include connecting the monitor to your PC, installing the necessary drivers, and using the On-Screen Display (OSD) to optimize performance. For optimal display, ensure your settings are configured to 1440x900 at 60Hz.
Installation and Setup
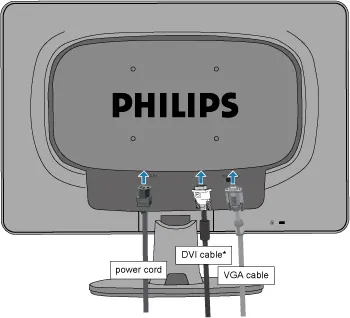
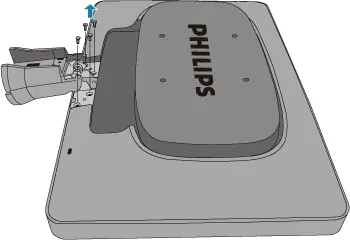
To install the monitor, place the base on a flat surface and slide the monitor body onto it. Connect the power cord and the signal cable (VGA or DVI) to the back of the monitor and your computer. For Windows systems, install the provided .inf and .icm driver files from the included CD-ROM to ensure proper Plug & Play functionality.


On-Screen Display (OSD)
The OSD allows you to adjust screen performance directly. Use the buttons on the front bezel to navigate the menu. Key settings include:
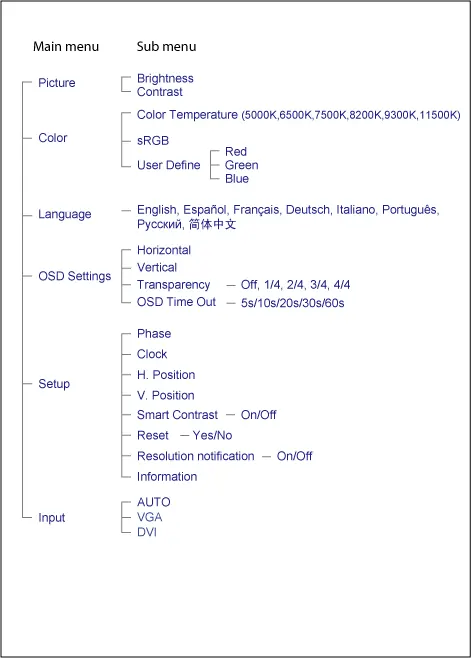
- Picture: Adjust brightness and contrast.
- Color: Select color temperature (5000K-11500K), sRGB, or user-defined RGB settings.
- Setup: Adjust phase, clock, horizontal/vertical position, and reset to factory settings.
- Input: Switch between VGA and DVI inputs.
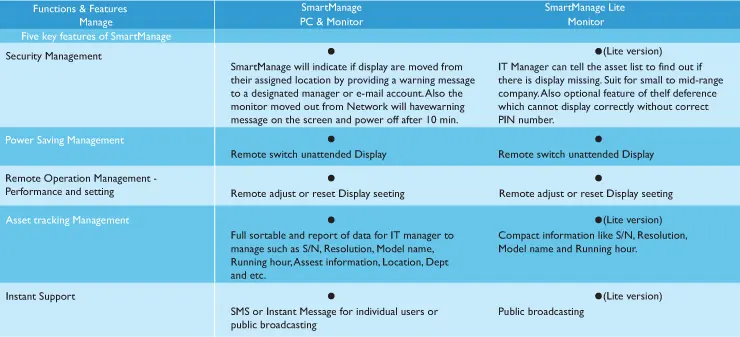
SmartManage and SmartControl II
SmartControl II is software that allows you to fine-tune monitor settings via an on-screen interface instead of hardware buttons. It includes a wizard for initial calibration. SmartManage is a more advanced tool for IT administrators to manage assets across a network. Note that these features are intended for business environments.
Maintenance and Safety
To maintain the monitor, keep it away from heat and direct sunlight. Clean the screen with a soft, dry cloth; do not use organic solvents like alcohol or ammonia. Always ensure the power plug and outlet are easily accessible.
Troubleshooting
If you encounter issues, check the following:
- No Picture (LED off): Ensure the power cord is connected and the monitor is turned on.
- No Picture (LED amber/yellow): Check if the computer is on and the signal cable is properly connected.
- Incorrect Display Position: Press the 'Auto' button to automatically adjust settings.
- After-image: This is a characteristic of LCD technology and usually disappears after a period of time.
Manufacturer information
Philips
Practical help
Common problems
No picture (Power LED not lit)
Ensure the power cord is plugged into the outlet and the back of the monitor. Check that the power button is in the ON position.
No picture (Power LED is amber or yellow)
Ensure the computer is turned on and the signal cable is securely connected. Check for bent pins on the cable.
Display position is incorrect
Press the 'Auto' button on the front bezel to automatically adjust the screen position.
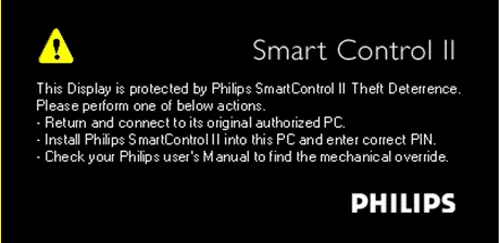
Theft Deterrence mode active
Enter your registered PIN, use the universal PIN 'PHILIPS', or perform the mechanical override by pressing the 'Menu' button for 10 seconds, followed by the 'Power' button for 10 seconds.
Before use
- Unpack all components (monitor, base, power cord, signal cables).
- Ensure the monitor is placed on a flat, stable surface.
- Verify that the power outlet is easily accessible.
- Check that your PC supports the recommended resolution of 1440x900 at 60Hz.
- Have the driver CD-ROM ready for initial setup.
Specs in practice
- Native Resolution
- 1440x900 at 60Hz is the optimal setting for the best image quality.
- Refresh Rate
- For LCDs, 60Hz is the optimal refresh rate; higher rates do not provide visible benefits.
Images and diagrams
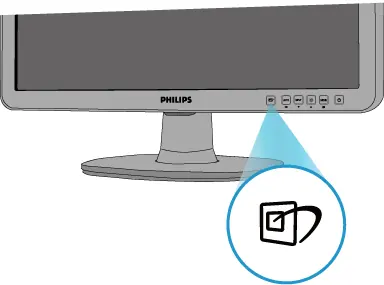
- Front panel buttons: 1-Power, 2-Menu, 3-Adjust, 4-Brightness, 5-Input, 6-Auto, 7-SmartImage.
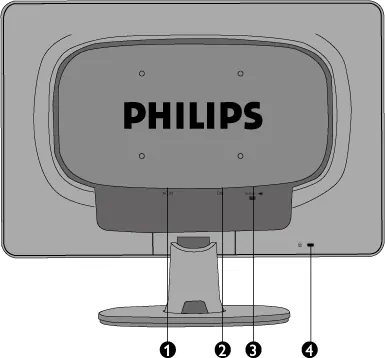
- Rear ports: 1-AC power input, 2-DVI-D input, 3-VGA input, 4-Kensington lock slot.
- Base attachment: Slide the monitor body onto the base until it clicks.
Model compatibility
- Compatible with standard PCs, Macs, and workstations.
- Plug-and-Play compatible with Windows 95, 98, 2000, XP, and Vista.
- SmartManage software is primarily for business/corporate environments.

Manual page author
Emily Carter
User documentation editor
Prepares concise manual descriptions and highlights the most useful setup, operation, and maintenance information for readers.