Electronics / Monitors
Service Manual for Philips 190X6 LCD Monitor
Technical service guide for the Philips 190X6 LCD monitor, providing detailed internal component layouts, PCB diagrams, and assembly views for professional maintenance.
Table of contents
Manual images
Jump to the sectionImportant information from the manual
This document serves as a technical service guide for the Philips 190X6 LCD monitor. It is intended for qualified service personnel to assist in the identification of internal components, PCB layouts, and assembly structures. It contains critical safety warnings regarding high voltage and proper grounding procedures.
Safety and handling
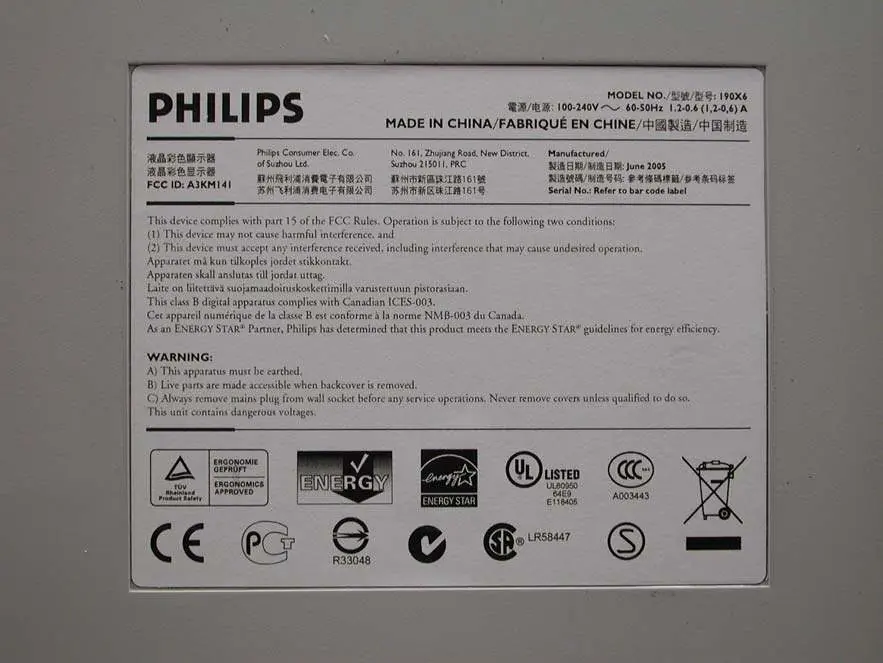
Warning: This apparatus must be earthed. Live parts are accessible when the back cover is removed. Always remove the mains plug from the wall socket before performing any service operations. Never remove covers unless qualified to do so, as the unit contains dangerous voltages.
Internal components and assembly
The manual provides detailed visual references for the internal structure of the monitor, including:
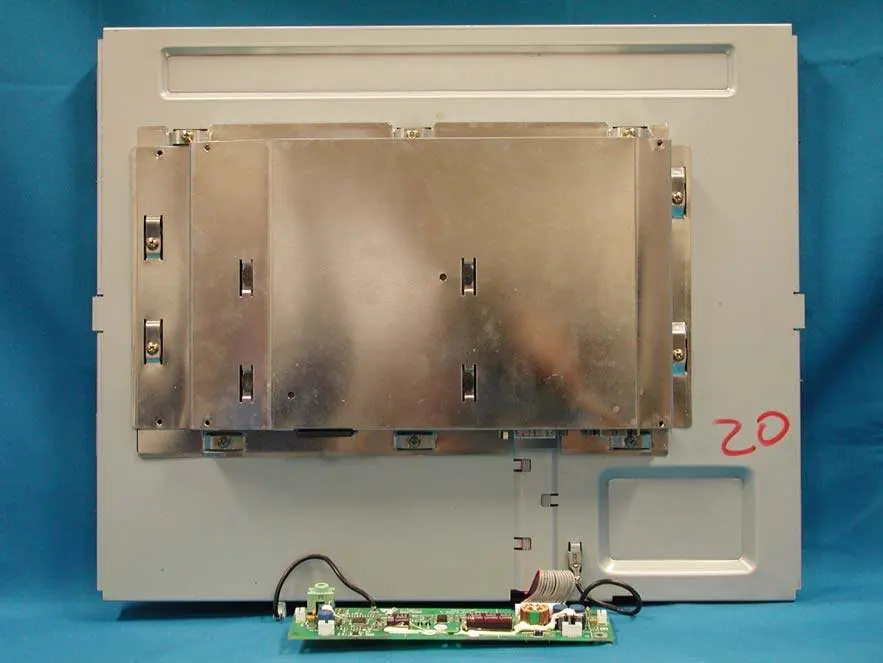
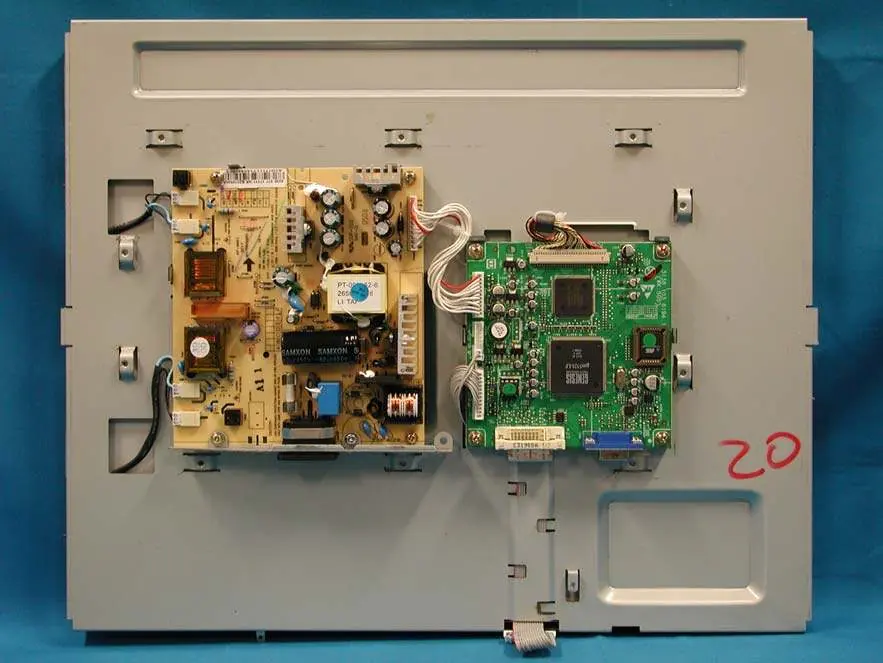

- Rear View: Views of the monitor with and without the front cabinet and back cover.
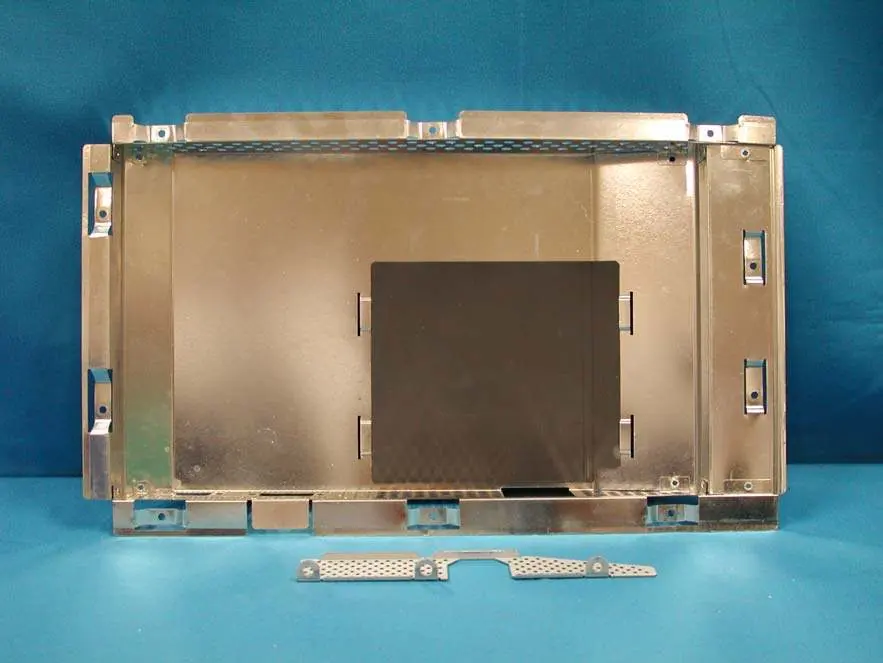
- Shielding Cover: Detailed view of the internal metal shielding components.
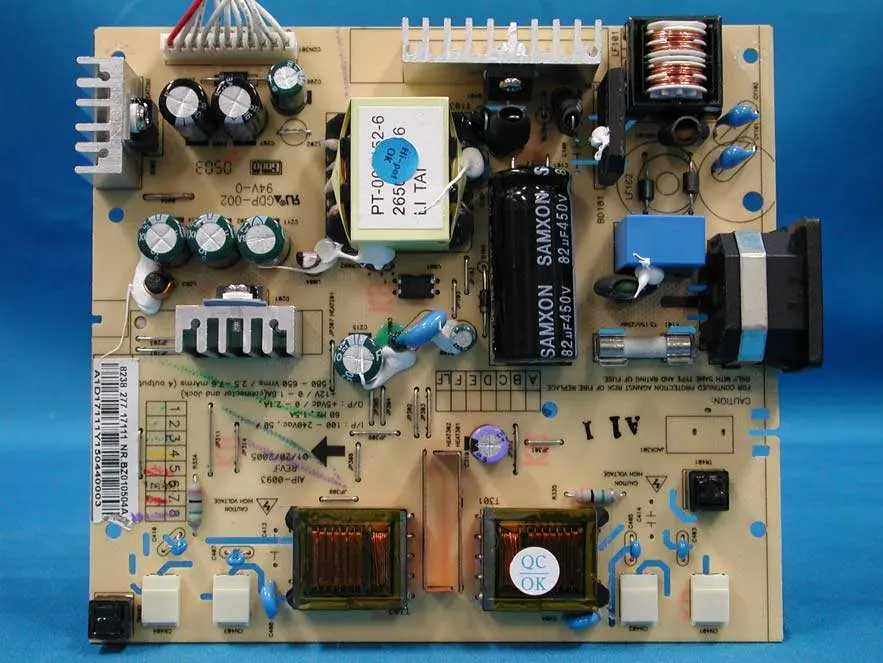
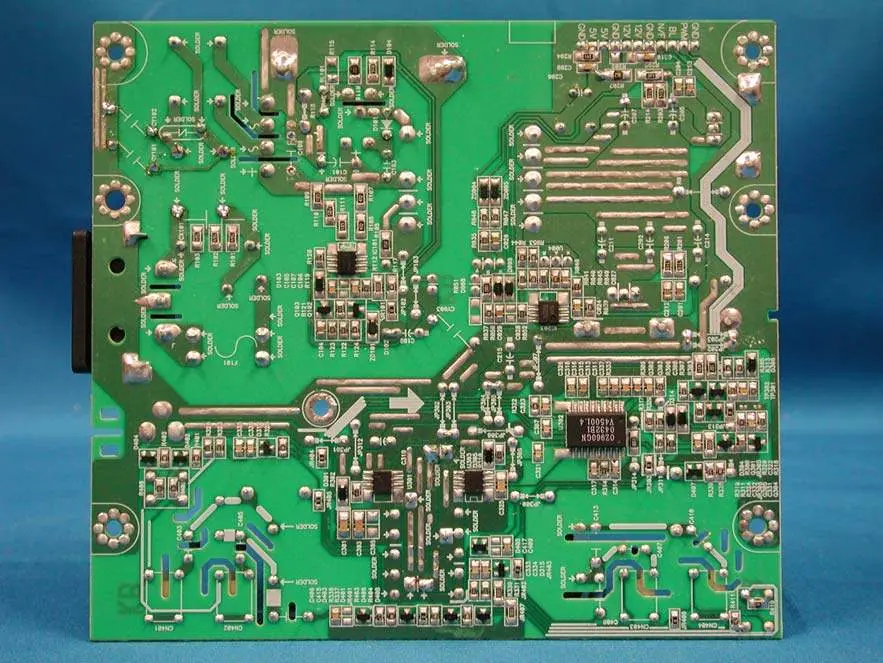
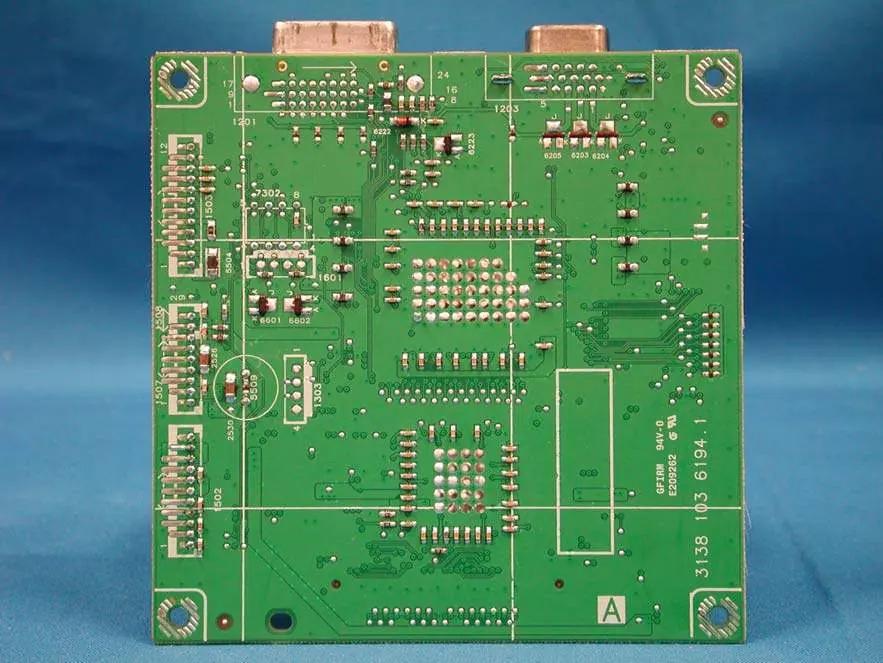
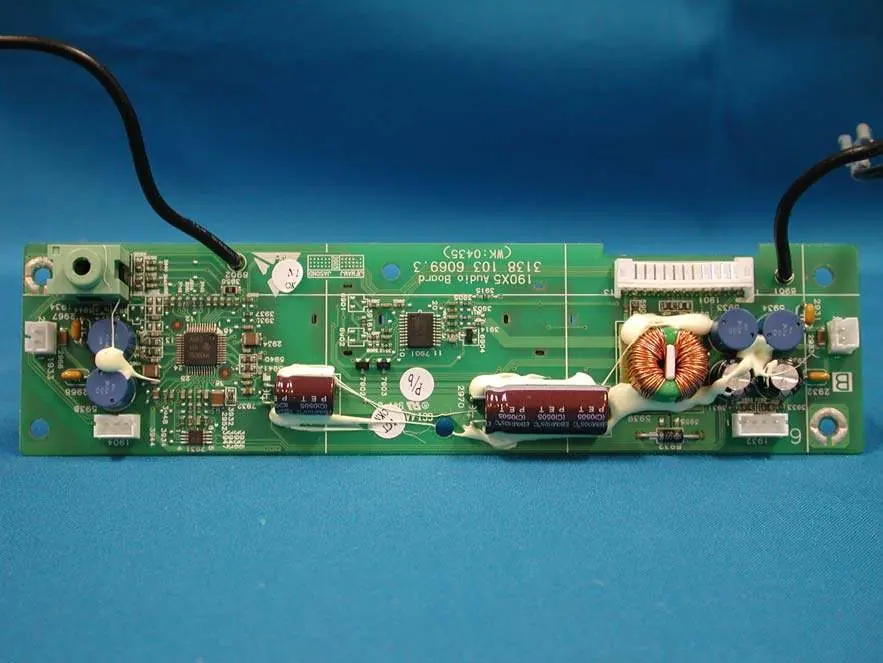
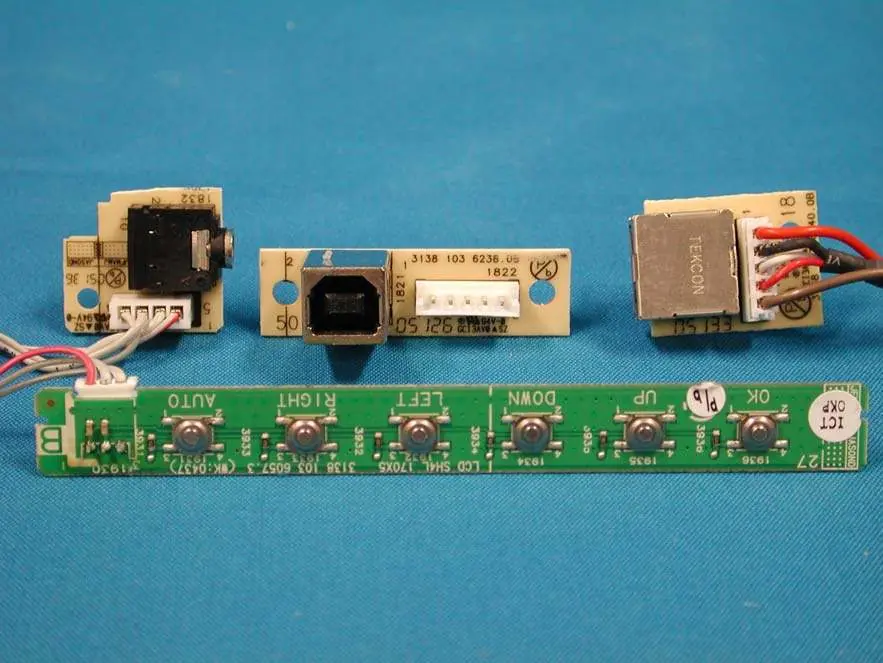
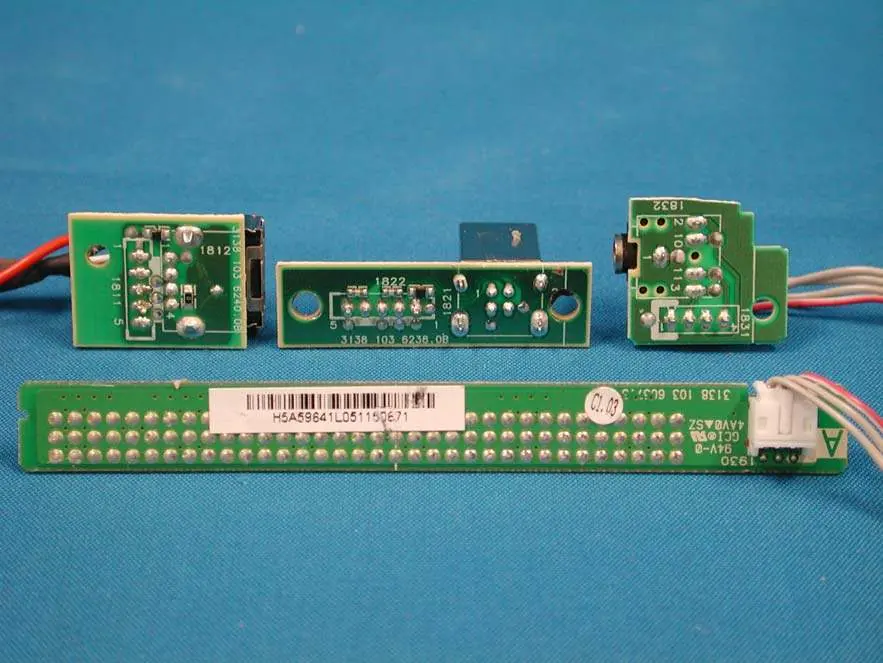
- PCB Layouts: Comprehensive photographic documentation of the various printed circuit boards, including power boards, main interface boards, and audio boards.
- Assembly: Step-by-step visual breakdown of the internal assembly, including the plate and LCD panel mounting.
Cables and connectivity
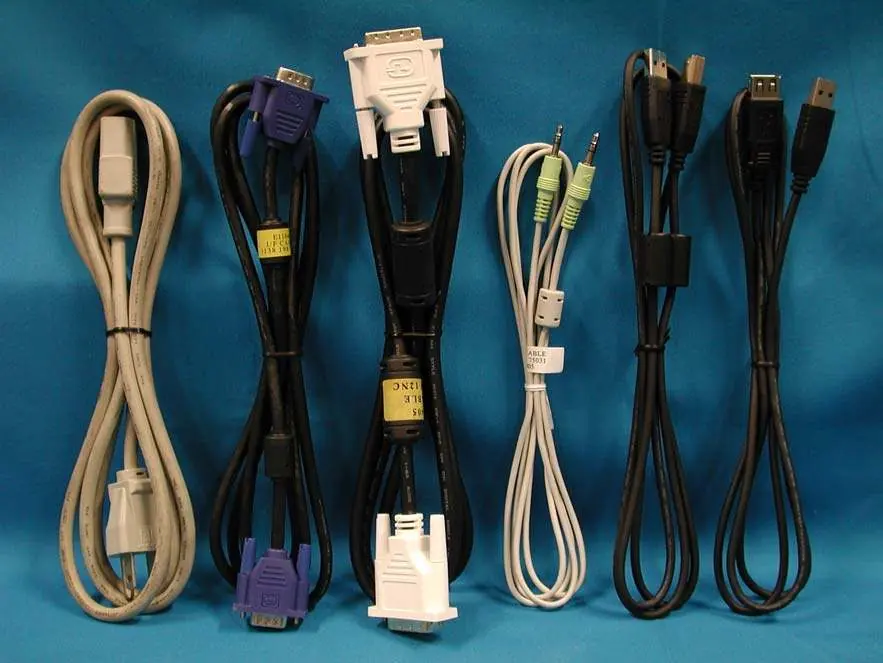
The monitor is supplied with a set of interface cables, including power cords and standard I/O cables required for signal transmission and connectivity.
Manufacturer information
Philips
Practical help
Common problems
High voltage hazard
Always disconnect the power plug from the wall outlet before removing any covers or performing internal maintenance.
Grounding requirement
Ensure the apparatus is properly earthed at all times to prevent electrical shock.
Before use
- Verify the power source is 100-240V, 60-50Hz.
- Ensure the device is connected to a grounded (earthed) wall outlet.
- Check that all interface cables are securely connected.
- Confirm the device is not operated with the back cover removed unless by qualified personnel.
Images and diagrams
- The manual includes detailed photographic layouts of the power supply board, main logic board, and audio board.
- Assembly diagrams show the sequence of the metal shielding and internal plate mounting.
Model compatibility
- This device is a Class B digital apparatus compliant with Canadian ICES-003.

Manual page author
Michael Turner
Technical manual editor
Reviews PDF manuals for structure, safety notes, and practical product details so readers can find the right information quickly.