Electronics / Monitors
Quick Start Guide for Philips 241V8/242V8 Monitor
Quick setup guide for Philips 241V8 and 242V8 series monitors. Includes instructions for stand assembly, cable connections, and OSD menu navigation.
Quick answers from the manual
Quick answer
- This guide provides basic setup instructions for the Philips V Line monitor, including stand assembly, cable connection, and OSD menu navigation. p. 1
Key actions
- Assemble the stand by clicking the base into the neck. p. 1
- Connect power and signal cables (HDMI/VGA/DP) to the rear ports. p. 1
First start
- Connect the power cable and your video source cable, then press the power button. p. 1
Show 1 more answers Show less
Where to find it in the PDF
- Quick Start Guide p. 1
Table of contents
Manual images
Click an image to enlargeQuick Start Guide
This document provides essential setup instructions for the Philips V Line monitor series (241V8/242V8). It covers the physical assembly, cable connections, and basic OSD (On-Screen Display) menu navigation.
Stand Assembly
To assemble the monitor stand:
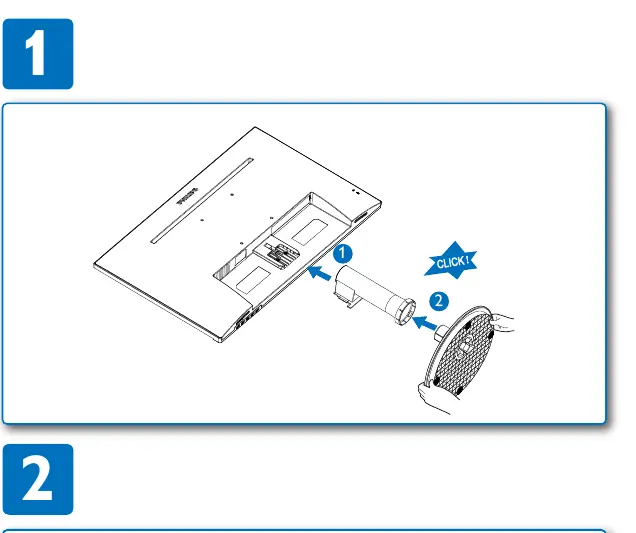
- Place the monitor face down on a flat, protected surface to avoid scratching the screen.
- Attach the stand base to the monitor neck until it clicks into place.
Cable Connections
Connect the necessary cables to the ports located on the back of the monitor:
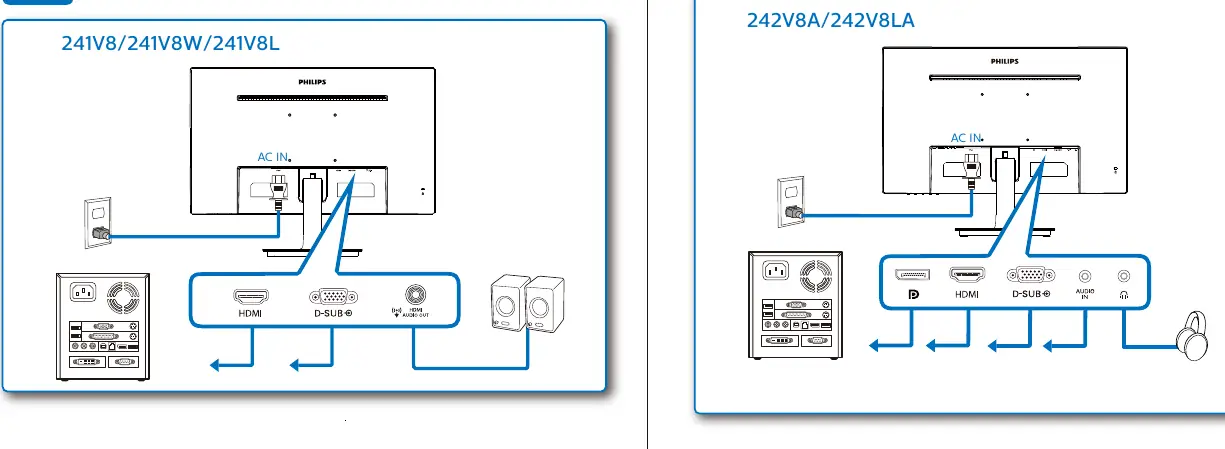
- Power: Connect the power cable to the AC IN port.
- Video Input: Connect your video source using the appropriate cable (HDMI, VGA, or DisplayPort, depending on your specific model).
- Audio: If applicable, connect the audio cable.
Note: Port availability varies by specific model (241V8, 241V8W, 241V8L, 241V8LA, 242V8A, 242V8LA).
OSD Menu Navigation
Use the physical buttons on the monitor to access and navigate the OSD menu:
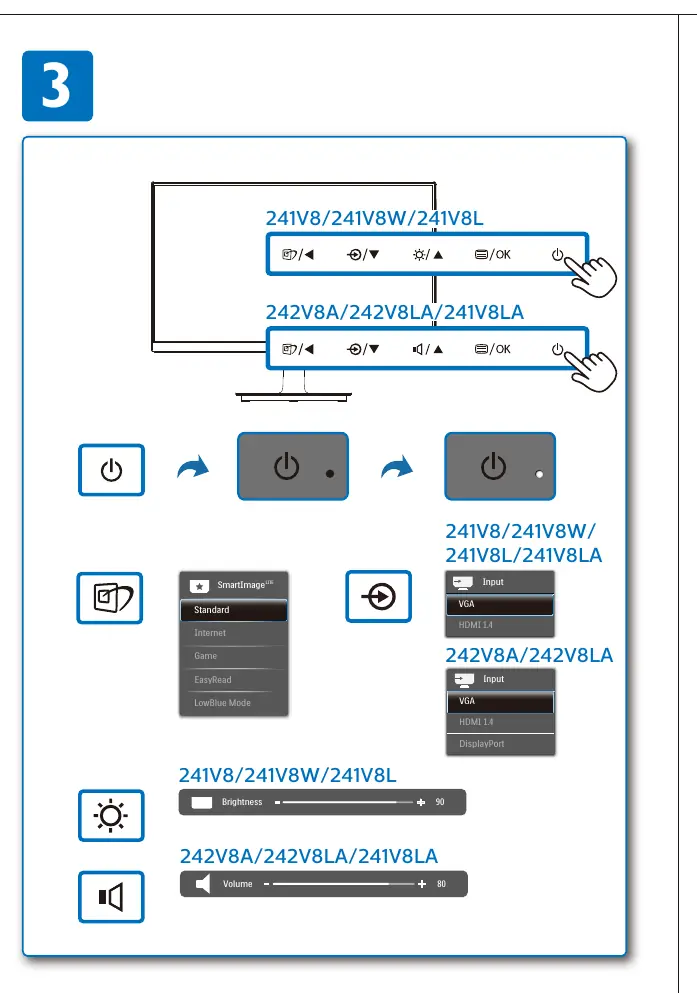
- Power Button: Turns the monitor on or off.
- Menu/OK Button: Opens the OSD menu or confirms a selection.
- Navigation Buttons: Use the arrow keys to move through the menu options (Picture, Color, Language, Audio, Input).
- SmartImage: Access preset image modes such as Standard, Game, or EasyRead.
Manufacturer information
Philips
Practical help
Before use
- Ensure the monitor is placed on a flat, stable surface.
- Verify you have the correct cables (Power, HDMI/VGA/DP, Audio) for your setup.
- Do not touch the screen surface during assembly to prevent damage.
Images and diagrams
- Step 1: Stand assembly procedure.
- Step 2: Rear port identification and cable connection.
- Step 3: OSD menu button layout and navigation.
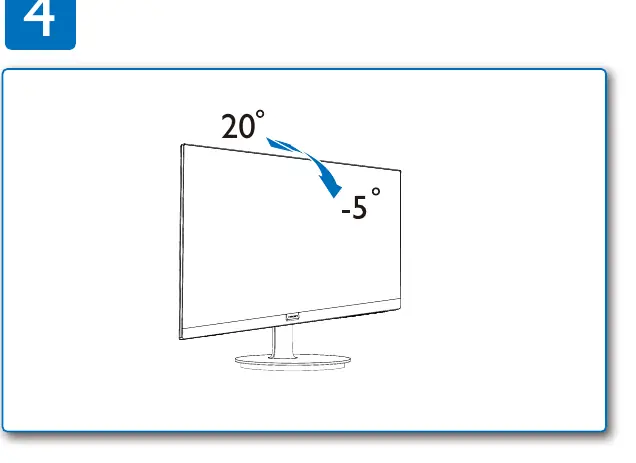
- Step 4: Monitor tilt adjustment (-5 to 20 degrees).
Show more Show less
Model compatibility
- Connection ports vary by specific model (e.g., 241V8LA vs 242V8A). Check the back of your unit.

Manual page author
David Miller
Documentation analyst