Electronics / Monitors
Quick Start Guide for Philips 242E1 Gaming Monitor
Quick start guide for the Philips 242E1 gaming monitor. Includes assembly instructions, connection guide, OSD menu navigation, and tilt adjustment settings.
Quick answers from the manual
Quick answer
- This guide provides instructions for assembling the Philips 242E1 monitor, connecting cables, and navigating the OSD menu. p. 1
Key actions
- Assemble the stand p. 1
- Connect power and video cables p. 1
- Navigate OSD menu p. 1
First start
- Connect the AC/DC adapter and video cable (HDMI or DP) to the monitor and your computer. p. 1
Show 2 more answers Show less
Technical specifications
| Parameter | Value | Meaning | Pages |
|---|---|---|---|
| Tilt | -5° to 20° | Vertical adjustment range | p. 1 |
Where to find it in the PDF
- Quick Start Guide p. 1
Table of contents
Manual images
Click an image to enlargeQuick guide from the manual
This guide provides the essential steps to set up and configure your Philips 242E1 gaming monitor. It covers physical assembly, cable connections, and basic OSD (On-Screen Display) menu navigation.
Package contents
Ensure the following items are included in your package:
- Monitor display
- Stand base
- AC/DC Adapter
- DisplayPort (DP) cable
- HDMI cable
Assembly
Follow these steps to assemble the monitor stand:
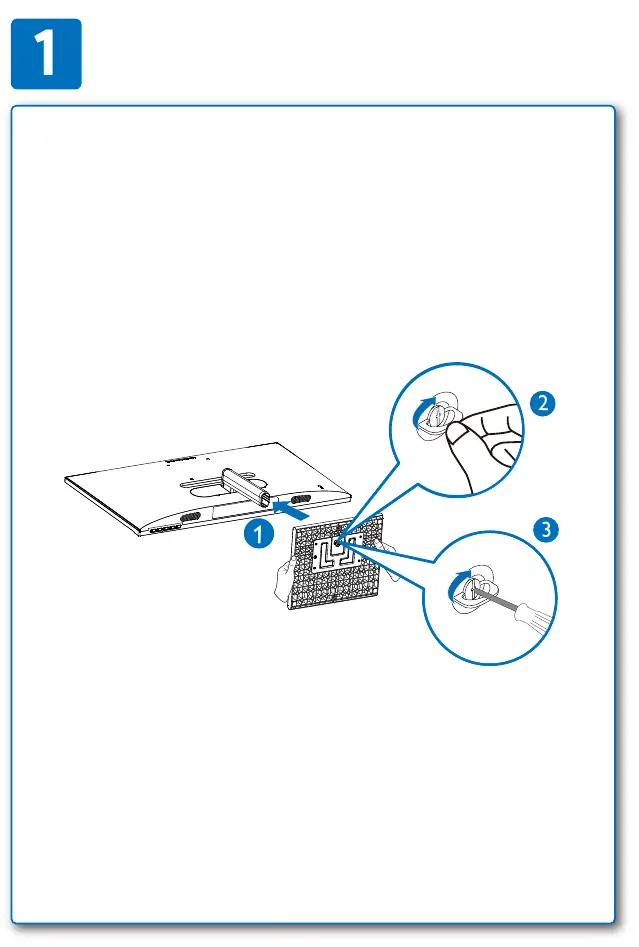
- Attach the stand base to the monitor arm.
- Ensure the connection is secure before placing the monitor on a flat surface.
Connections
Connect your devices using the ports located on the back of the monitor:
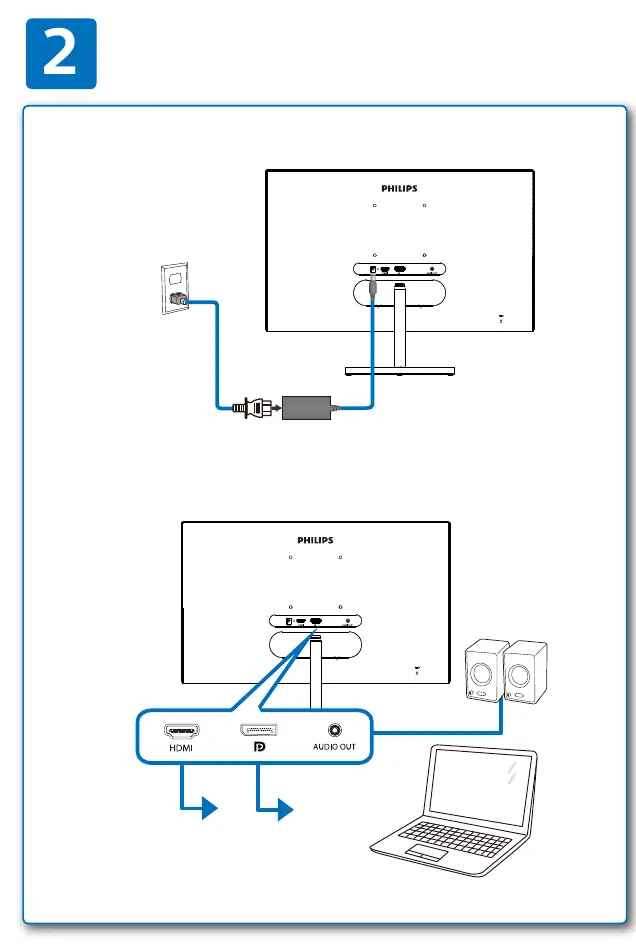
- Power: Connect the AC/DC adapter.
- Video: Use the HDMI or DisplayPort (DP) cable to connect to your computer.
- Audio: Use the audio out port for external speakers or headphones.
OSD Menu and Controls
Use the buttons on the monitor to navigate the OSD menu:
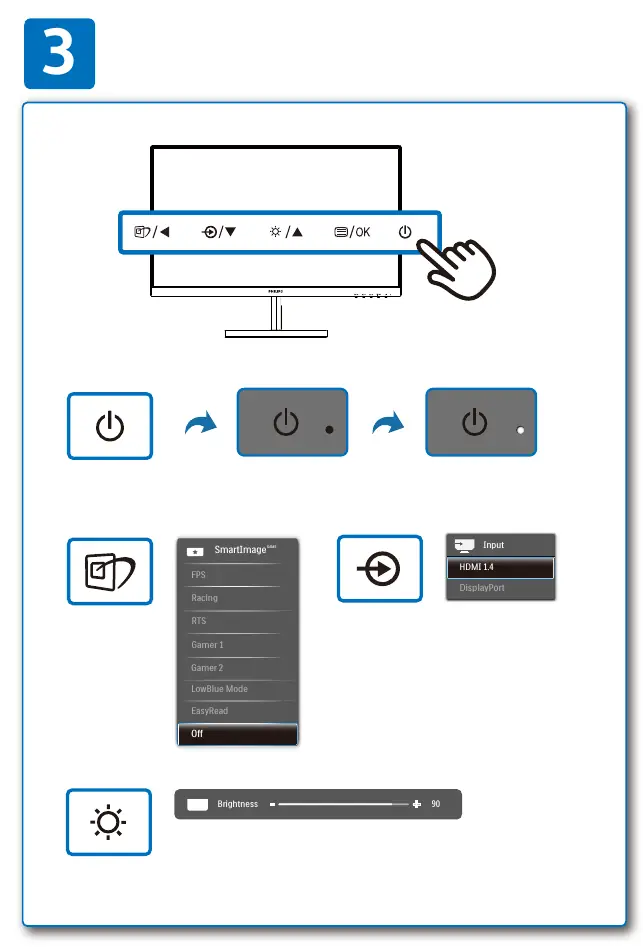
- Navigation: Use the directional buttons to move through the menu options.
- Selection: Press the OK button to select an option.
- Menu Structure: The OSD includes settings for LowBlue Mode, Picture, Color, Language, Audio, Input, and TXT.
- SmartImage Game: Access preset modes including Racing, FPS, RTS, Gamer 1, Gamer 2, LowBlue Mode, and EasyRead.
Tilt Adjustment
The monitor stand allows for vertical tilt adjustment to improve viewing comfort:
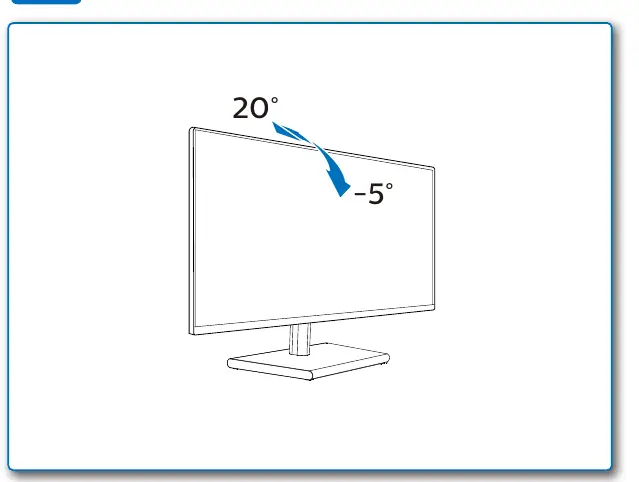
- Tilt range: -5° to 20°.
Manufacturer information
Philips
Practical help
Before use
- Ensure you have the AC/DC adapter
- Check for DP and HDMI cables
- Place monitor on a flat surface
- Verify all cable connections are secure
Specs in practice
- SmartImage Game
- Preset display modes optimized for different gaming genres (Racing, FPS, RTS, Gamer 1, Gamer 2)
Show more Show less
Images and diagrams
- Step 1: Attach stand base to the monitor
- Step 2: Connect power and video cables
- Step 3: Use OSD buttons for menu navigation
- Step 4: Adjust monitor tilt
Model compatibility
- Supports HDMI 1.4
- Supports DisplayPort

Manual page author
Emily Carter
User documentation editor