Lighting / Outdoor Lighting
User Manual for Philips Bustan Outdoor Wall Light
Quick guide for installing and maintaining the Philips Bustan outdoor wall light. Includes step-by-step mounting instructions, wiring diagrams, and safety precautions for models 16483/xx/P0 and 16483/xx/P3.
Table of contents
Manual images
Click an image to enlargeQuick guide from the manual
This manual provides installation instructions for the Philips Bustan outdoor wall light. Before beginning any installation, ensure the main power supply is switched off at the circuit breaker to prevent electrical shock.
Installation
The installation process requires basic tools, including a drill, a screwdriver, and a utility knife. The fixture is rated IP44, meaning it is protected against splashing water, making it suitable for outdoor use.
Mounting steps
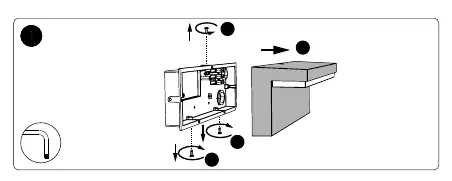
- Power Off: Ensure the main power supply is turned off.
- Prepare Base: Mark the mounting holes on the wall, drill them, and secure the mounting base using the provided screws and wall plugs.
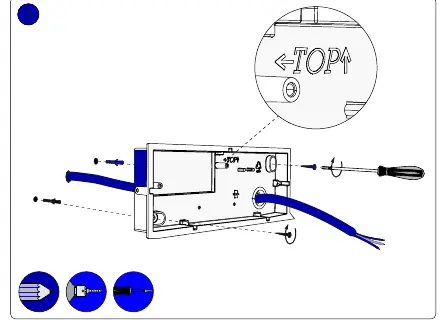
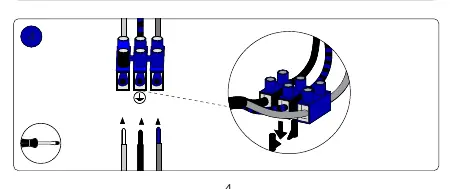
- Wiring: Feed the power cable through the rubber grommet in the base. Connect the wires to the terminal block, ensuring the Live, Neutral, and Earth wires are connected to their respective terminals.
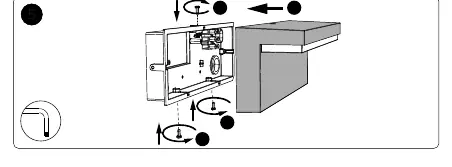
- Final Assembly: Attach the light fixture to the mounting base and secure it using the provided screws.
- Power On: Restore the main power supply to test the light.
Safety and Maintenance
Ensure all seals are properly fitted during installation to maintain the IP44 water resistance rating. If the light fails to operate, verify that the power is on and that all wiring connections are secure.
Manufacturer information
Philips
Practical help
Common problems
Light does not turn on
Verify that the main power supply is switched on at the circuit breaker and check that all wiring connections at the terminal block are secure.
Before use
- Ensure the main power supply is turned off at the circuit breaker.
- Verify you have a drill, screwdriver, and utility knife ready.
- Check that the mounting surface is suitable for the fixture.
- Confirm the IP44 rating is sufficient for your intended installation location.
Images and diagrams
- The manual uses icons to indicate that the power must be switched OFF before installation and ON after completion.
- Wiring diagrams illustrate the correct connection points for Live, Neutral, and Earth wires.
Model compatibility
- This manual applies to models 16483/xx/P0 and 16483/xx/P3.

Manual page author
Emily Carter
User documentation editor
Prepares concise manual descriptions and highlights the most useful setup, operation, and maintenance information for readers.