Lighting / Marine Lighting
Installation Guide for Resistex Komet LED Porthole
Quick installation guide for the Resistex Komet LED Porthole. Includes safety instructions, mounting steps, and maintenance tips for model 850700.
Quick answers from the manual
Quick answer
- The Resistex Komet is an LED porthole fixture. Installation must be performed by a professional, ensuring power is disconnected before starting. p. 1
Key actions
- Mounting the fixture p. 2
First start
- Ensure power is off before starting installation. p. 1
Show 3 more answers Show less
Maintenance and reset
- Do not use chemicals or abrasives to clean the fixture. p. 1
Technical specifications
| Parameter | Value | Meaning | Pages |
|---|---|---|---|
| IP | 65 | Dust tight and water jet resistant | p. 1 |
| IK | 10 | High impact protection | p. 1 |
Where to find it in the PDF
- Safety and Dimensions p. 1
- Installation Steps p. 2
Table of contents
Manual images
Click an image to enlargeImportant Information
This document provides installation and safety instructions for the Resistex Komet LED Porthole (Model 850700). The installation must be performed by a professional installer in compliance with local electrical standards and regulations.
Safety Notes
- Power Supply: Never work on the luminaire while it is connected to a power source. Ensure the voltage is disconnected before starting.
- ESD Protection: The device is sensitive to electrostatic discharges (ESD). Handle with appropriate precautions.
- Compliance: Installation must adhere to all relevant electrical standards.
Installation
Follow these steps to install the Komet LED Porthole:
- Ensure the power is turned off at the main breaker.
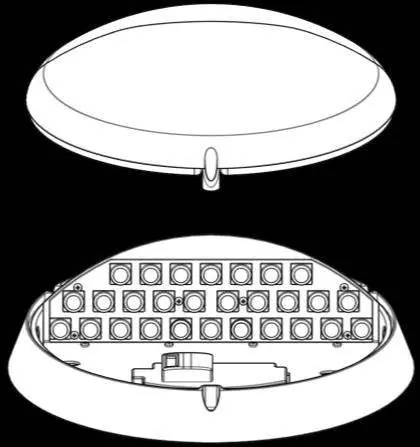
- Remove the cover from the base of the fixture.
- Mark and drill the mounting holes (ø6mm) on the installation surface.
- Feed the power cable through the cable entry point.
- Secure the base to the wall or ceiling using the provided mounting points.
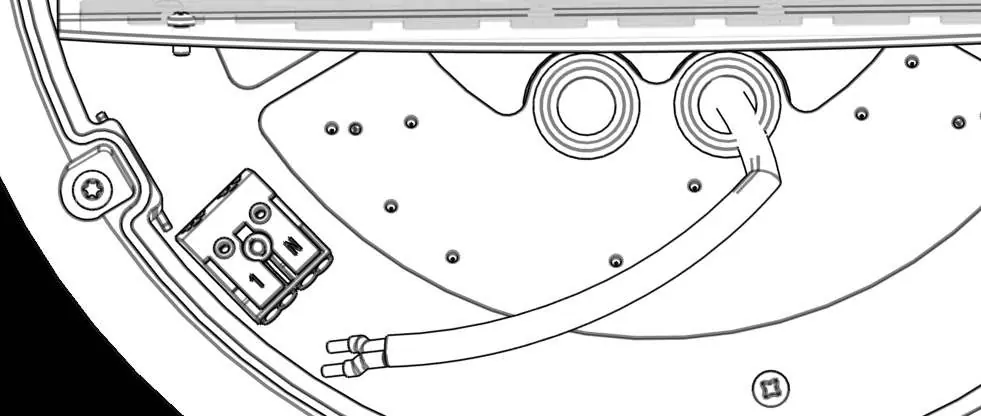
- Connect the power supply wires (L and N) to the terminal block inside the fixture.
- Reattach the cover to the base and secure it.
- Restore power to the fixture.
Maintenance
To ensure the longevity of the fixture:
- Do not use chemicals or abrasive products to clean the luminaire.
- Keep these instructions for future dismantling or maintenance needs.
- For additional information, visit the official website at www.Resistex-sa.com.
Official resources from the manual
Practical help
Common problems
Fixture does not light up
Verify that the power supply is connected correctly to the L and N terminals and that the main power is switched on.
Electrostatic discharge risk
Handle the internal components with care, following ESD safety protocols during installation.
Before use
- Ensure power is disconnected at the source
- Verify the mounting surface is suitable for the fixture
- Ensure a professional installer is performing the work
- Check that all necessary tools (drill, screwdriver) are available
Show more Show less
Images and diagrams
- Steps 1-2: Removing the cover from the base.
- Steps 3-4: Drilling mounting holes and preparing cable entry.
- Step 7: Wiring the L and N connections to the terminal block.

Manual page author
Michael Turner
Technical manual editor