Power / Batteries Chargers
User Manual for ROTHENBERGER Supertronic 2000 E Pipe Threader
Quick guide for the ROTHENBERGER Supertronic 2000 E cordless pipe threader, including setup, operation, battery charging, maintenance, and troubleshooting.
Table of contents
Manual images
Jump to the sectionQuick guide from the manual
The ROTHENBERGER Supertronic 2000 E is a cordless pipe threader designed for cutting BSPT R and NPT threads from 1/4" to 2". This guide covers essential operation and maintenance steps.
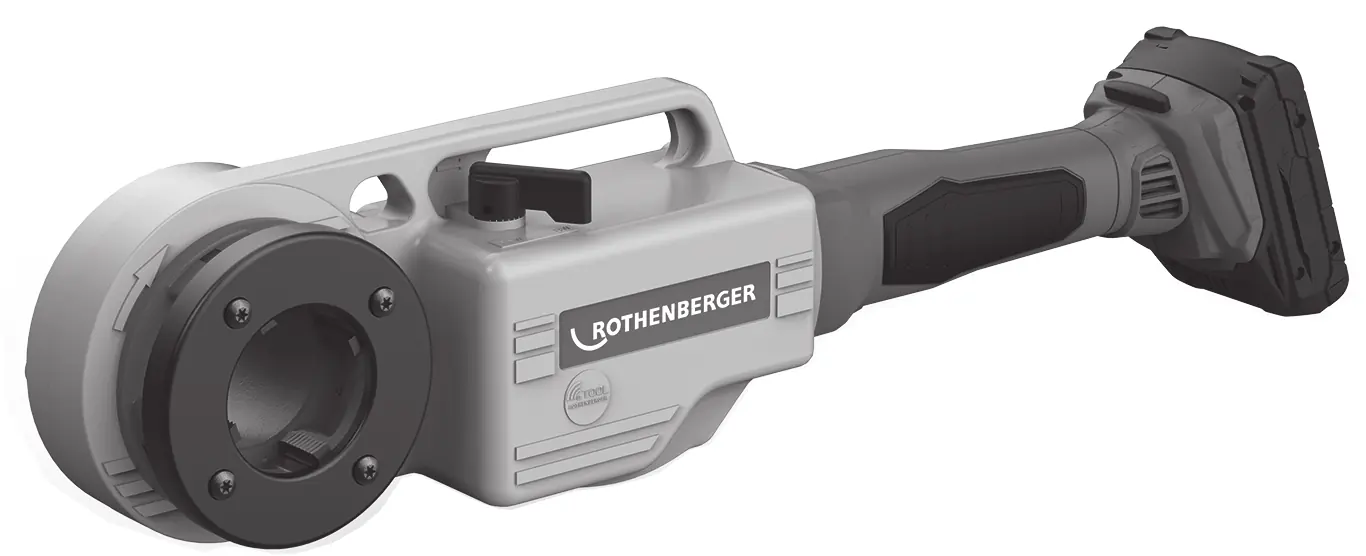
Device Overview
The device consists of the main threading unit, a tube clamp (essential for all threading operations), and a battery pack. Key components include the head housing, gear box, and the reverse speed lever for unscrewing the head from the pipe.
Operation
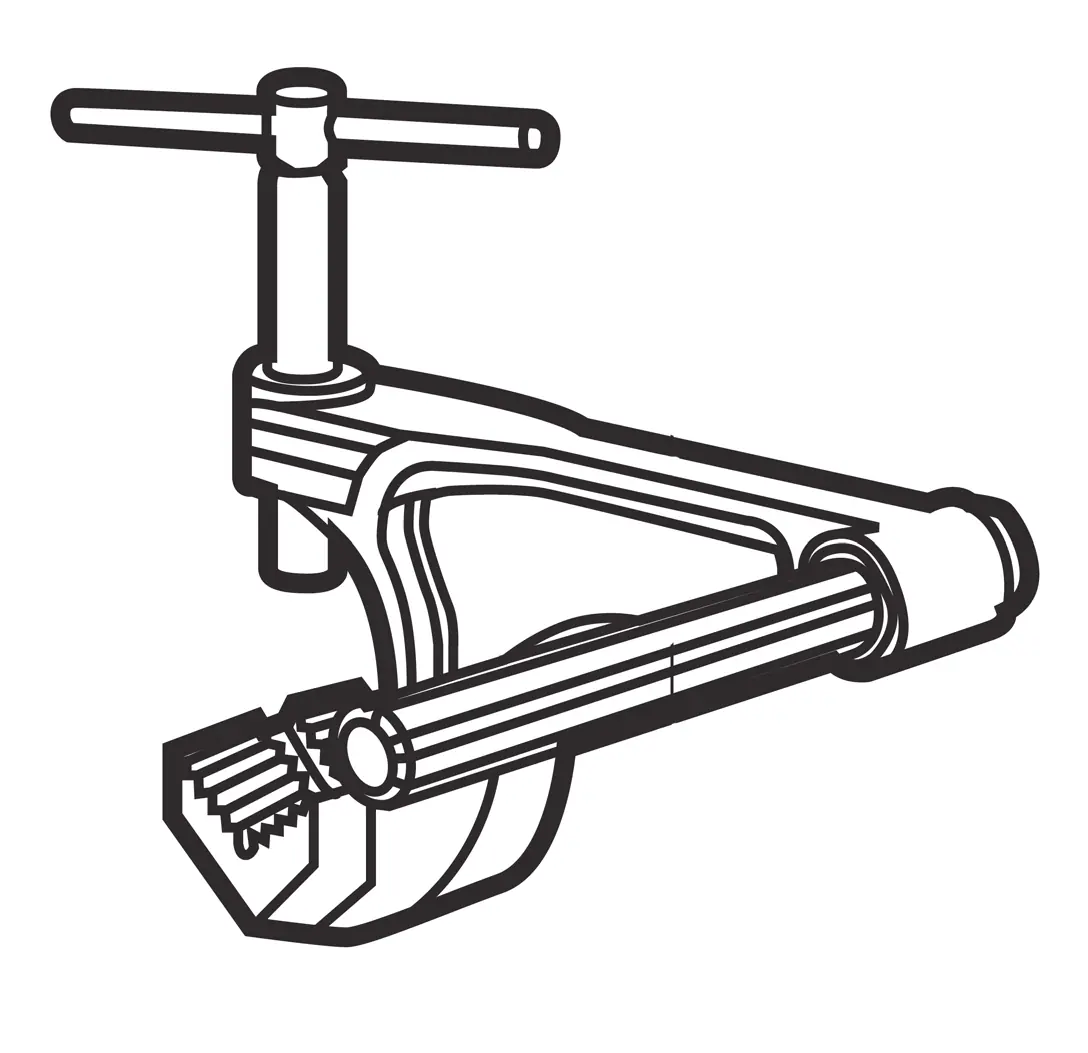
- Setup: Securely mount the tube clamp. Ensure the anchor bolt is parallel to the pipe and extends 1-1.5 cm beyond the pipe end.
- Head Selection: Choose the appropriate threading head. For sizes 1.1/4" and smaller, use the provided adapter. Insert the head from the front for right-hand threads or from the opposite side for left-hand threads.
- Threading: Insert the machine into the tube, ensuring it is guided by the tube clamp bolt. Set the reverse gear lever to the working direction. Press the electric switch and apply pressure to the machine against the pipe until it begins to pull itself.
- Lubrication: Continuously and abundantly lubricate the head with ROTHENBERGER threading oil during the process.
- Completion: Once the desired thread length is reached, stop the motor. Change the reverse gear lever position and start the motor to unscrew the head from the pipe.
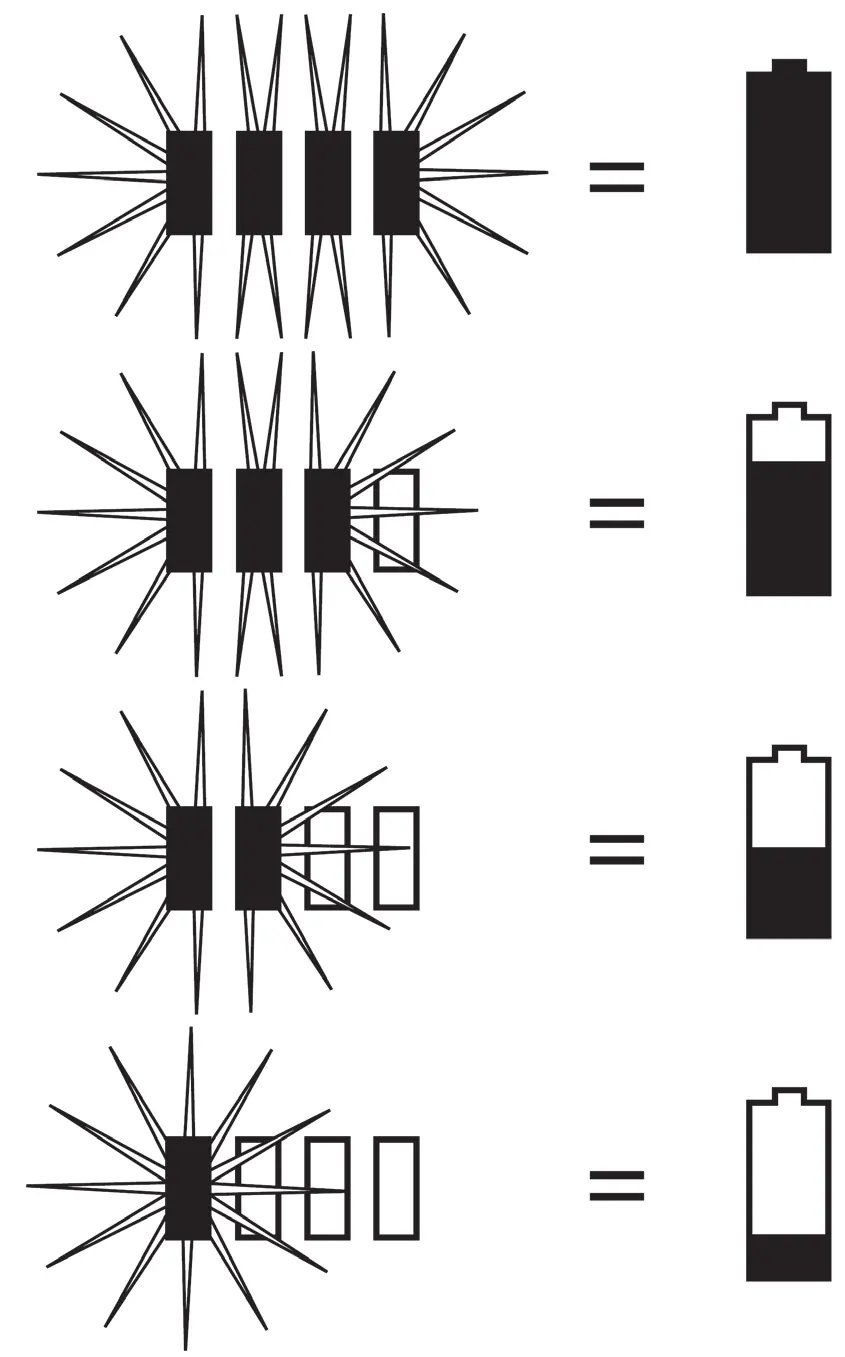
Battery and Charger
The charger is designed for ROTHENBERGER and CAS battery packs. Before use, ensure the charger's air slots are free (minimum 5 cm distance). The battery pack should be charged before the first use and whenever performance drops. LED indicators on the battery show the charge level.
Maintenance
- Switch: If the motor does not stop when the switch is released, it is defective and must be repaired immediately.
- Threading Heads: Keep free of swarf and check for damaged teeth to ensure thread quality.
- Gear Box: Change grease every 500 operating hours using LGMT 2 grease by SKF or similar.
- Tube Clamp: Replace clamp jaws if the pipe begins to slip.
Troubleshooting
- Insufficient Power: Check extension cable length/section, ensure correct working speed, verify tube clamp security, and ensure continuous lubrication.
- Off-centre Threading: Check tube clamp position (shaft parallel to tube) and pipe quality.
- Poor Thread Quality: Check teeth condition, lubrication, and oil quality.
Manufacturer information
ROTHENBERGER
Practical help
Common problems
Insufficient power
Check extension cable length, ensure correct working speed, verify tube clamp security, and ensure continuous lubrication.
Off-centre threading
Check tube clamp position (shaft must be parallel to the tube) and verify pipe quality.
Poor thread quality
Check condition of threading head teeth, ensure abundant lubrication, and use high-quality threading oil.
Locked shift lever
Move the machine slightly upwards and downwards.
Before use
- Ensure the tube clamp is securely mounted and the anchor bolt is parallel to the pipe.
- Check that the threading head is in good condition with no damaged teeth.
- Verify the battery is fully charged.
- Ensure the reverse gear lever is in the correct position.
- Have ROTHENBERGER threading oil ready for continuous lubrication.
Specs in practice
- Threading capacity
- 1/4" - 2" pipe diameter range.
- Threading speed
- 25-15 U/m (rotations per minute).
- Fast reverse speed
- 58 U/m, intended only for unscrewing the head from the pipe.
Images and diagrams
- Overview (A): Shows the main unit, battery, tube clamp, and adapters.
- Changing Battery (B): Illustrates how to insert and remove the battery pack.
- Operating (C): Shows the sequence of clamping, threading, lubricating, and unscrewing.
- Charger/Battery (D): Explains LED indicators for battery charge levels and fault conditions.
Model compatibility
- Compatible with original ROTHENBERGER and CAS (Cordless Alliance System) battery packs.
- Threading heads must be compatible with the machine (Rothenberger Series 600 or equivalent).

Manual page author
David Miller
Documentation analyst
Organizes user manual content into clear summaries, with attention to model details, product context, and everyday usability.