HVAC / Air Conditioners
User Manual for ROVSUN Cold Juice Dispenser
Quick guide for the ROVSUN Cold Juice Dispenser. Learn how to install, operate, clean, and maintain your beverage dispenser, including safety guidelines and technical specifications.
Table of contents
Manual images
Click an image to enlargeQuick guide from the manual
This manual provides essential instructions for the ROVSUN Cold Juice Dispenser. Before using the machine, ensure you have read the safety guidelines, verified the power supply, and washed the dispenser. The machine is designed for cold beverages and should not be used for other purposes. Always ensure the machine is placed on a flat, stable surface with adequate ventilation.
Technical parameters
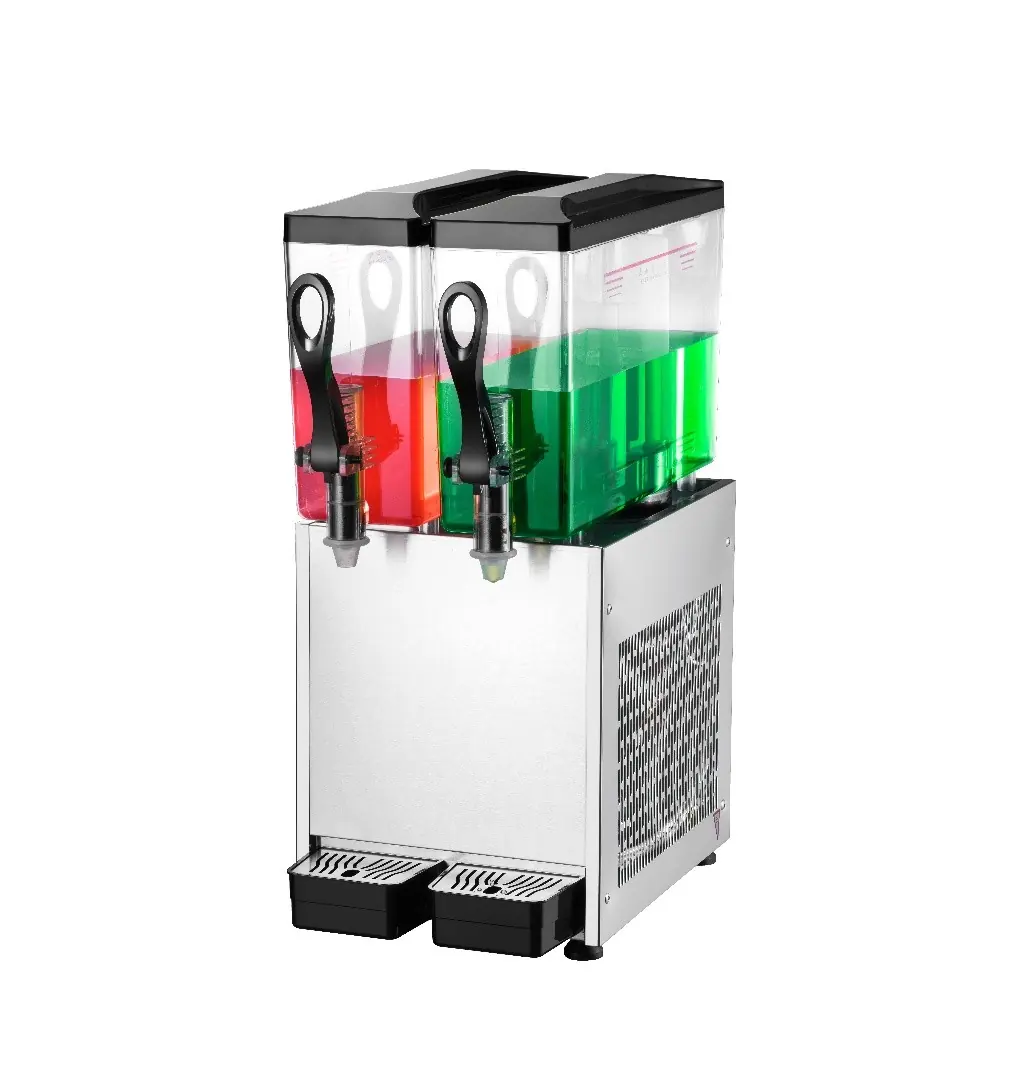
- Capacity: Available in 10Lx2, 10Lx3, and 10Lx4 configurations.
- Power Supply: 110V/60Hz.
- Cold Beverage Temperature: 7°C to 12°C (44.6°F to 53.6°F).
- Refrigerant: R290.
Installation
Proper installation is critical for the effective operation of the juice dispenser:
- Site Selection: Choose a flat, stable surface that avoids direct sunlight in the summer.
- Ventilation: Maintain at least 15cm of clearance around the dispenser to ensure proper air circulation.
- Electrical Requirements: Check that the power supply meets requirements (110-120V). The power cable cross-section should be 1.5-2.5mm². The socket must be grounded and equipped with a fuse for safety.
Operation
Follow these steps to operate the dispenser:
- Filling: Pour the prepared beverage into the tank. The liquid level should be at least 70mm from the cover to prevent overflow.
- Temperature Limit: The input beverage temperature must not exceed 35°C, otherwise, it will affect refrigeration performance.
- Dispensing: Once the beverage reaches the proper temperature, press the cup against the push board to dispense.
- Automatic Control: The refrigerator will stop running automatically when the target temperature is reached and restart when the temperature increases.
- Restarting: If the machine turns off suddenly, wait at least 5 minutes before restarting to prevent compressor damage.
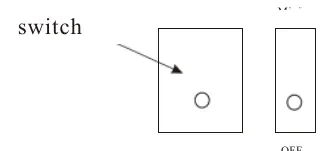
- Shutdown: When finished, switch the power to the OFF position before disconnecting the power supply.
Cleaning and maintenance
To maintain hygiene and machine performance, wash the hoppers daily:
- Turn off the power supply and drain all liquid.
- Open the cover, gently rock the hopper edge, and lift it upward to remove it.
- Clean all parts thoroughly.
- Reinstall the parts, paying close attention to the correct installation of the gasket.
Practical help
Common problems
Machine stops running automatically
This is normal operation controlled by the temperature controller; it will restart when the temperature increases.
Machine turned off suddenly
Wait at least 5 minutes before restarting to avoid damaging the compressor.
Beverage overflowing or leaking
Ensure the beverage level in the tank is at least 70mm from the cover.
Before use
- Verify the power supply is 110-120V and the socket is grounded.
- Ensure the machine is placed on a flat, stable surface.
- Provide 15cm of clearance around the unit for air circulation.
- Wash the hoppers before first use.
- Check that the power cable is not too thin (1.5-2.5mm²).
Specs in practice
- Cold beverage temperature
- The machine maintains liquid between 7°C and 12°C.
- Input temperature limit
- Beverages added to the tank should not exceed 35°C.
Images and diagrams
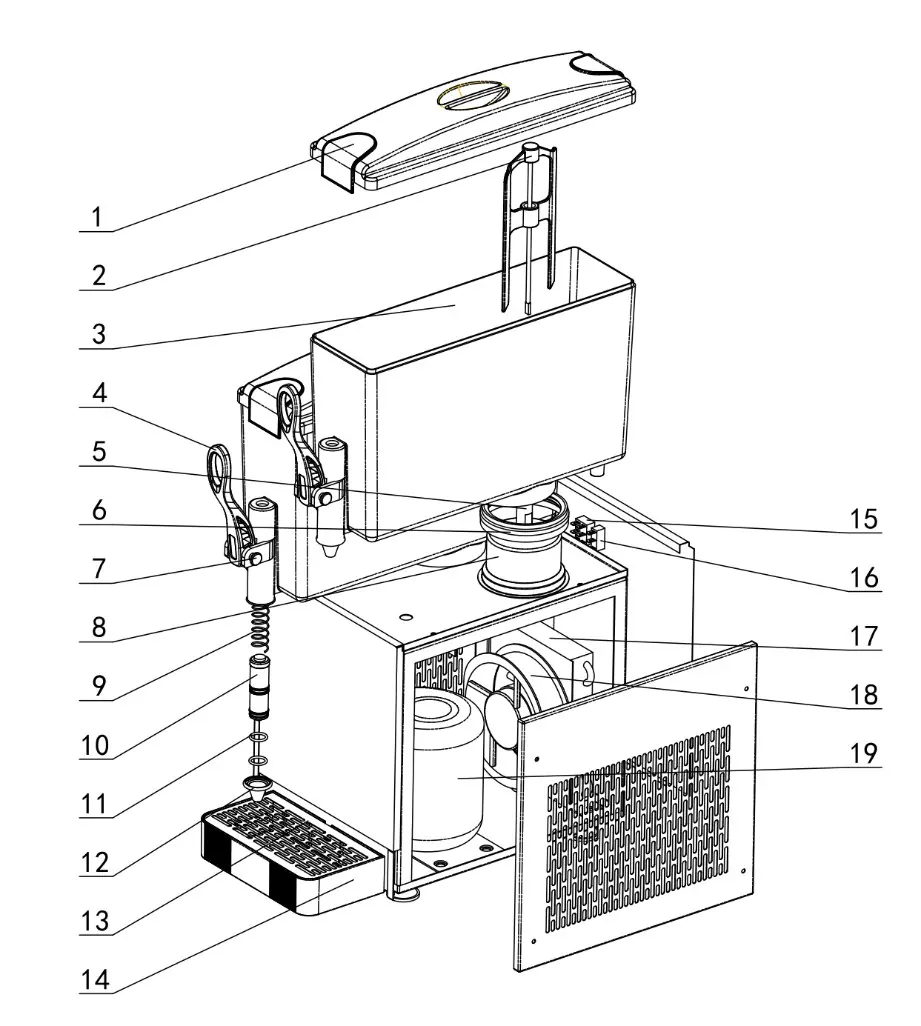
- The parts diagram identifies 19 components, including the drip tray, mixing blade, tank, and compressor.
- The power switch diagram shows the OFF position; always switch to OFF before unplugging.
Model compatibility
- Designed for cold beverages only.
- Requires 110-120V power supply.
- Not for outdoor use.

Manual page author
David Miller
Documentation analyst
Organizes user manual content into clear summaries, with attention to model details, product context, and everyday usability.