Automotive / Interior Accessories
Rugged Ridge 1369X.XX Jeep Carpet Kit Installation Instructions
Installation guide for the Rugged Ridge Jeep Carpet Kit (1369X.XX). Learn how to properly fit, cut, and adhere the carpet sections for CJ7 and Wrangler models.
Table of contents
Quick guide from the manual
This installation guide covers the Rugged Ridge Jeep Carpet Kit designed for Jeep CJ7 and Wrangler models (1976-2006). Please note that the carpet is supplied without precut holes or notches to accommodate the various vehicle configurations over the years. You will need to perform custom cutting and marking during the installation process to ensure a proper fit.
Preparation and tools
Before beginning the installation, ensure you have the following tools:
- Box knife
- Marker
- Quality spray adhesive (not included)
Preparation steps:
- Remove the front and rear seats to facilitate installation.
- Clean all mounting surfaces thoroughly.
- Ensure the work area is completely dry before installing the carpet.
- If necessary, remove shift boot covers.
- Ensure the work area is properly ventilated before applying adhesive.
Installation steps
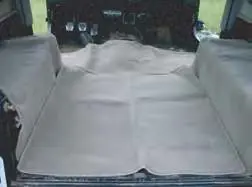
- Test fit: Place the carpet pieces into the vehicle to ensure all parts are supplied and to check the fit.
- Fender well covers: Install the LH and RH fender well covers. Mark the location of the side roll bar and cut only the amount of carpet needed for a flush fit. Spray the back of the carpet with adhesive and slide into place.
- Rear lower carpet: Install the rear lower carpet set. Mark the hole locations for seat and seatbelt mounting points. Cut only what is needed to expose the mounting holes, apply adhesive, and slide into place.
- Center carpet section: Install the center section. Mark seat and seatbelt holes if needed, cut to expose mounting holes, apply adhesive, and slide into place.
- Front carpet section: Install the front section. Mark holes for seats and shifter knobs. Cut only what is needed to expose mounting holes and the shift pattern. If necessary, cut slits at the front LH and RH side tub support brackets. Ensure the carpet does not interfere with pedal operation. Apply adhesive and slide into place.
- Finalize: Reinstall seats and shift boots.
Important notices
Warning: Do not air ship this carpet kit, as some kits include adhesive that cannot be shipped via air freight. Always ensure the work area is properly ventilated when using spray adhesive.
Practical help
Common problems
Carpet does not fit around roll bars or seat mounts
The carpet is supplied without precut holes. You must mark and cut the carpet during installation to match your specific vehicle configuration.
Adhesive not included
You must purchase a quality spray adhesive separately from a hardware store or fabric supplier.
Before use
- Remove front and rear seats.
- Clean all mounting surfaces.
- Ensure the work area is completely dry.
- Test fit all carpet pieces before applying adhesive.
- Ensure the work area is properly ventilated.
Images and diagrams
- The manual includes images showing the test fit process, cutting around roll bars, and marking holes for shifters and seat mounts.
Model compatibility
- Compatible with Jeep CJ7 and Wrangler models from 1976 to 2006.

Manual page author
Michael Turner
Technical manual editor
Reviews PDF manuals for structure, safety notes, and practical product details so readers can find the right information quickly.