Power / Batteries Chargers
Ryobi 18V Battery, Charger, and String Trimmer User Manual
Comprehensive user guide for the Ryobi 18V Lithium-Ion Battery Pack (P189), 18V Battery Charger (P118B), and 18V String Trimmer/Edger (P20103/P20103VNM). Includes safety instructions, operation, maintenance, and troubleshooting.
Table of contents
Manual images
Click an image to enlargeQuick Guide
This manual covers three distinct Ryobi 18V products. Always read and understand all safety instructions before use. Wear eye protection with side shields marked to comply with ANSI Z87.1. Keep work areas clear of debris and bystanders. Always remove the battery pack before performing maintenance, changing accessories, or storing the tools.
18V Lithium-Ion Battery Pack (P189)
The battery pack is designed to provide fade-free power. It does not need to be fully drained before recharging. If the tool stops during use, release the trigger to reset. If it still does not work, the battery needs recharging. Store in a cool, dry place (below 80°F) and keep charged at 30%-50% for long-term storage. Never disassemble or attempt to repair the battery pack.
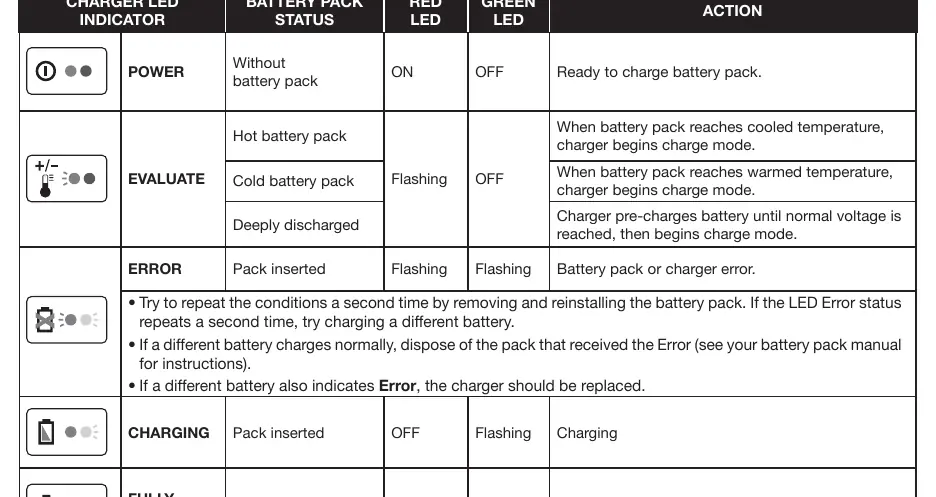
18V Battery Charger (P118B)
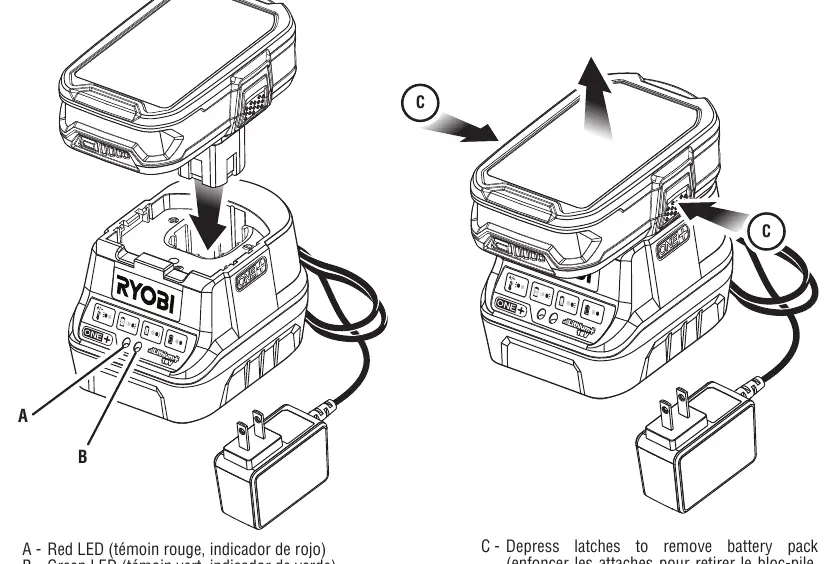
The charger is for indoor use only with Ryobi 18V Li-ion batteries. Ensure the power supply is 120V, 60Hz AC. Align the raised ribs on the battery with the grooves in the charger and press down until latches snap into place. The charger features LED indicators to show status: Power (Ready), Evaluate (Hot/Cold/Deeply Discharged), Error, Charging, and Fully Charged.
18V String Trimmer/Edger (P20103)
This tool requires assembly of the grass deflector. To operate, hold the trimmer with both hands. Cut tall grass from the top down to prevent wrapping. The trimmer features an auto-feed head; do not bump the head to advance the line, as this may damage the unit. To switch between trimming and edging, depress the button on the side of the trimmer and rotate the boom.

Maintenance and Troubleshooting
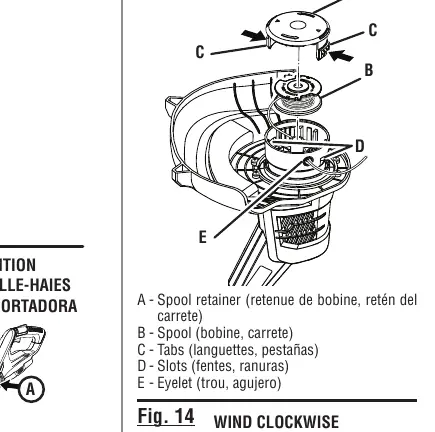
Periodically inspect the product for damaged, missing, or loose parts. Use only identical replacement parts. For the trimmer, use only 0.065 in. diameter round or twisted monofilament line. If the trimmer line does not advance, check for welded line, tangled line, or an empty spool. If the motor fails to start, ensure the battery is secure and charged.
Manufacturer information
Ryobi
Practical help
Common problems
Battery will not charge
Check charger connection, ensure battery is within acceptable temperature range (let it cool or warm up).
Trimmer line will not advance
Check if line is welded to itself, tangled on the spool, or if the spool is empty. Lubricate with silicone spray if necessary.
Motor fails to start
Ensure the battery pack is fully seated and latches are snapped into place. Check if the battery is charged.
Grass wraps around trimmer head
Cut tall grass from the top down to prevent wrapping.
Before use
- Inspect the product for damaged, missing, or loose parts.
- Ensure the battery pack is fully charged.
- Wear ANSI Z87.1 compliant eye protection.
- Clear the work area of rocks, glass, nails, or wire.
- Ensure the grass deflector is properly installed.
Images and diagrams
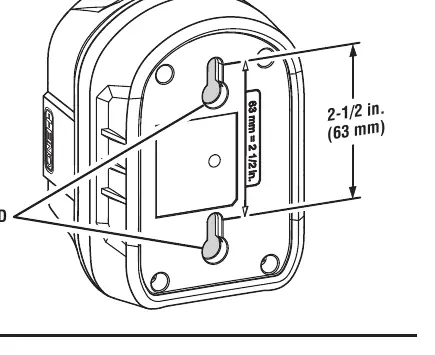
- Fig 1: Charger key hole hanger for wall mounting.
- Fig 2: Battery insertion and removal process.
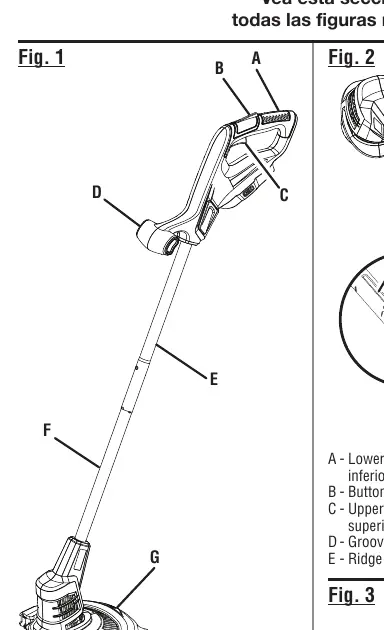
- Fig 7: Proper trimmer operating position.
- Fig 13: Spool retainer and spool replacement steps.
Model compatibility
- Use only Ryobi 18V ONE+ batteries and chargers.
- Do not use blades, wire, or rope on the string trimmer.

Manual page author
Emily Carter
User documentation editor
Prepares concise manual descriptions and highlights the most useful setup, operation, and maintenance information for readers.