Tools / Power Tools
User Manual for Ryobi 18V Brushless Hedge Trimmer P2608
Get started with your Ryobi 18V Brushless Hedge Trimmer P2608. This guide covers assembly, safe operation, maintenance, and troubleshooting for your tool, battery, and charger.
Table of contents
Manual images
Click an image to enlargeQuick guide from the manual
This manual provides essential instructions for the safe and effective use of the Ryobi 18V Brushless Hedge Trimmer (P2608). Always wear eye protection with side shields and heavy-duty gloves. Keep both hands on the handles during operation. Before each use, clear the area of debris, wires, or cords that could become entangled in the blades. If the blades jam, the motor will automatically reverse; release the trigger and depress it again to resume.
Product Overview
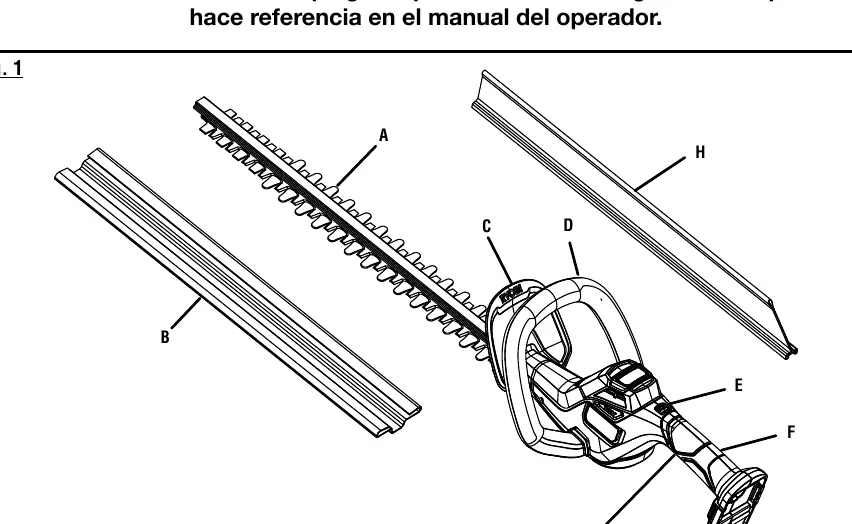
The hedge trimmer features a 22-inch blade with a 3/4-inch cutting capacity. It includes a debris deflector to help clear cut material, a lock-out button to prevent accidental starting, and a scabbard for safe storage.
Assembly
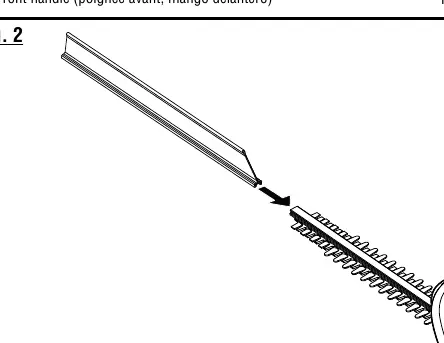
The product is shipped fully assembled. Before first use, inspect the unit for any damage that may have occurred during shipping. If the debris deflector is not installed, align its angled edge with the grooves on the guide bar and slide it on until it rests beneath the guard.
Operation
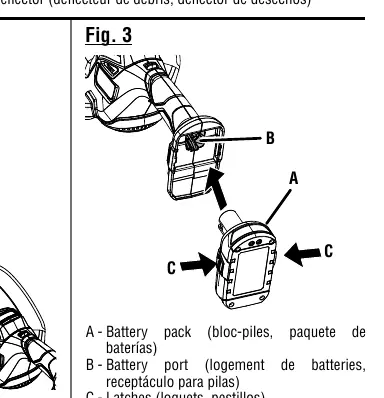
Installing/Removing Battery: Insert the battery pack into the port until the latches snap into place. To remove, depress the latches on both sides of the battery pack.
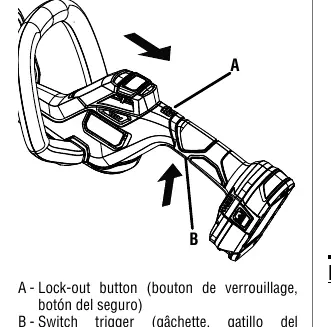
Starting and Stopping: To start, press and hold the lock-out button, then depress the switch trigger. Release the lock-out button while continuing to hold the trigger for operation. To stop, simply release the switch trigger.
Cutting Tips: Use a slow, sweeping motion from side to side. For new growth, use a wide sweeping action. For older, thicker growth, use a sawing movement. Never cut near electric cords or lines.
Maintenance
Cleaning: Remove the battery before cleaning. Use a damp cloth with mild detergent to clean the body. Do not use strong solvents. Use a small brush or vacuum to clear debris from motor air vents.
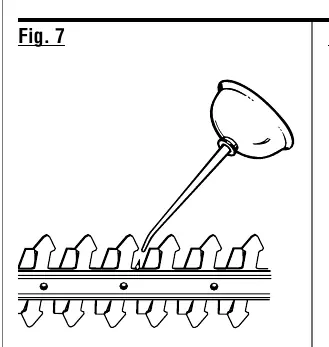
Lubrication: Lubricate the blades before and after each use with lightweight machine oil. Ensure the battery is removed before performing this task.
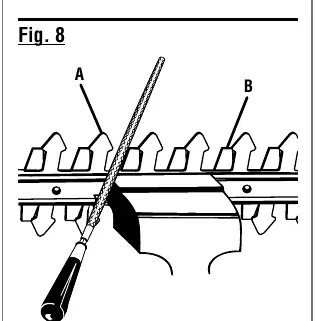
Sharpening: If the blades become dull, clamp the blade assembly in a vise and use an 8-inch smooth round file (1/4 in. or 7/32 in. diameter) to sharpen the cutting surface of each tooth, maintaining the original angle.
Storage
Always place the scabbard on the blades before storing. Store the unit in a dry, well-ventilated area, inaccessible to children, and away from corrosive agents like garden chemicals or de-icing salts.
Manufacturer information
Ryobi
Practical help
Common problems
Blades are jammed
The motor will automatically reverse. Release the switch trigger and depress it again to resume operation. If it persists, remove the battery and clear the obstruction.
Battery not charging
Ensure the charger is connected to a 120V AC outlet. Check if the battery is hot or cold; the charger will wait until the battery reaches an acceptable temperature before charging.
Unit will not start
Ensure the battery is fully seated and the latches have snapped into place. Verify the battery is charged.
Before use
- Inspect the tool for damaged, missing, or loose parts.
- Ensure the debris deflector is properly installed.
- Wear ANSI Z87.1 compliant eye protection and heavy-duty gloves.
- Clear the cutting area of cords, wires, and debris.
- Ensure the battery is fully charged and properly seated.
Specs in practice
- Blade Length
- 22 inches.
- Cutting Capacity
- 3/4 inch maximum stem diameter.
- Cutting Speed
- 3,200 cuts per minute.
Images and diagrams
- Fig 1: Parts identification including blades, scabbard, guard, and handles.
- Fig 2: Debris deflector installation procedure.
- Fig 3: Battery pack installation and removal.
- Fig 4: Starting controls (lock-out button and switch trigger).
- Fig 7: Blade lubrication points.
Model compatibility
- Use only with Ryobi 18V ONE+ battery packs and chargers.
- Refer to supplement 987000-432 for specific battery/charger correlation.

Manual page author
Michael Turner
Technical manual editor
Reviews PDF manuals for structure, safety notes, and practical product details so readers can find the right information quickly.