Tools / Power Tools
User Manual for Ryobi 12V Rotary Tool TVM01
Quick guide for the Ryobi 12V Rotary Tool TVM01. Learn about assembly, operation, speed settings, accessory installation, and safety precautions.
Table of contents
Manual images
Click an image to enlargeQuick Guide
The Ryobi 12V Rotary Tool (TVM01) is a versatile power tool designed for carving, engraving, polishing, sanding, cutting, and drilling. This guide provides essential information for safe and efficient operation. Always read the full manual before use.
Safety Warnings
- Personal Protective Equipment: Always wear eye protection with side shields (ANSI Z87.1 compliant). Use a dust mask or respirator if the operation creates dust.
- Kickback: Maintain a firm grip and position your body to resist kickback forces. Avoid working on corners or sharp edges where the accessory might snag.
- Accessory Safety: Use only accessories recommended by the manufacturer. Ensure the rated speed of the accessory is at least equal to the tool's operating speed.
- Work Area: Keep the work area clean and well-lit. Keep children and bystanders away.
Product Features
- Quick-Change Collet: 1/8 in. Universal size.
- Variable Speed: 5,000-35,000 RPM, adjustable via a 5-setting dial.
- LED Indicators: Displays battery status and error codes (overload, temperature).
Assembly
Ensure the tool is completely assembled before use. If any parts are missing or damaged, contact customer support at 1-800-525-2579.
Operation

Charging the Tool
Use a USB-C cable to charge the tool. When charging, the LED will flash green. Once fully charged, the LED will remain solid green. Do not charge in extreme temperatures.
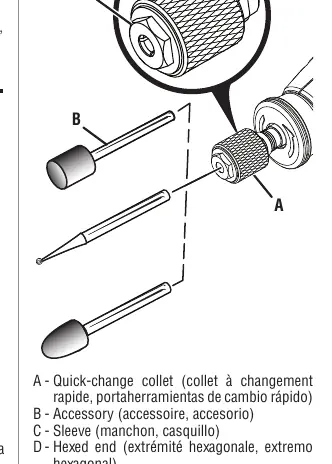
Using the Quick-Change Collet
The tool comes with a preinstalled 1/8 in. collet. To remove or install:
- Turn off the tool.
- Depress and hold the spindle lock button while rotating the shaft until it engages.
- Use the included 3/8 in. wrench on the bottom threaded end of the collet to loosen or tighten.
Installing/Removing Accessories
- Turn off the tool.
- Ensure the quick-change collet is securely installed.
- Depress the spindle lock button and loosen the collet sleeve by hand (or with the wrench if necessary).
- Insert the accessory shank, then pull it out 1/16 in. to allow for thermal expansion.
- Tighten the sleeve clockwise until the accessory is gripped.
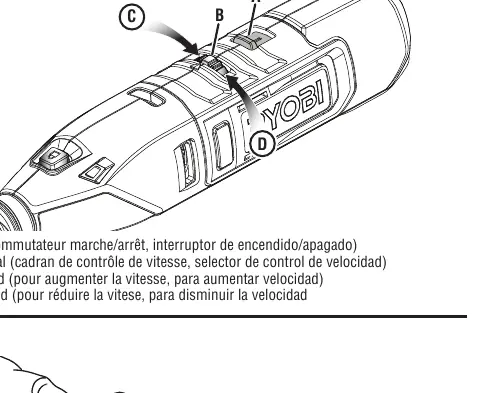
Speed Selection
Use the speed control dial (numbered 1-5) to adjust the RPM. Refer to the Application Speed Recommendations table in the manual to match the speed to the material (e.g., soft wood, hard wood, steel, plastic) and the accessory type.
Maintenance
- General: Avoid using solvents on plastic parts; use a clean cloth to remove dirt, oil, or grease.
- Battery: This tool uses a lithium-ion battery. For storage longer than 30 days, store in a discharged condition in a cool, dry place.
- Disposal: Do not dispose of the tool in household trash. Recycle the lithium-ion battery through authorized programs.
Manufacturer information
Ryobi
Practical help
Common problems
Tool shuts off automatically
The tool has triggered overload or high-temperature protection. Wait 5 seconds, turn the switch to OFF, then back to ON to resume.
Accessory slips during use
The collet is not tightened sufficiently. Use the included 3/8 in. wrench to tighten the collet sleeve securely.
LED flashes red
Indicates an error. Check for low battery (3 flashes), excessive force (6 flashes), or over-temperature (9 flashes).
Before use
- Ensure the battery is charged.
- Wear ANSI Z87.1 compliant eye protection.
- Verify the accessory shank size matches the 1/8 in. collet.
- Ensure the accessory is not damaged or cracked.
- Secure the workpiece with a clamp or vise.
- Check that the speed setting is appropriate for the material.
Specs in practice
- 5,000-35,000 RPM
- The variable speed range. Lower speeds are better for polishing and delicate work; higher speeds are for cutting and shaping.
- 1/8 in. Universal Collet
- The standard size for most rotary tool accessories. Not compatible with 1/16 in. shanks.
Images and diagrams
- Figure 1: Using the tool hanger for storage.
- Figure 2: Charging port and LED status indicator.
- Figure 3-4: Using the spindle lock and wrench to change the collet and accessories.
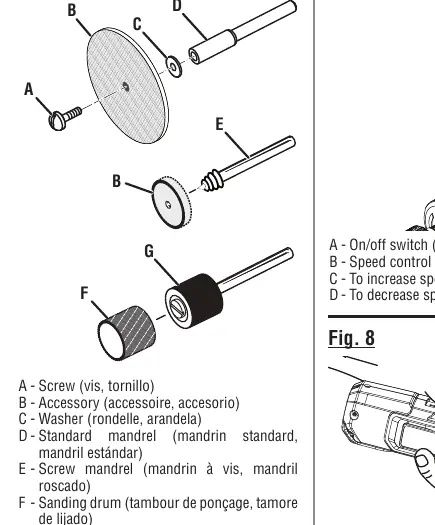
- Figure 5: Installing different mandrel types (standard, screw, drum).
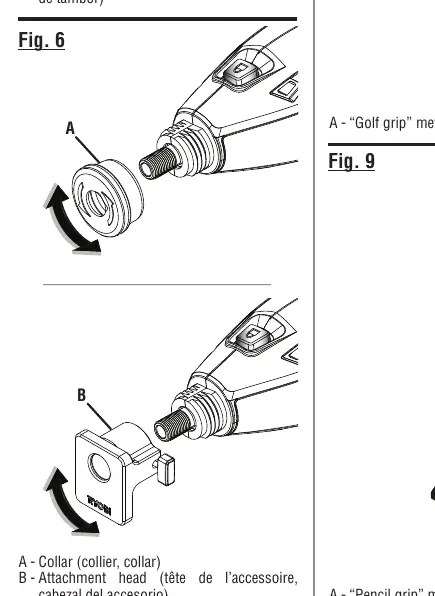
- Figure 6: Installing optional attachment heads.
Model compatibility
- Compatible with Ryobi attachment heads: A90PG01, A90PG02, A90SG01, A90SG02, A90GG01, A90DS01, A90CG01, A90FS01.
- Not compatible with 1/16 in. shank accessories.

Manual page author
Michael Turner
Technical manual editor
Reviews PDF manuals for structure, safety notes, and practical product details so readers can find the right information quickly.