Optics / Digital Binoculars
User Manual for Sharper Image RISE 12H Personal Tower Heater
Quick guide for the Sharper Image RISE 12H Personal Tower Heater. Includes safety instructions, operating modes (Fan Only, Low/High Heat), cleaning tips, and troubleshooting steps.
Table of contents
Manual images
Click an image to enlargeQuick Guide
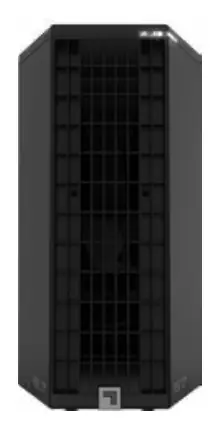
The Sharper Image RISE 12H is a personal tower heater designed for indoor living spaces. Before use, inspect the unit for damage. Ensure the heater is placed on the floor in an upright position, at least 3 feet away from any flammable objects, furniture, or curtains. Plug directly into a grounded wall outlet; do not use extension cords, power strips, or timers.
Safety Instructions
- Intended Use: For indoor living spaces only. Do not use in bathrooms, laundry areas, or damp locations.
- Placement: Keep at least 3 feet of clearance on all sides. Operate only on the floor in an upright position.
- Electrical Safety: Do not use with extension cords, surge protectors, or GFCI outlets. Do not run the cord under carpeting or furniture.
- Supervision: Extreme caution is required when used around children or impaired persons.
- Prohibitions: Do not use in windows, outdoors, or near high-temperature heat sources like fireplaces.
Safety Features
- Cool-Touch Cabinet: The outer housing remains safe to touch even on high heat settings.
- Automatic Safety Shut-Off: Power is cut if airflow is blocked to prevent overheating.
- Automatic Tip-Over Protection: Power is cut if the unit tips over. Return to an upright position to restore power.
Controls
The unit is operated via a control dial located on the top:
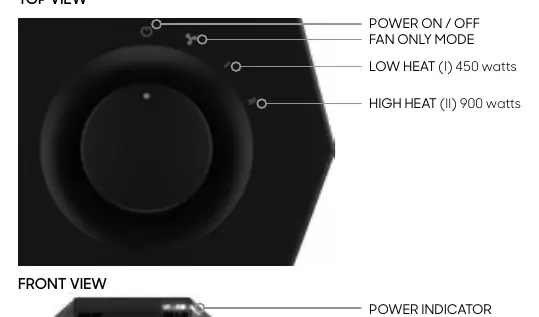
- Power On/Off: Turns the unit on or off.
- Fan Only Mode: Operates the fan without heat.
- Low Heat (I): 450 watts.
- High Heat (II): 900 watts.
A power indicator light on the front confirms the unit is active.
How to Use
- Position the heater on the floor so airflow is not obstructed.
- Plug the power cord into a standard grounded wall outlet.
- Turn the control dial to select the desired mode: Fan Only, Low Heat (I), or High Heat (II).
Cleaning and Maintenance
Regular cleaning is recommended on a weekly basis.
- Preparation: Always unplug the heater before cleaning.
- Air Inlets/Grille: Use a vacuum cleaner with a brush attachment to remove accumulated dust from the air inlets on the back and the front outlet grille.
- Internal Cleaning: Periodically blow out the heater with pressurized air to clear the heat element and motor of dust and debris.
- Exterior: Wipe down the entire heater with a soft, dry cloth.
Resetting the Heater
If the heater stops working due to overheating:
- Turn the heater off and unplug the power cord.
- Remove any obstructions blocking the airflow.
- Wait 5–10 minutes for the unit to cool down.
- Plug the power cord back in and place the heater in the desired position.
- Turn the unit on using the control dial.
Troubleshooting
If the unit fails to power on, check the following:
- Ensure the unit is plugged in.
- Check your home circuit breaker or fuse.
- Ensure the unit has not overheated (see Resetting the Heater).
- Check if the tip-over switch has been triggered; place the unit on a level surface.
- If the unit is not producing sufficient heat, ensure it is set to High Heat and that doors/windows are closed to trap heat.
Support
For service or warranty inquiries, contact Sharper Image Consumer Services at 833-800-8669 or email [email protected].
Manufacturer information
Sharper Image
Practical help
Common problems
Unit fails to power on
Check power connection, circuit breaker, or fuse. Ensure the unit has not overheated (perform reset procedure) or tipped over.
Unit not producing sufficient heat
Ensure the dial is set to High Heat (II), close doors and windows, and allow several minutes for the room to heat up.
Unit powered but no heat
Verify the unit is not set to Fan Only mode.
Before use
- Check the heater for visible damage.
- Ensure airflow is not obstructed.
- Plug into a standard grounded wall outlet.
- Place on the floor in an upright position.
- Ensure no flammable materials are within 3 feet.
Specs in practice
- High Heat (II)
- 900 watts
Images and diagrams
- Top View: Shows the control dial for Power, Fan Only, Low Heat, and High Heat settings.
- Front View: Shows the location of the power indicator light.
Model compatibility
- Do not use with extension cords or power strips.
- Do not use with timers or dimmer switches.
- Not for use in bathrooms, laundry areas, or damp locations.

Manual page author
David Miller
Documentation analyst
Organizes user manual content into clear summaries, with attention to model details, product context, and everyday usability.