Furniture / Home Furnishing
Sim-Lab Pedal Slider Baseplate 2.11 Assembly Guide
A comprehensive assembly guide for the Sim-Lab Pedal Slider Baseplate 2.11. This manual covers tools required, step-by-step installation for the baseplate, optional seat sliders, and heel rests, as well as pedal compatibility diagrams.
Table of contents
Quick guide from the manual
This document provides assembly instructions for the Sim-Lab Pedal Slider Baseplate 2.11. Before starting, ensure you have the necessary tools and verify all parts against the bill of materials on page 14. Note that some extra parts may be supplied as spares, which is intentional.
Tools needed
- 4mm, 5mm, and 6mm Hex wrenches
- 8mm, 10mm, and 13mm wrenches
Inserting Slot-Nuts
If you need to insert a Slot-Nut into the profile slot from the side, you can use a smaller Hex wrench to help wiggle it into the correct position.
Assembly
The assembly process varies depending on your cockpit configuration. Follow the specific pages for your setup:
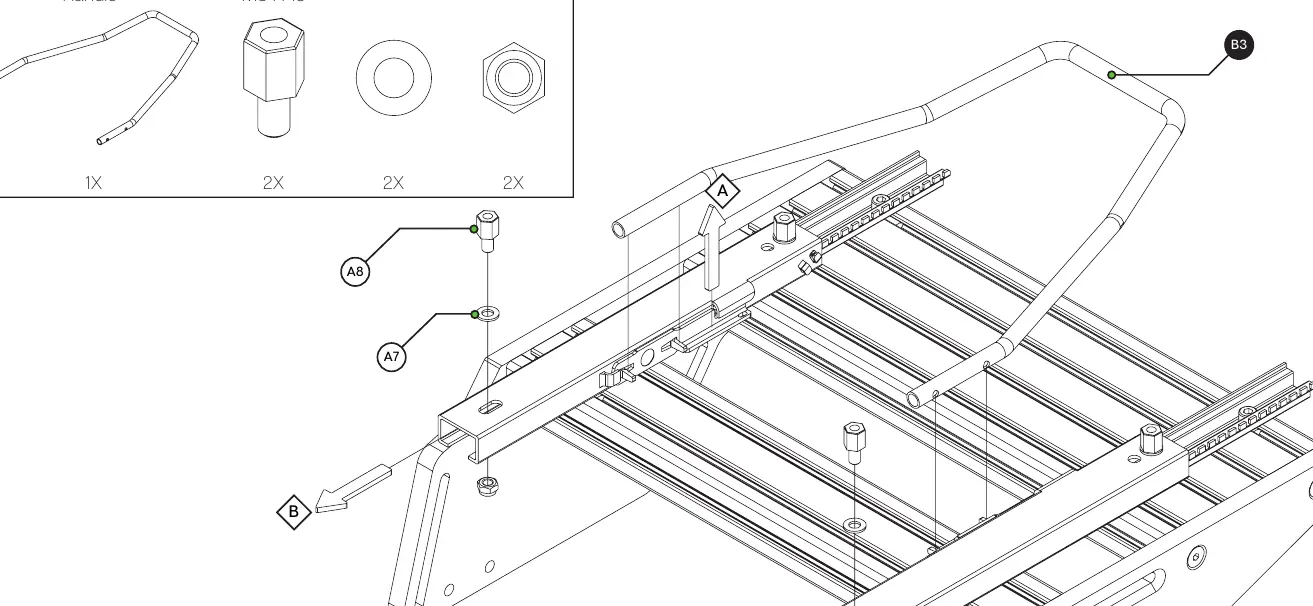
- Pedal Base Plate: Follow instructions on pages 3-4.
- Optional Seat Slider: Follow instructions on pages 6-9.
- Optional Heel Rest: Follow instructions on page 11.
Note on Seat Slider Handle: For the handle to fit snugly between the sliders, it may need to be widened slightly by bending it until it seats properly.
Pedal Compatibility
The baseplate is compatible with a wide range of pedal sets. Refer to pages 15-17 for specific mounting hole patterns for brands such as Aseteck, Fanatec, Heusinkveld, InSim, Logitech, Meca, SimCoach, Simtrecs, Thrustmaster, and VRS.
Support
If you have questions regarding assembly, contact the support department at [email protected] or visit the Discord server at www.sim-lab.eu/discord.
Official resources from the manual
Practical help
Common problems
Slot-Nut insertion
If you forgot to install a Slot-Nut, you can insert it directly into the slot from the side. Use a smaller Hex wrench to help wiggle it into place.
Seat Slider handle fit
If the handle does not fit snugly between the sliders, widen it by bending it until it seats properly.
Leftover parts
The manufacturer supplies more parts than required for some entries as spares. Having leftovers is intentional.
Before use
- Check the bill of materials on page 14 to ensure all parts are delivered.
- Have 4mm, 5mm, and 6mm Hex wrenches ready.
- Have 8mm, 10mm, and 13mm wrenches ready.
- Identify your cockpit type to follow the correct assembly path.
- Verify pedal set compatibility using the diagrams on pages 15-17.
Specs in practice
- Spacer M8 x 15
- Component used for spacing during assembly.
Images and diagrams
- Pages 15-17 show specific mounting hole patterns for various pedal brands.
- Page 2 illustrates the correct method for inserting Slot-Nuts into profiles.
Model compatibility
- Compatible with various cockpits; manual shows P1-X and GT1-EVO examples.
- Optional seat sliders and heel rests require specific installation steps.

Manual page author
David Miller
Documentation analyst
Organizes user manual content into clear summaries, with attention to model details, product context, and everyday usability.