Industrial / Air Sampling Pumps
Operating Instructions for SKC Pocket Pump TOUCH 220-1000TCNB
Quick guide and operating instructions for the SKC Pocket Pump TOUCH 220-1000TCNB. Learn how to charge, set flow rates, operate in constant flow or pressure modes, and perform maintenance.
Quick answers from the manual
Quick answer
- The SKC Pocket Pump TOUCH is a portable sample pump. To operate, charge the battery, set the desired flow rate via the touch screen, connect your sampling media, and press Run. p. 2, 13, 18
Key actions
- Set flow rate p. 13
- Verify flow rate p. 13, 14, 17
- Run sample p. 18
First start
- Charge battery p. 3
- Power on p. 2, 4
Show 4 more answers Show less
Problems and fixes
Display frozen
Shut off pump, remove battery, reinstall battery.
p. 23Maintenance and reset
- Change battery p. 23
Technical specifications
| Parameter | Value | Meaning | Pages |
|---|---|---|---|
| Flow Range | 20-500 ml/min | Operating range in constant flow mode. | p. 25 |
| Weight | 8.3 oz (235 gm) | Device weight. | p. 25 |
Where to find it in the PDF
- Physical Features p. 1
- Charging p. 3
- Operation p. 13, 18
- Maintenance p. 23
Table of contents
Manual images
Click an image to enlargeQuick guide from the manual
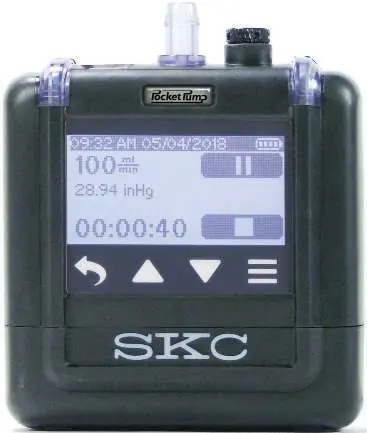
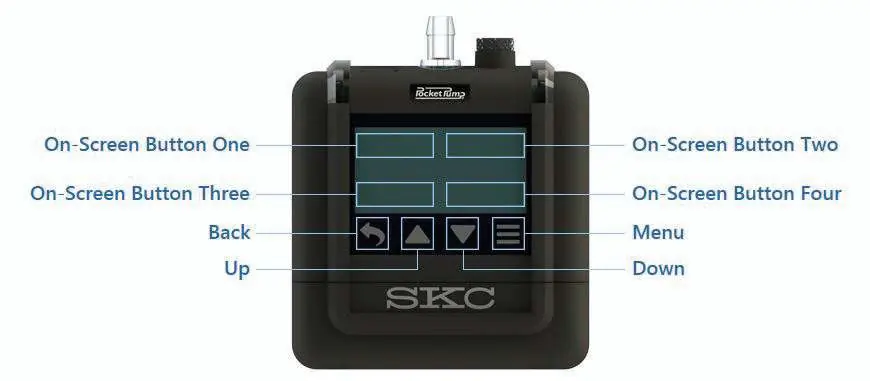
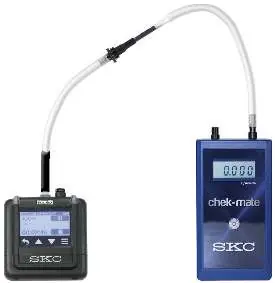
The SKC Pocket Pump TOUCH is a portable sample pump designed for air sampling. To begin, ensure the battery is fully charged using the magnetic charging cable. Power on the device using the button on top. Use the touch screen to navigate menus, set flow rates, and start sampling. Always verify flow rates before and after sampling using a flowmeter.
Getting Started
Charging the Battery: Connect the USB cable to a wall adapter, PC, or portable power pack. Hover the magnetic charging connector over the contact on the back of the pump until the LEDs light blue. A full charge takes approximately 10 hours.
Turning the Pump On/Off: Press the Power On/Off button on top of the pump. The screen will light up. To turn off, press the button again while the pump is not running. The pump will automatically power off after five minutes of inactivity.
Operation
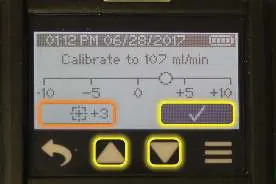
Setting Flow Rate: From the Main Menu, touch Sample >Flow. Use the arrow buttons to adjust the flow rate. Touch the check mark to save.
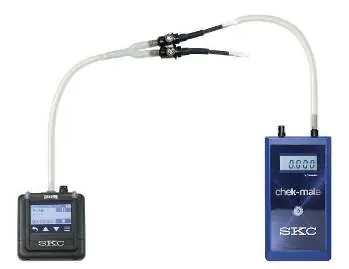
Constant Flow Mode: Used for single or multiple sorbent tube trains. Requires a 222 Series Low Flow Holder (single) or 224 Series Multiple-tube Low Flow Holder (multiple) and a Constant Pressure Controller (CPC) for multiple tubes.
Constant Pressure Mode: For advanced users. Requires setting back pressure. From the Main Menu, touch Sample >Advanced >Set Pressure. Adjust the pressure and confirm.
Sampling: Once the flow rate is verified and the sampling train is connected, select Sample >Flow (or Advanced) and touch the Run button to start.
Maintenance
Changing the Battery: Turn off the pump. Use the provided 1.5-mm hex key to loosen the two safety screws on the back of the battery pack housing. Lift the housing to remove it. Install the new battery pack, align it with the pump case, and tighten the screws.
Cleaning the Touch Screen: Use a soft, clean, and dust-free cloth. Do not use alcohol.
Troubleshooting
If the display is frozen, press the Power On/Off button to shut off the pump, remove the battery, and reinstall it.
Technical Specifications
The pump features a flow range of 20 to 500 ml/min. It is housed in an IP 64-rated case and requires 1/4-inch ID tubing. Operating temperature range is 32 to 113 F (0 to 45 C).
Practical help
Common problems
Display is frozen
Press the Power On/Off button to shut off the pump, remove the battery, and reinstall it.
Charger LEDs not lit blue
Ensure the charging cable is connected to an active power source and properly seated on the pump charging contact.
Flow fault
Check for restricted airflow, such as kinked tubing or overloaded sample media. Clear the fault by touching any button on the display.
Before use
- Charge the battery completely.
- Verify pump flow rate before and after each sampling operation.
- Ensure the correct tube holder is used for the sampling media.
- Inspect the magnetic charging contact for metallic dust.
- Ensure 1/4-inch ID tubing is used.
Show more Show less
Images and diagrams
- Physical features diagram showing inlet, exhaust, and charging contacts.
- Charging train diagrams for AC and portable options.
- Flow verification train diagrams for single-tube, multiple-tube, and bag sampling.
Model compatibility
- Requires 1/4-inch ID tubing.
- Requires SKC-approved battery pack (Cat. No. P76303).
- Requires 222 Series Low Flow Holder for single tube sampling.
- Requires 224 Series Multiple-tube Low Flow Holder and Constant Pressure Controller for multiple tube sampling.

Manual page author
Michael Turner
Technical manual editor