Garden / Garden Beds
Assembly Instructions for Step2 Lakewood Delivery Box
A complete assembly and maintenance guide for the Step2 Lakewood Delivery Box. Includes step-by-step installation instructions, lock assembly, anchoring options, and cleaning tips.
Quick answers from the manual
Quick answer
- The Step2 Lakewood Delivery Box (194717A01B) requires assembly using a drill. Key steps include assembling the lock, filling the base with sand/gravel for stability, and following the numbered assembly steps for the panels. p. 1, 2, 3, 4
Key actions
- Assemble the lock mechanism onto the door panel. p. 3, 4
- Fill the base with sand or gravel for stability. p. 4
- Install the door by inserting the left side first. p. 10
Problems and fixes
Screws are hard to drive
Use a drill on the lowest torque setting; screws form their own holes.
p. 2Maintenance and reset
- Clean with a 50/50 mixture of white vinegar and water. p. 1
Where to find it in the PDF
- Safety and Cleaning p. 1
- Parts List p. 2
- Assembly Steps p. 3, 4, 5, 6
Table of contents
Manual images
Click an image to enlargeQuick guide from the manual
This document provides assembly instructions for the Step2 Lakewood Delivery Box (Model 194717A01B). The product requires assembly using a drill and screwdriver. Note that the product does not have pre-drilled holes; the screws are designed to form their own holes during installation.
Safety warnings
- Entrapment Hazard: This product is not a toy. Do not allow children to play inside the delivery box.
- Heat Hazard: Be aware of sun and weather conditions; the inside of the box can reach elevated temperatures.
- Inspection: Periodically inspect the product and replace damaged or worn components.
Assembly instructions


- Lock Assembly: Assemble the lock mechanism (N1-N7) onto the door panel (G) as shown in steps 1a-1d.
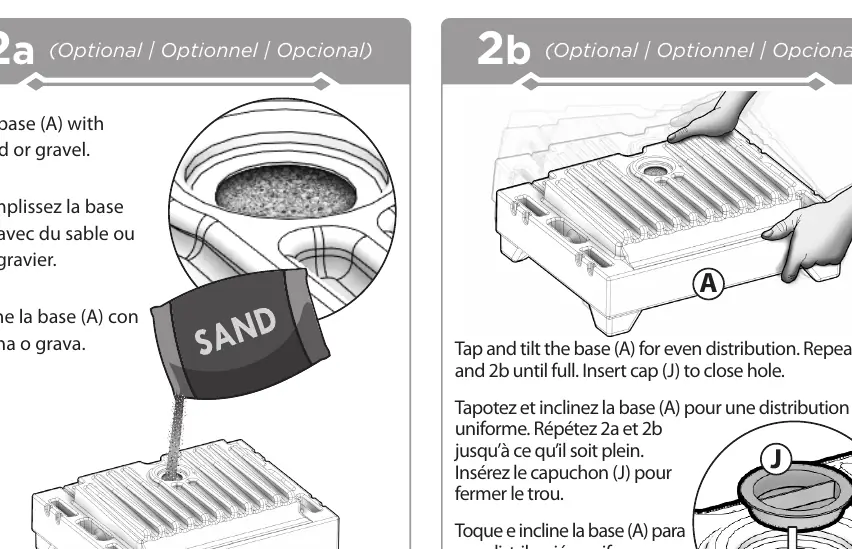
- Base Filling (Optional): Fill the base (A) with sand or gravel to add weight and stability. Tap and tilt the base to ensure even distribution, then insert the cap (J).
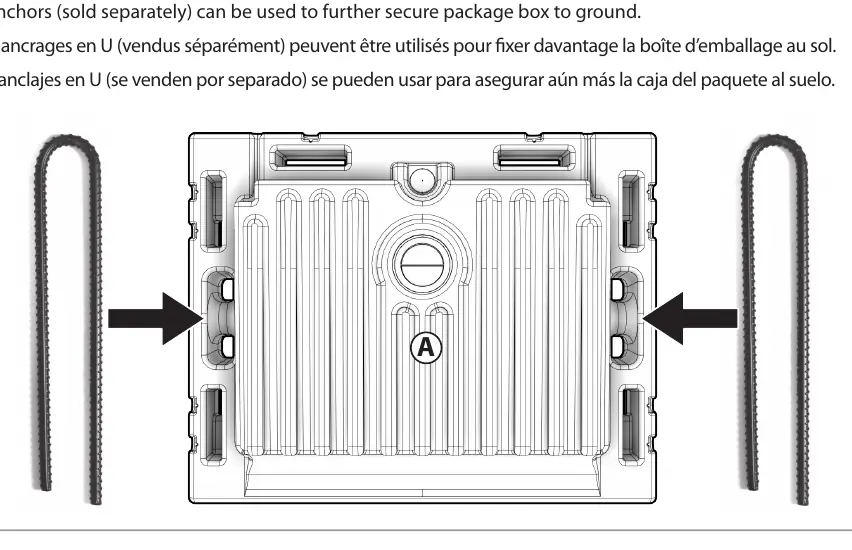
- Anchoring (Optional): Use U-anchors or a tether (sold separately) to secure the box to the ground or a structure.
- Main Assembly: Follow steps 4 through 13 to assemble the side walls (L, R), back panel (D), and internal components (C, H, K).
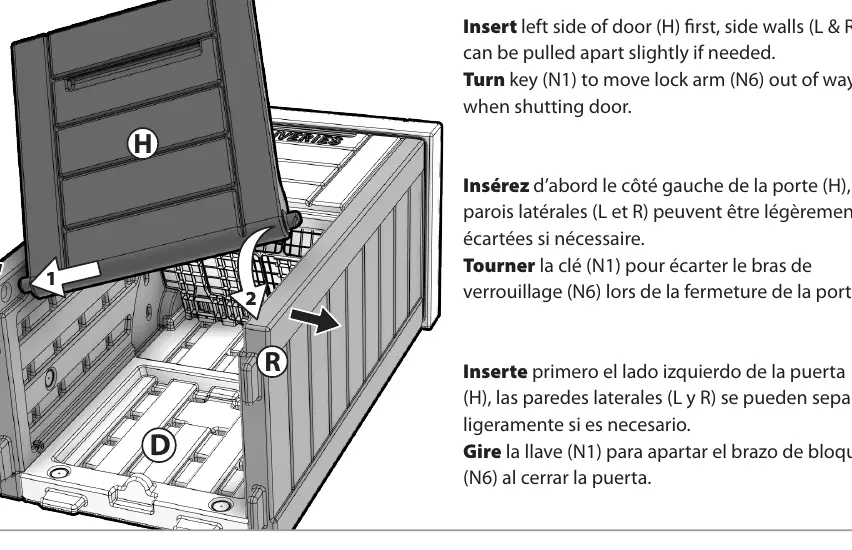
- Door Installation: Insert the door (H) into the assembly. If necessary, pull side walls (L & R) apart slightly to fit.
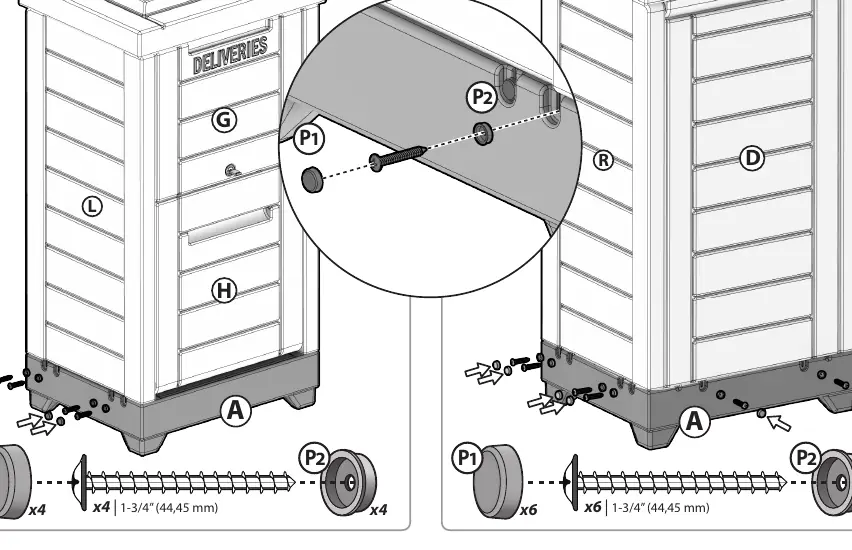
- Final Assembly: Complete the assembly by attaching the base (A) and installing the sign (E) using the provided double-sided tape (F).
Cleaning and maintenance
For general cleaning, use a 50/50 mixture of white vinegar and water. Please recycle the product components when possible, in compliance with government regulations.
Practical help
Common problems
Difficulty driving screws
The product has no pre-drilled holes. Adjust your drill torque to the lowest setting and increase incrementally to drive the screw head flush with the surface. Do not over-tighten.
Box is unstable
Fill the base (A) with sand or gravel to provide weight and stability.
Before use
- Verify all parts are present (A, B, C, D, E, F, G, H, J, K, L, R, N1-N7, P1, P2).
- Ensure you have a screwdriver and a drill.
- Read all safety warnings regarding entrapment and heat.
- Decide if you will use optional anchoring (U-anchors or tether).
Specs in practice
- Base Filling
- Fill with sand or gravel to stabilize the unit.
Images and diagrams
- Steps 1a-1d detail the lock assembly.
- Steps 2a-2b show how to fill the base with sand/gravel.
- Steps 3a-3b illustrate optional anchoring methods.
- Steps 4-13 guide the main structural assembly.
- Step 14 shows door installation.
Model compatibility
- U-anchors and tethers are sold separately.
- The product is designed for outdoor use.

Manual page author
David Miller
Documentation analyst
Organizes user manual content into clear summaries, with attention to model details, product context, and everyday usability.