Furniture / Storage Cabinets
User Manual for Tchibo Sideboard 152846AS1XXVI
Quick guide for assembling and maintaining your Tchibo Sideboard 152846AS1XXVI. Includes step-by-step assembly instructions, wall mounting, and door adjustment.
Table of contents
Manual images
Click an image to enlargeQuick Guide
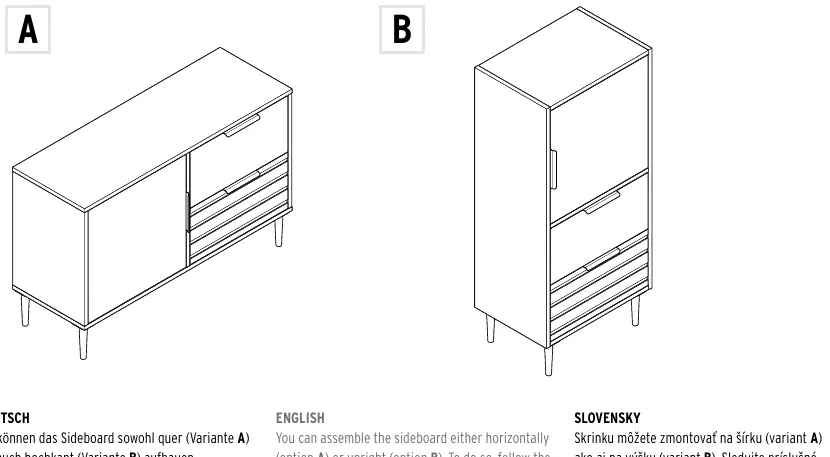
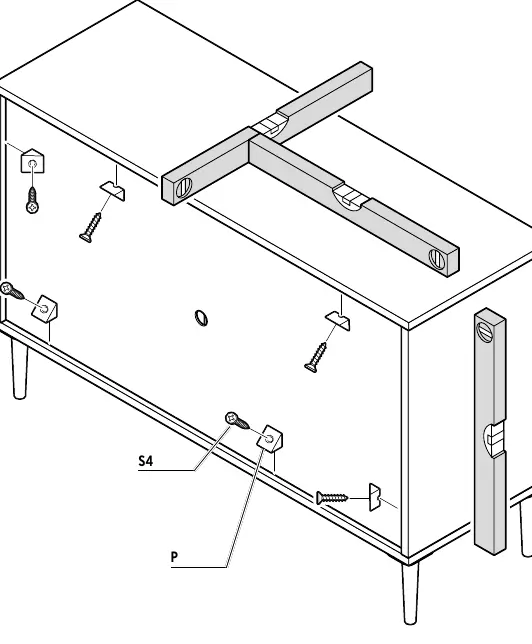
This sideboard can be assembled in two configurations: horizontally (Option A) or vertically (Option B). Assembly requires two people. Before starting, ensure you have a soft, level surface to prevent scratching the furniture. The package includes wall mounting materials suitable for standard, solid walls.
Assembly Options
The manual provides instructions for both assembly variants. Option A describes the horizontal configuration, while Option B describes the vertical configuration. Follow the specific steps for your chosen variant. Note that for steps 3 and 4, the assembly differs based on whether the door opens to the right (B1) or left (B2).
Wall Mounting
For safety and stability, the sideboard must be fastened to a suitable wall. Use the provided screws and wall plugs. Before drilling, verify that no pipes or electrical wiring are located behind the wall at the drilling location. Ensure the unit is standing level and plumb before final tightening.
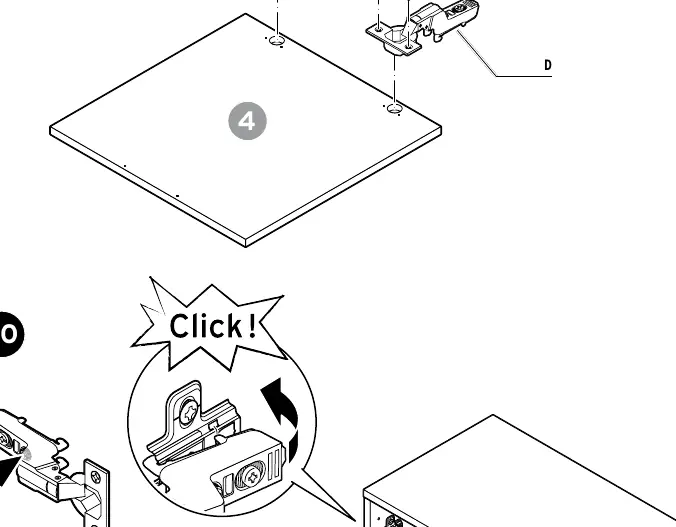
Door and Drawer Adjustment
If the hinges do not attach correctly, screw the front screw on the hinge strip in fully. You can adjust the door alignment using the hinge screws. Drawers with different front designs can be swapped around as desired.
Care and Maintenance
Clean surfaces with a slightly damp cloth and wipe dry. Do not use abrasive or caustic cleaning agents, or hard brushes, as these may damage the finish.
Load Limits
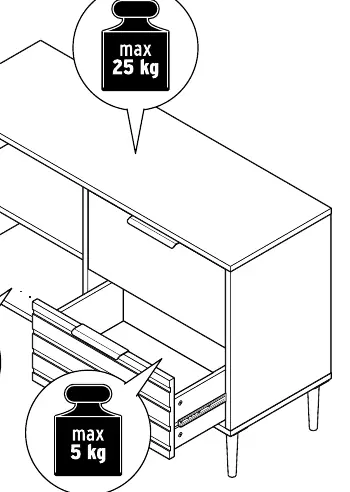
- Top surface: Max 25 kg
- Internal shelf: Max 15 kg
- Door compartment: Max 10 kg
- Drawer: Max 5 kg
Manufacturer information
Tchibo GmbH
Practical help
Common problems
Door not hanging correctly
Adjust the door using the hinge screws as illustrated in the adjustment section.
Hinges not attaching
Screw the front screw on the hinge strip in fully.
Stability issues
Ensure the unit is standing level and plumb; use levelling wedges if necessary.
Before use
- Check for all parts listed in the parts list.
- Ensure you have a second person for assembly.
- Prepare a soft, level surface for assembly.
- Verify no pipes or electrical wiring are behind the wall before drilling.
- Ensure the unit is level and plumb before final wall mounting.
Specs in practice
- Max load (top)
- 25 kg
- Max load (internal shelf)
- 15 kg
- Max load (door compartment)
- 10 kg
- Max load (drawer)
- 5 kg
Images and diagrams
- Assembly options A and B show horizontal and vertical configurations.
- Steps 3 and 4 differ based on door opening direction (B1/B2).
Model compatibility
- Wall mounting materials provided are suitable for standard, solid walls.

Manual page author
Michael Turner
Technical manual editor
Reviews PDF manuals for structure, safety notes, and practical product details so readers can find the right information quickly.