Garden / Portable Garages
Assembly Guide for The Home Depot 13ft x 26ft Carport Canopy
A comprehensive assembly and installation guide for the 13ft x 26ft carport canopy. This guide covers safety precautions, parts identification, step-by-step frame assembly, cover installation, and optional anchoring methods for both ground...
Table of contents
Manual images
Click an image to enlargeImportant Information from the Manual
This guide provides instructions for assembling the 13ft x 26ft carport canopy. Before beginning, ensure you have all parts listed in the manual and wear appropriate safety gear, including work gloves, long sleeves, and safety goggles. Do not attempt assembly during stormy weather, and ensure the ground is stable. Always remove snow from the roof after snowfall and do not walk on the roof.
Tools Required
- Work gloves
- Safety goggles
- Screwdriver
- Power drill
- Tape measure
- Mallet
Assembly Steps
1. Frame Assembly
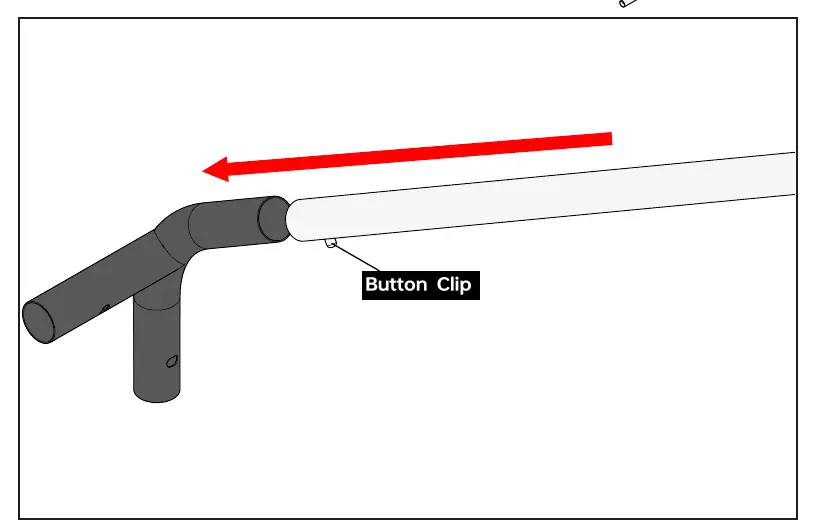
The frame is constructed using tubes connected by button clips. To connect tubes, press the button clip and insert one tube into another. Avoid forcing the tubes, as this may damage the clips.
2. Base Plate Connection
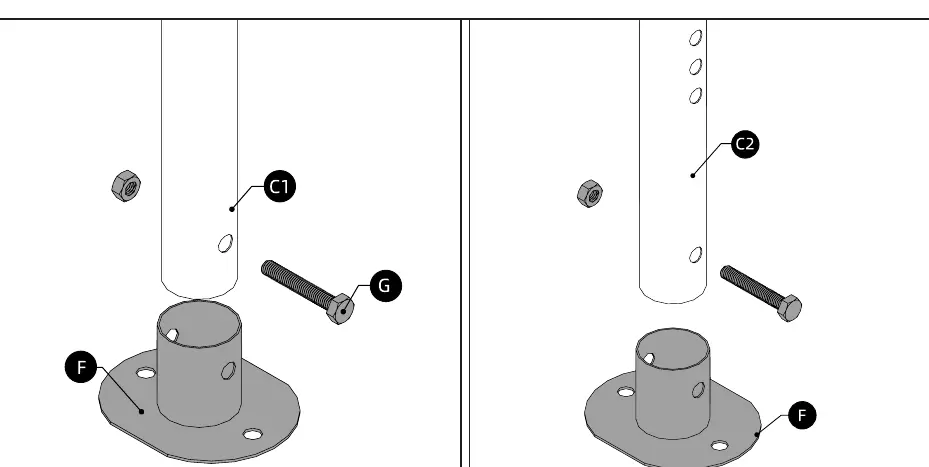
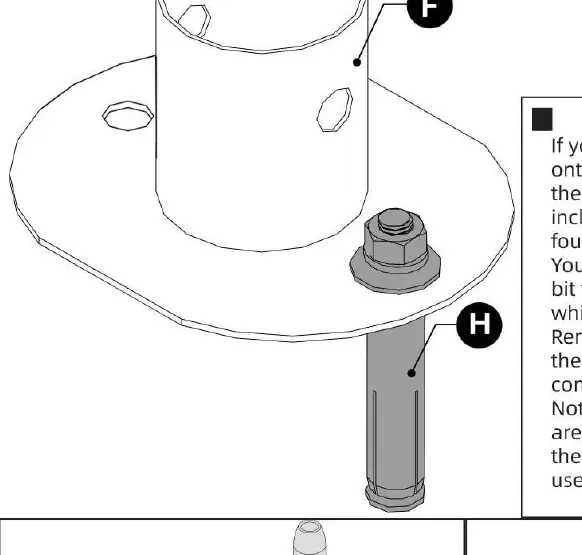
Connect tubes C1 and C2 to the base plates (F). Ensure you use the end of the tube without the button clip when connecting to the base plate. Repeat this process for all C1 and C2 tubes.
3. Frame Setup
Lay the frame down temporarily to attach the C1+F and C2+F assemblies. Ensure C2 components are placed at the front and back of the frame with the three holes facing outwards.
4. Optional Stability Braces
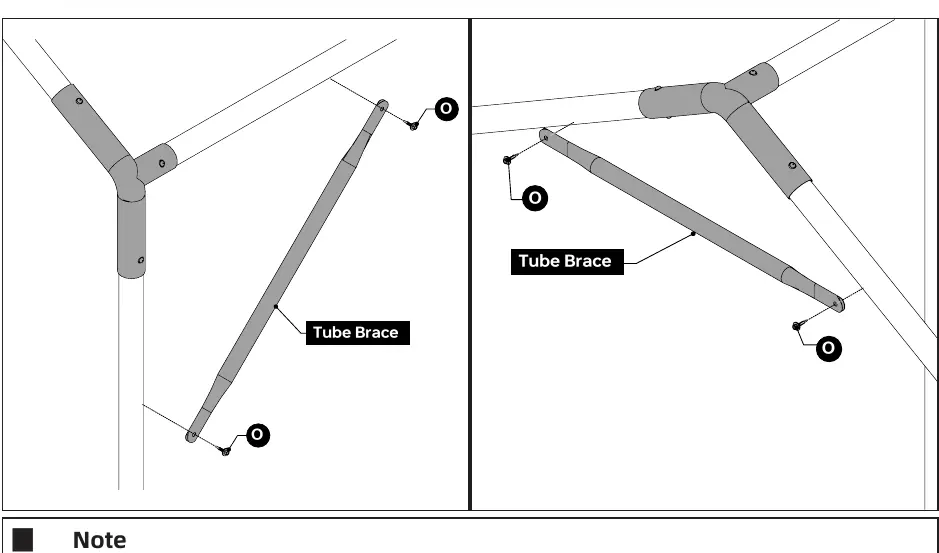
You may install Tube Braces for extra stability. This step requires a power tool to drive part O into the tubes. There are no predrilled holes for these screws; the exact location is not critical for stability.
5. Top Cover Installation
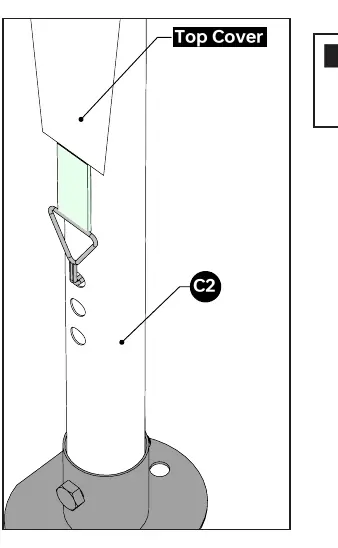
Pull the top cover over the frame. If the cover feels too tight, avoid pulling the four legs; instead, pull and drag the top part of the cover to prevent tearing. Secure the hooks at the end of the top cover's feet into the holes at the bottom of the C2 tubes.
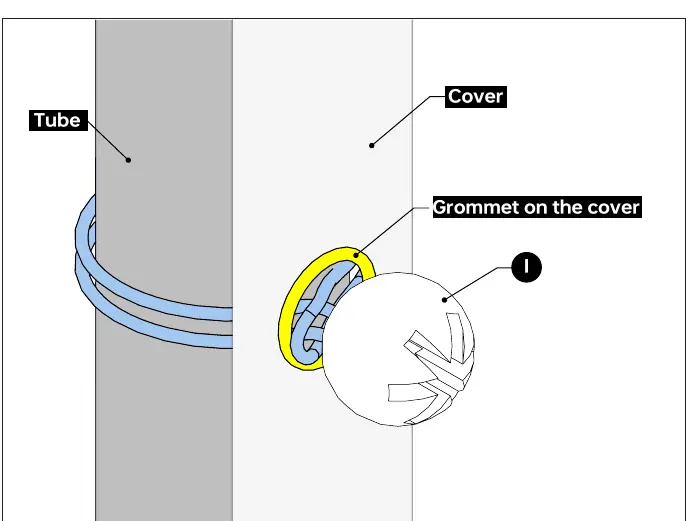
6. Side and Door Cover Installation
Use the provided bungee cords (Part I) to fasten the covers to the tubes. Where grommets overlap (e.g., top cover and side cover, or top cover and door cover), use one bungee cord to secure both grommets together.
Anchoring Options
The carport can be secured using the provided ground anchors (K and L) or, for concrete surfaces, using the concrete anchor bolts (H). For concrete installation, you will need an M12 drill bit to drill a hole 5.1cm (2 inches) deep.
Manufacturer information
The Home Depot
Practical help
Common problems
Top cover feels too tight or loose during installation
Do not pull the four legs of the top cover. Instead, pull and drag the top part of the cover to avoid tearing.
Difficulty connecting tubes
Press the button clip before inserting one tube into another. Do not force the tubes, as this risks damaging the clip.
Concrete anchor installation
Requires an M12 drill bit to drill a hole 5.1cm (2 inches) deep. Once the bolt and sleeve are inserted, they are difficult to remove, so plan the location carefully.
Before use
- Verify all parts are present according to the parts list.
- Wear work gloves, long sleeves, and safety goggles.
- Ensure the assembly site has stable ground.
- Have a ladder available if necessary.
- Ensure you have a power tool for optional tube braces or concrete anchors.
Specs in practice
- M12 Drill Bit
- Required for drilling holes when installing concrete anchors.
- 5.1cm (2 inch)
- The required depth for holes when using concrete anchors.
Images and diagrams
- Button Clip: The mechanism inside tubes used for locking frame sections together.
- Bungee Cord (I): Used to fasten covers to the frame tubes through grommets.
- Tube Brace: Optional component used to add extra stability to the frame.
Model compatibility
- Optional concrete anchoring requires specific M12 drill bit.
- Optional ground anchoring uses parts K and L.

Manual page author
David Miller
Documentation analyst
Organizes user manual content into clear summaries, with attention to model details, product context, and everyday usability.