HVAC / Towel Warmers
Towelrads Richmond Electric Towel Radiator Installation Instructions
Quick installation guide for the Towelrads Richmond Electric Towel Radiator. Includes tools required, safety precautions, step-by-step mounting instructions, and care tips.
Table of contents
Manual images
Click an image to enlargeImportant Information
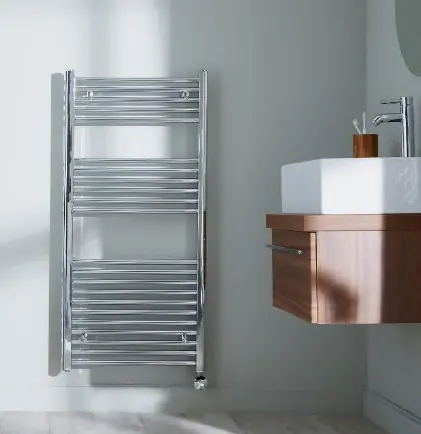
The Towelrads Richmond Electric Towel Radiator comes with a 5-year guarantee, with a 2-year guarantee on the heating element. Please note that the radiator shown in the manual is for illustration purposes only. Installation must be carried out by a qualified professional or a fully competent person in accordance with relevant British and European standards (BS7593:2006, EN12828:2012+A1;2014, EN12831:2003 & EN14336:2004).
Tools Required
- Drill and drill bit
- Residual Current Device (RCD) - recommended
- Pozi Drive screwdriver and flathead screwdriver
- PTFE tape
- Measuring tape
- Spirit level
- Pencil
- Fused spur
Safety Precautions
- When drilling walls, check first for hidden pipes and/or cables.
- Wear all necessary personal protective equipment, including safety eyewear when drilling.
- Handle the product with care.
- Keep small parts away from children.
- Check that all components are present and that you are satisfied with the size, design, and finish before starting installation.
Installation Steps
- Gently remove the radiator from all packaging.
- Ensure the selected wall is sufficiently strong enough to hold the weight of the electric towel warmer.
- Before drilling, ensure there are no hidden pipes or wires in the wall.
- Using the radiator and a spirit level, mark the position of the brackets.
- Mark the centers of the brackets on the wall. Drill four suitable holes and insert wall plugs.
- Screw the round external brackets into the wall plugs using the wall screws.
- Screw the round internal bracket to the front cover plate. These two parts connect through the radiator horizontal bar.
- Mount the radiator onto the wall by sliding the internal brackets on the radiator into the external brackets on the wall. Secure the radiator into position by tightening the grub screws into the holes on the side of the external brackets using the hexagonal key.
- Make the necessary connections to the electrical fused spur. This must be done by a qualified electrician.
Care and Maintenance
Regular cleaning with a soft cloth will keep the surface of your radiator looking new. Soapy water can be used to remove stubborn stains, then buff dry with a soft cloth. Do not use abrasive or chemical cleaners to clean your radiator as these will damage the surface finish over time.
Practical help
Common problems
Drill wandering on tiled surfaces
Apply a piece of insulating tape or a couple of layers of masking tape to the wall before drilling.
Losing small parts during installation
When working near a basin or bath, insert the plug into the waste to prevent parts from falling down the drain.
Damaged or missing parts
Contact your point of purchase immediately. Do not install a damaged or faulty product.
Before use
- Check that all components are present.
- Ensure the wall is strong enough to hold the radiator weight.
- Check for hidden pipes or cables before drilling.
- Ensure you have a qualified electrician for the electrical connection.
- Use a Residual Current Device (RCD) when using power tools near water.
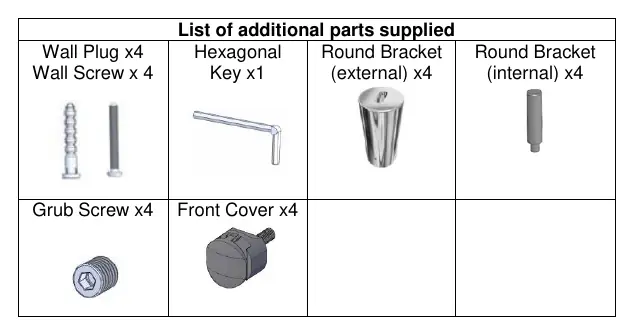
Images and diagrams
- The parts list includes wall plugs, wall screws, a hexagonal key, round external brackets, round internal brackets, grub screws, and front covers.
Model compatibility
- Supplied wall plugs and screws are intended for masonry walls; alternative fixings may be required depending on the wall type.

Manual page author
Emily Carter
User documentation editor
Prepares concise manual descriptions and highlights the most useful setup, operation, and maintenance information for readers.